In this lab, I implemented centralized software deployment using Group Policy. The objective was to simulate how organizations push applications to domain-joined computers without manually installing software on each machine.
In this phase, I deployed Mozilla Firefox to a domain computer directly from a shared network folder using Group Policy Software Installation (GPSI).
This exercise reinforced how powerful centralized management can be in a Windows Server environment.
Why Use Group Policy for Software Deployment?
In enterprise environments, manually installing applications on every workstation is inefficient and difficult to manage.
Using Group Policy allows administrators to:
- Deploy software to multiple computers at once
- Ensure consistent application versions
- Reduce manual configuration errors
- Maintain centralized control over installations
This method is commonly used for standard business applications across domain environments.
How Group Policy Software Deployment Works
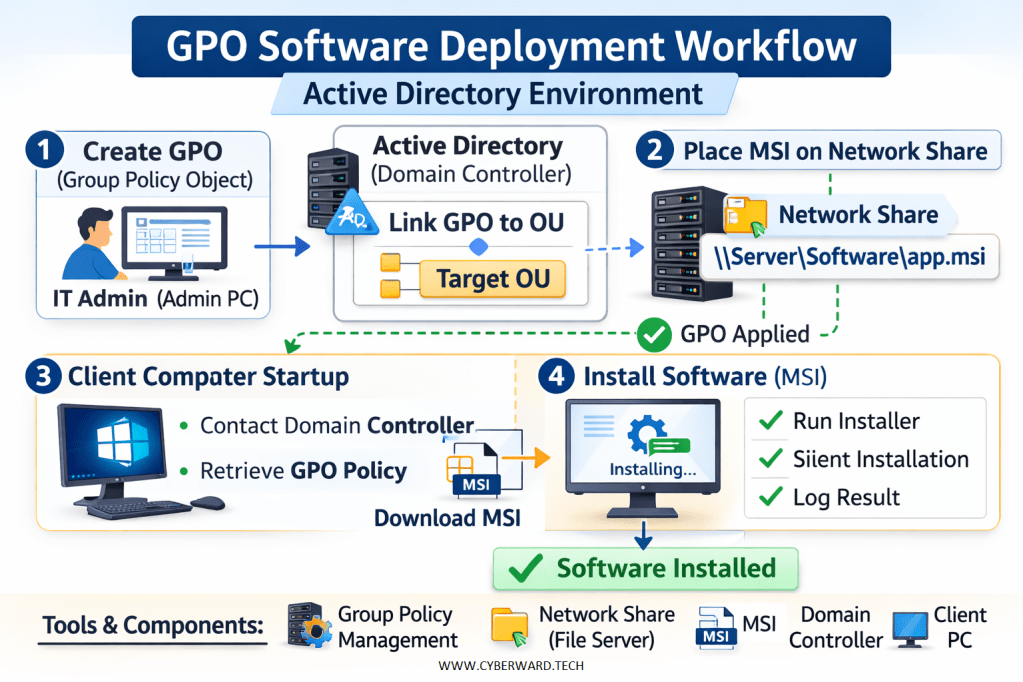
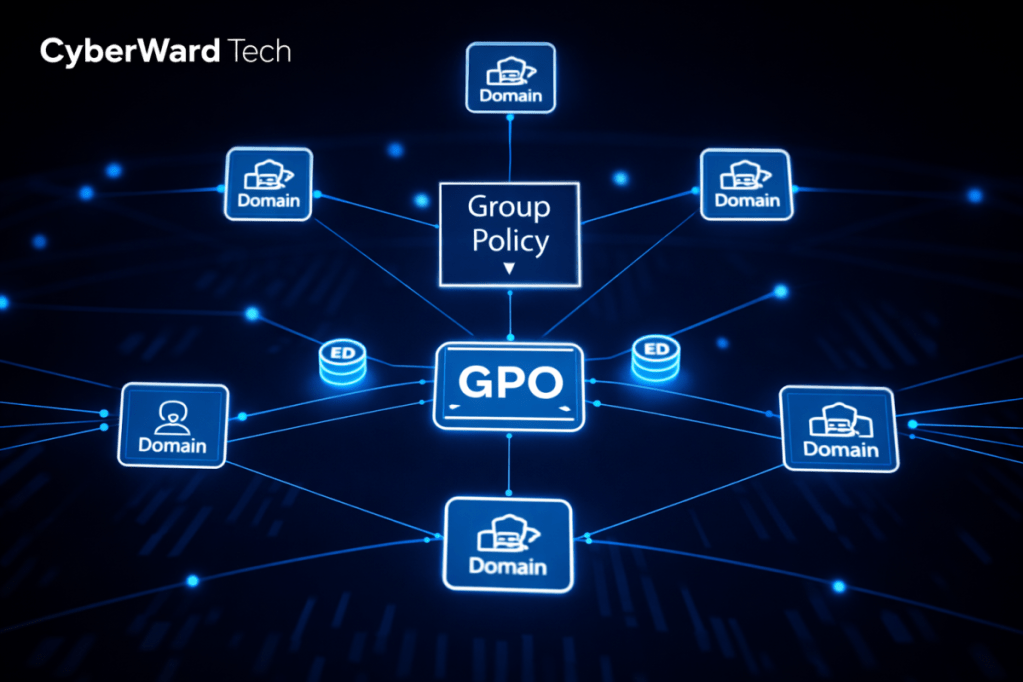
In a Windows domain environment using Active Directory, software can be centrally deployed using Group Policy. The IT administrator creates a Group Policy Object (GPO), links it to the appropriate Organizational Unit (OU), and assigns an MSI package stored on a secure network share. When domain-joined computers restart or users log in, they automatically retrieve the policy from the domain controller and install the software without manual intervention. This allows IT departments to deploy applications efficiently, consistently, and at scale.
Step 1 — Preparing the Software Package
First, I downloaded the Microsoft Installer (.msi) version of Mozilla Firefox.
This is important because Group Policy Software Installation requires an MSI package, not an EXE file.
The installer was placed inside a shared folder on the server. Proper share and NTFS permissions were configured to allow domain computers to read the installation file. In this lab, I Downloaded Firefox, store the installer in a shared folder, and deploy it automatically to a domain computer.
The path used in the policy:
\\CW-CD01\Software\Firefox.msi
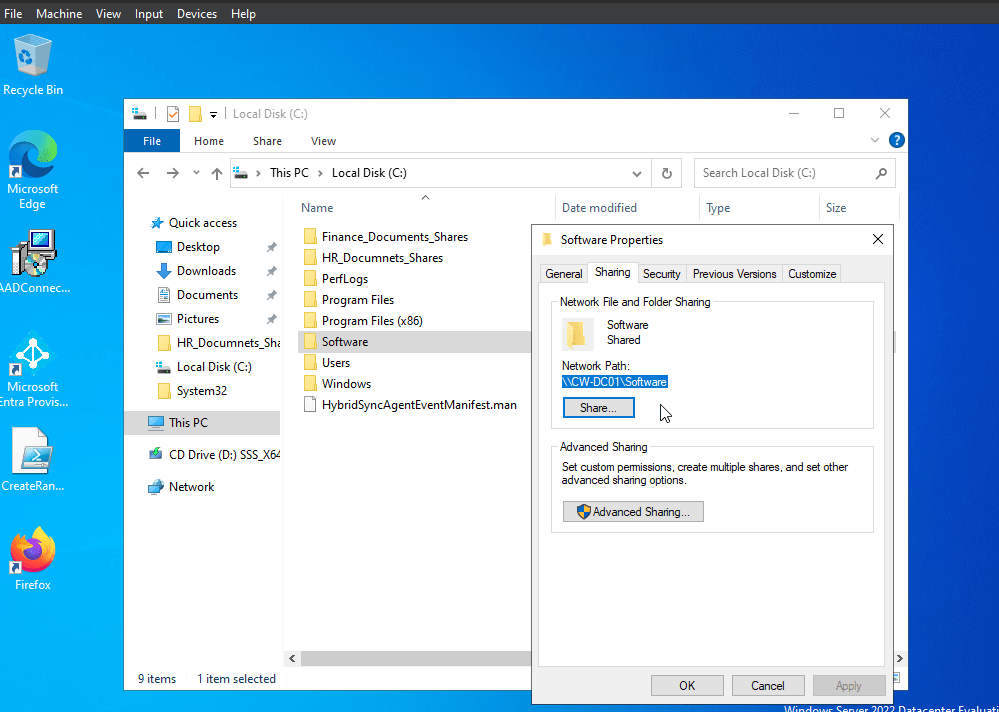
Using the UNC path is critical — mapped drives will not work for Group Policy deployment.
Step 2 — Creating the Group Policy Object (GPO)
Using Group Policy Management:
- Opened Group Policy Management Console (GPMC)
- Right-clicked the appropriate Organizational Unit (OU)
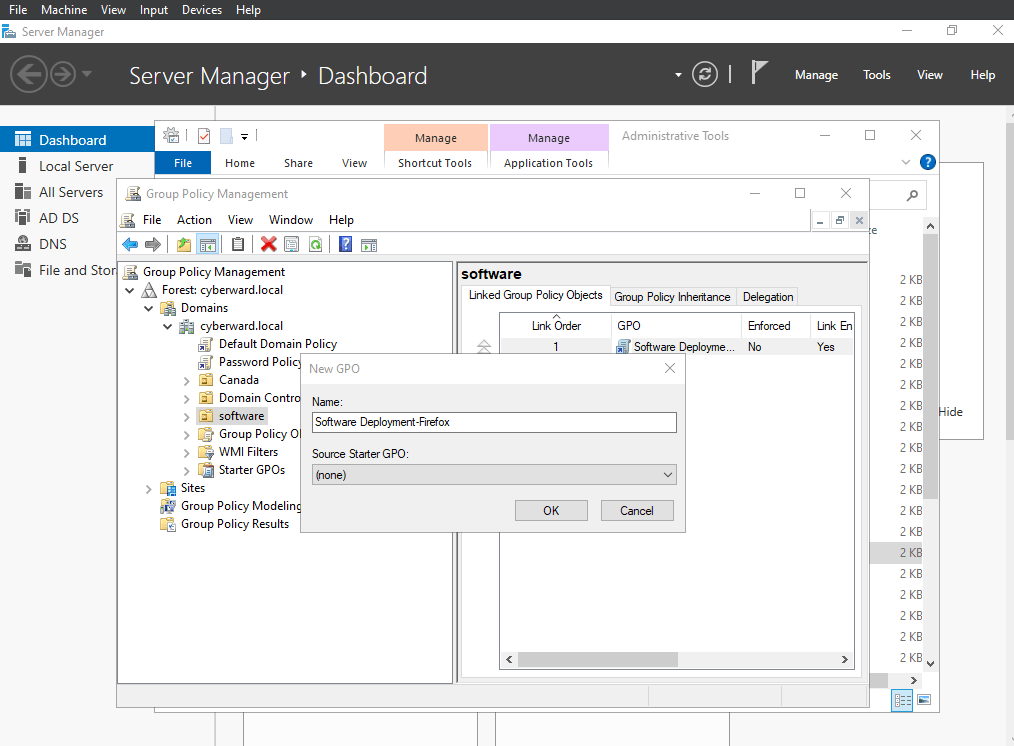
- Selected Create a GPO in this domain, and Link it here
- Named the policy: Software Deployment – Firefox
The policy was linked to the OU containing the target computer account.
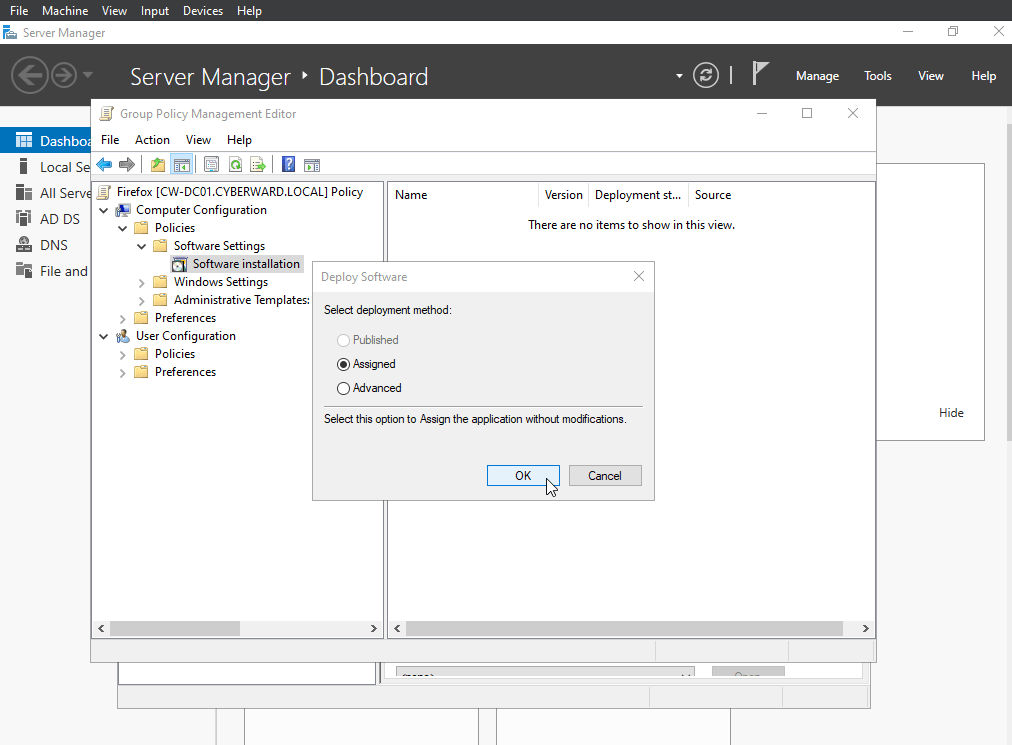
Step 3 — Configuring Software Installation
Inside the newly created GPO:
- Navigated to: Computer Configuration
→ Policies
→ Software Settings
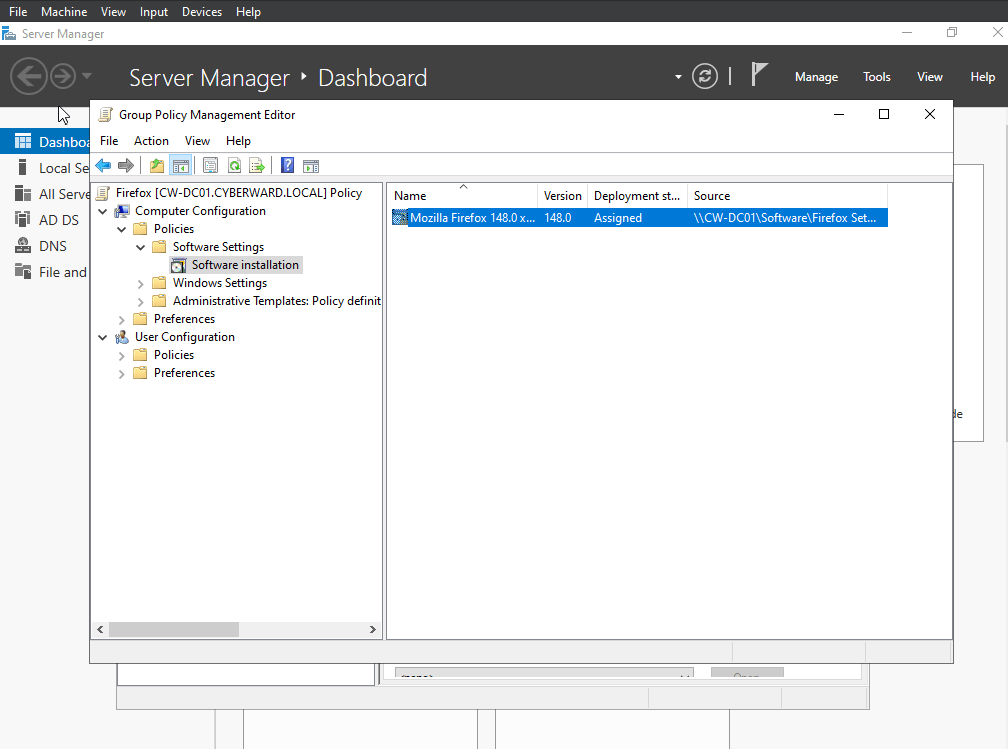
→ Software Installation - Right-clicked and selected New → Package
- Entered the UNC path to the Firefox MSI installer
- Selected Assigned deployment method
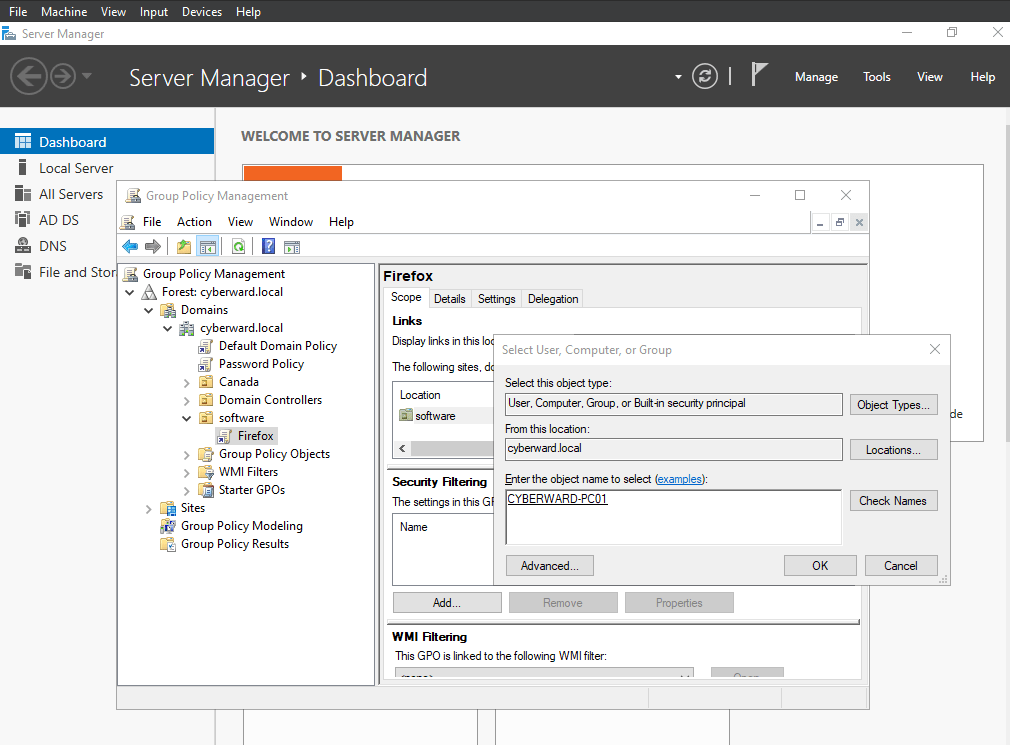
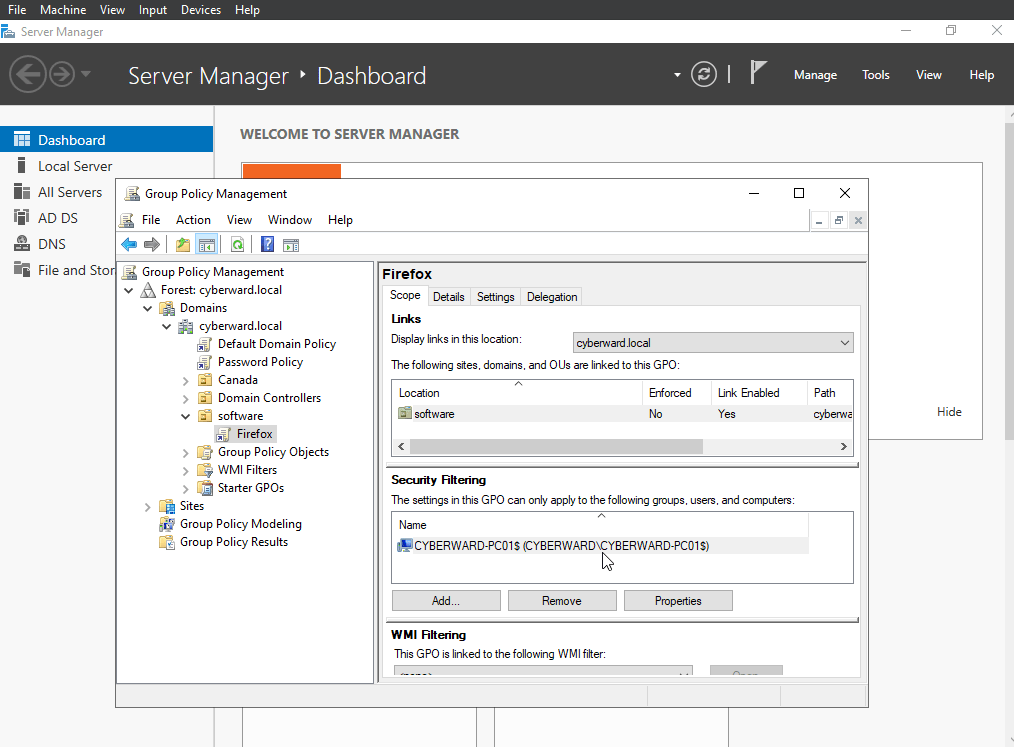
- Add the target computers for the software deployment
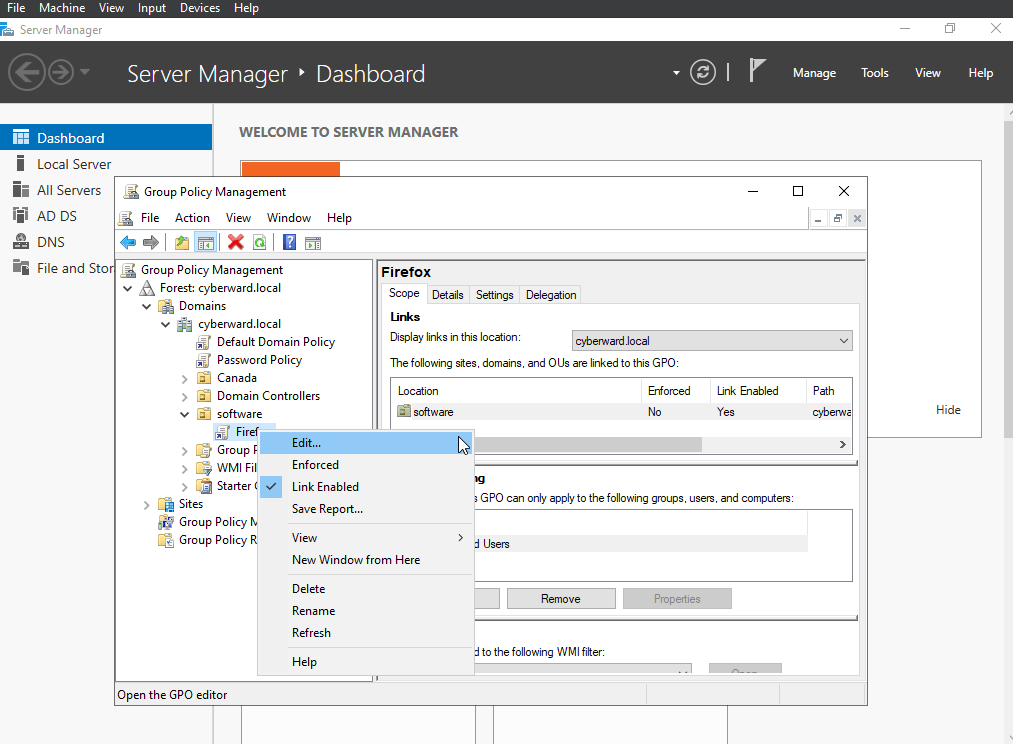
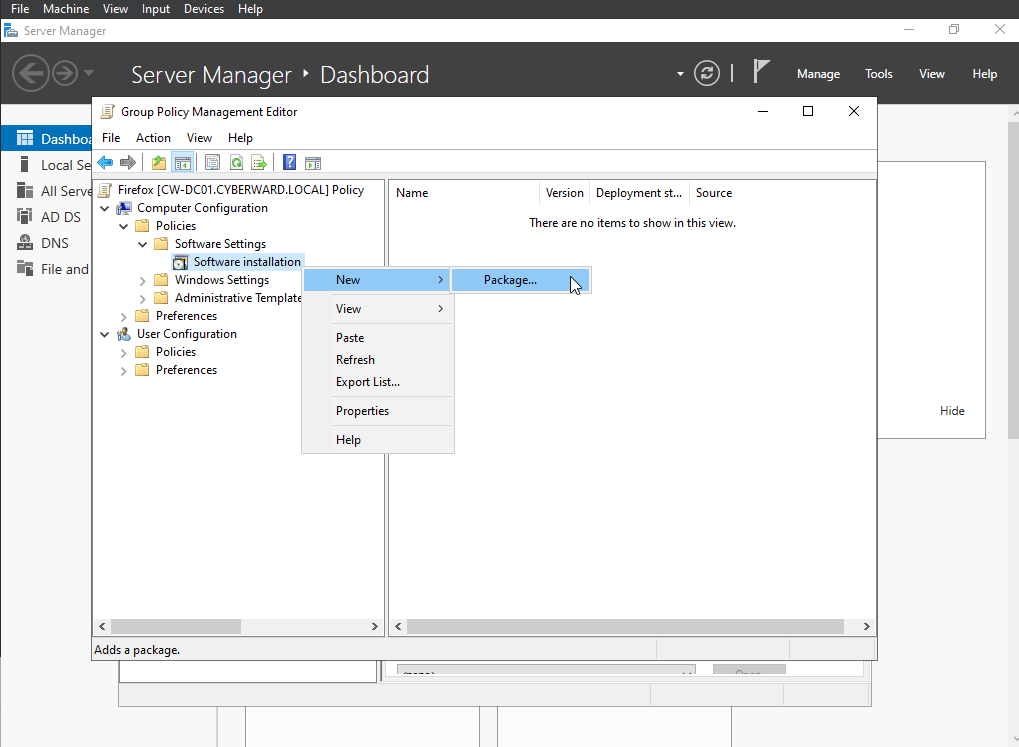
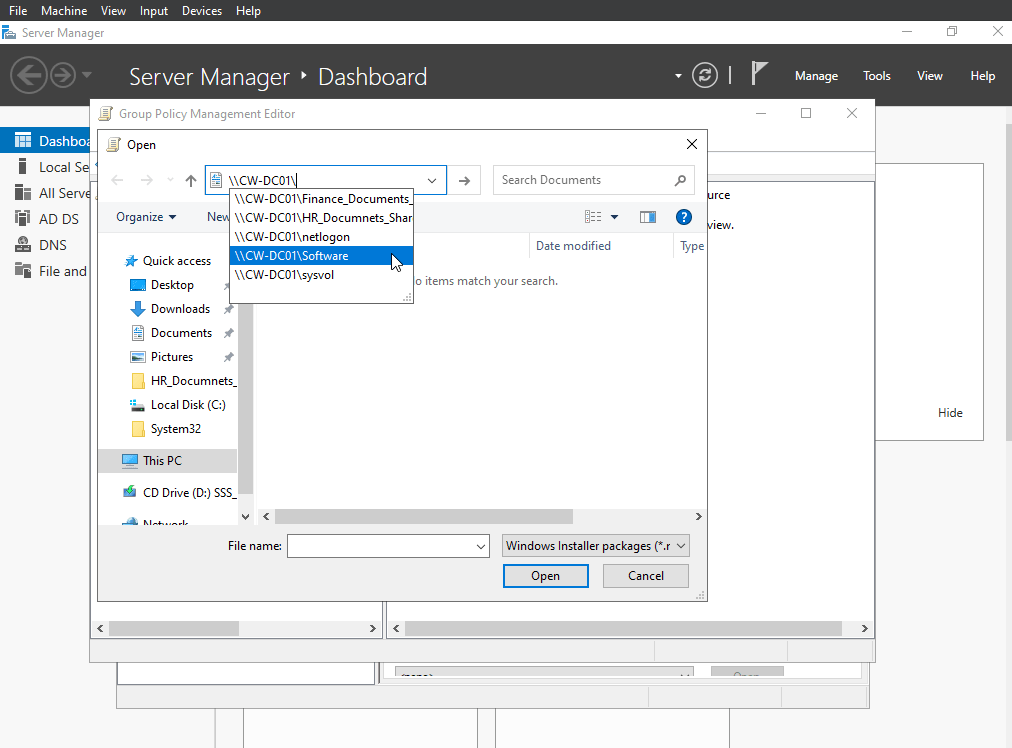
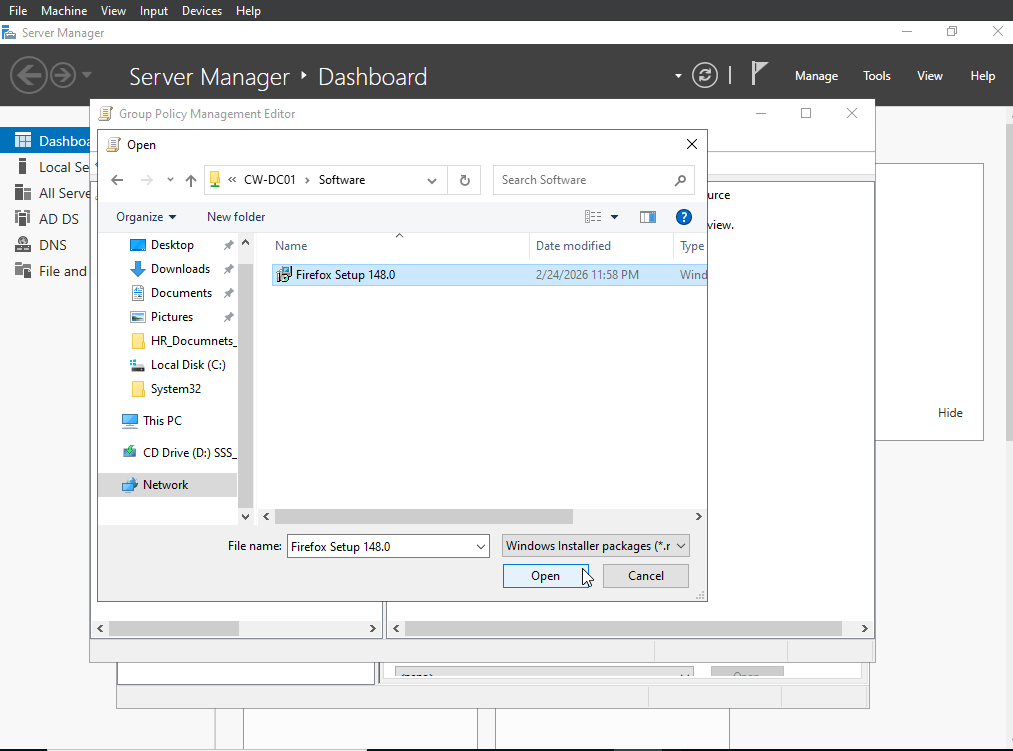
Using “Assigned” ensures the application installs automatically during computer startup.
add the target computer , in this case, CYBERWARD-PC01
Step 4 — Forcing Group Policy Update
On the Windows 11 client machine(CYBERWARD-PC01):
- Ran
gpupdate /force - Restarted the computer
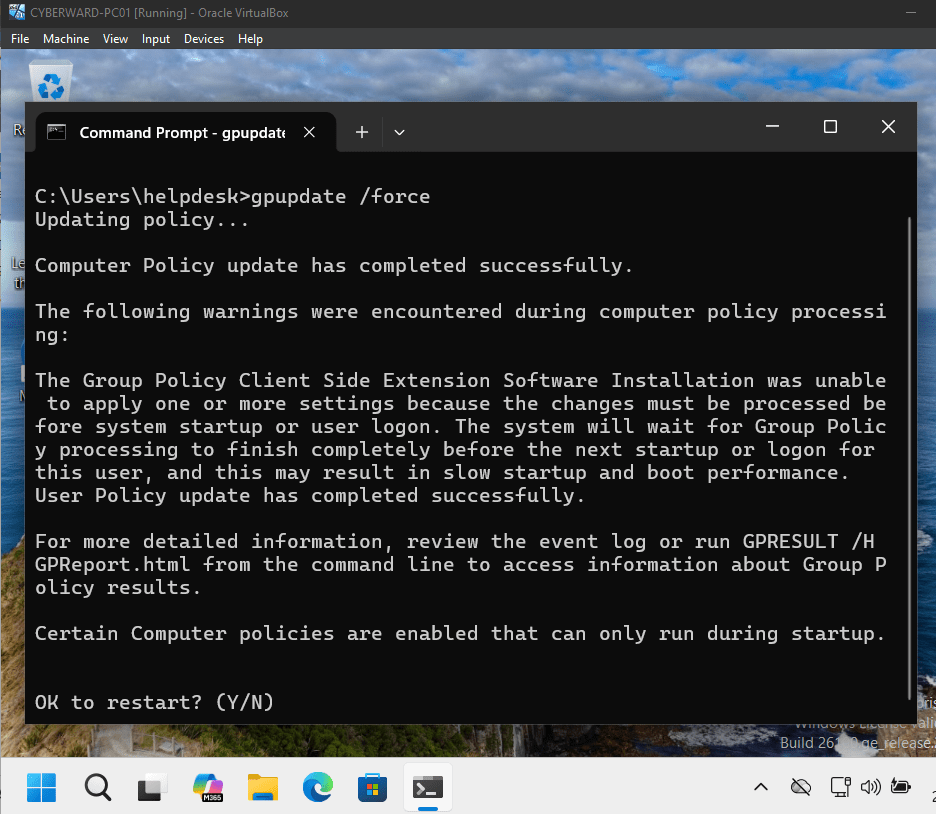
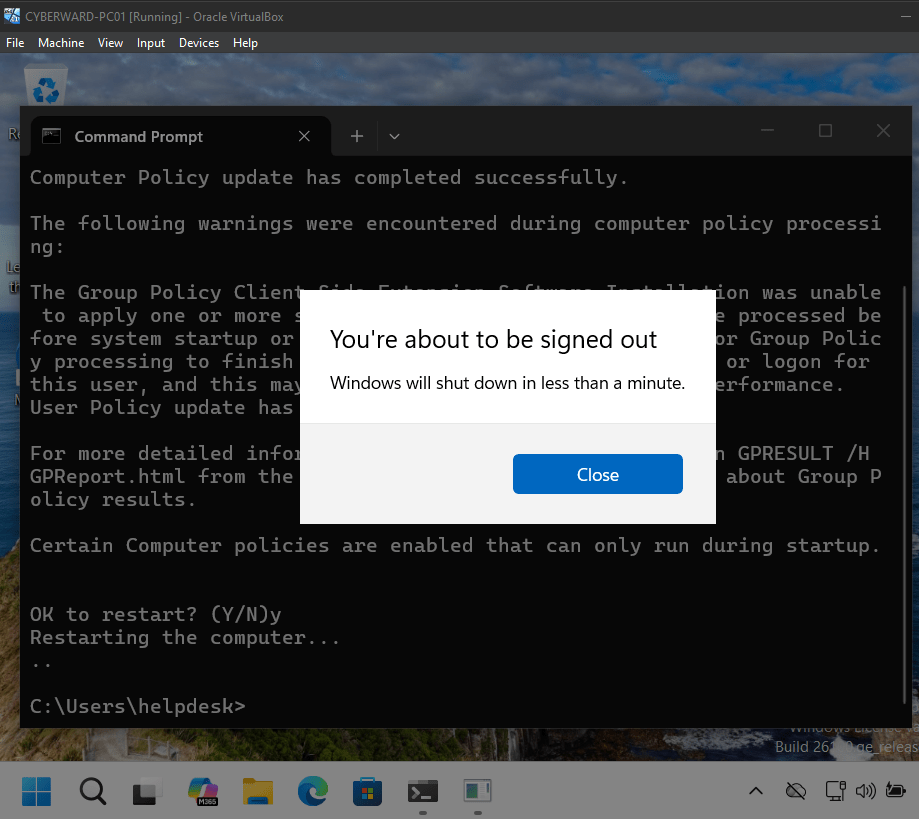
During startup, Windows processed the new Group Policy and installed Firefox automatically before user login.
No manual installation was required.
Step 5 — Validation
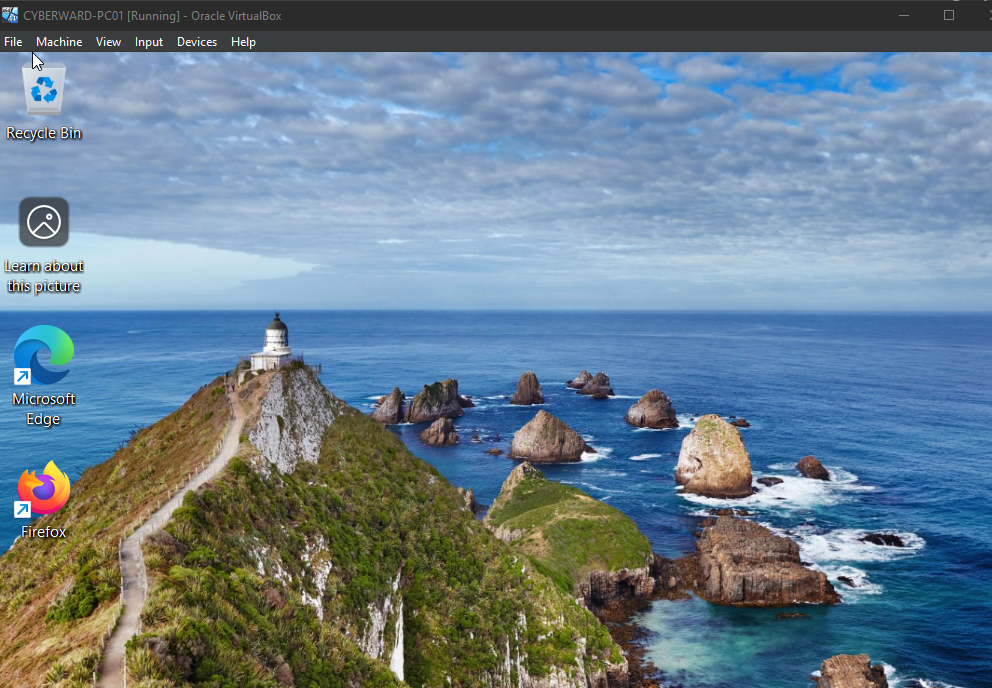
After login, I confirmed:
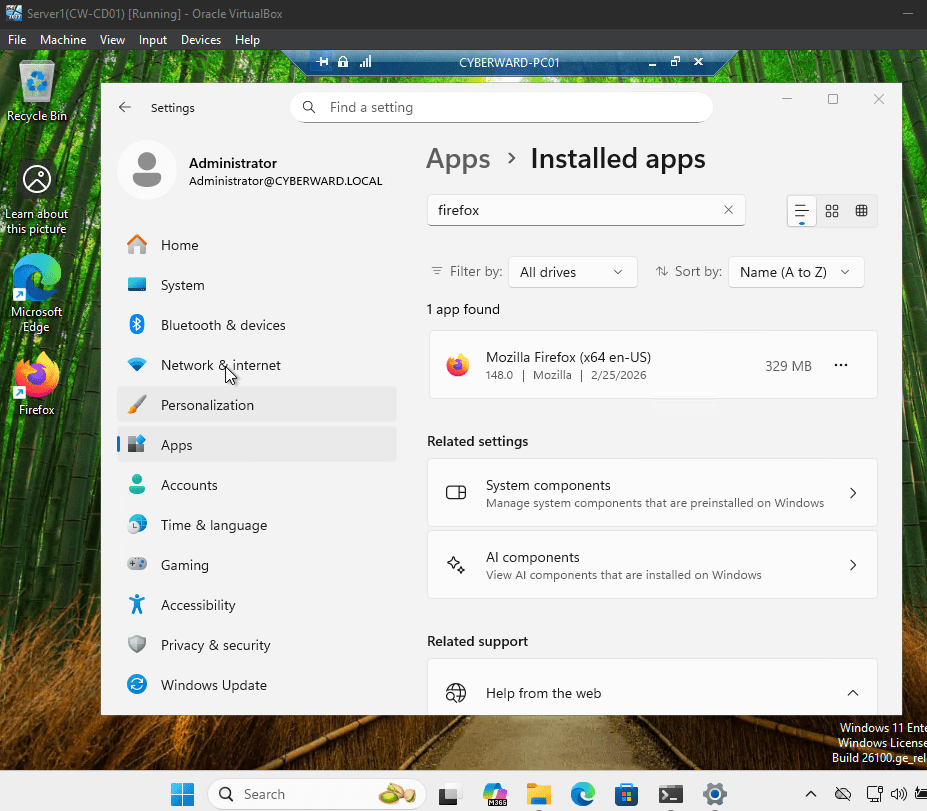
- Mozilla Firefox was successfully installed
- The application launched without errors
- The installation occurred without user interaction
This confirmed that the GPO was correctly configured and properly applied to the domain-joined computer.
Manual Installation Through Remote Desktop
Step 1 – Make Sure RDP Is Enabled on the User Machine
On the user computer:
- Open System Properties
- Go to Remote Desktop
- Enable:
✔ “Allow remote connections to this computer”
OR via PowerShell (run as admin on the user PC):
Set-ItemProperty -Path 'HKLM:\System\CurrentControlSet\Control\Terminal Server' ` -Name "fDenyTSConnections" -Value 0
Also ensure:
- Windows Firewall allows Remote Desktop
- User is in Remote Desktop Users group (or you are domain admin)
Step 2 – From the Server (or Admin PC)
On the server:
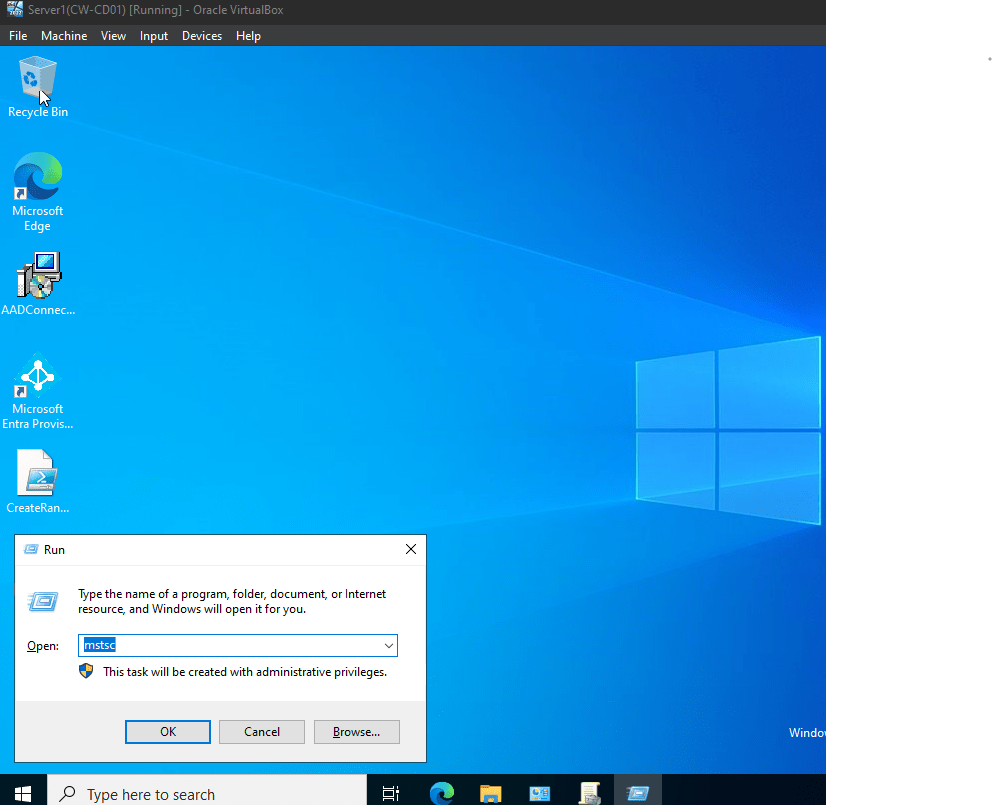
Press:
Win + R
Type:
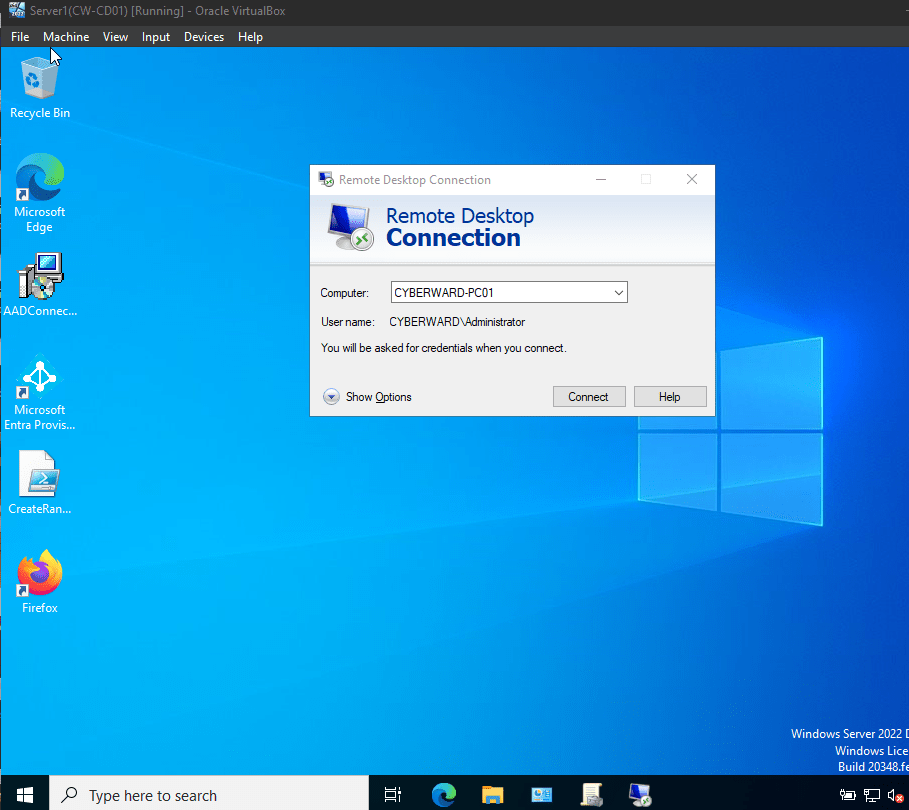
mstsc
That opens Remote Desktop Connection.
Step 3 – Enter Computer Name
In the computer field, enter the computer name:
CYBERWARD-PC01
OR
CYBERWARD-PC01.cyberward.local
Then click Connect
Step 4 – Authenticate Using Domain Credentials
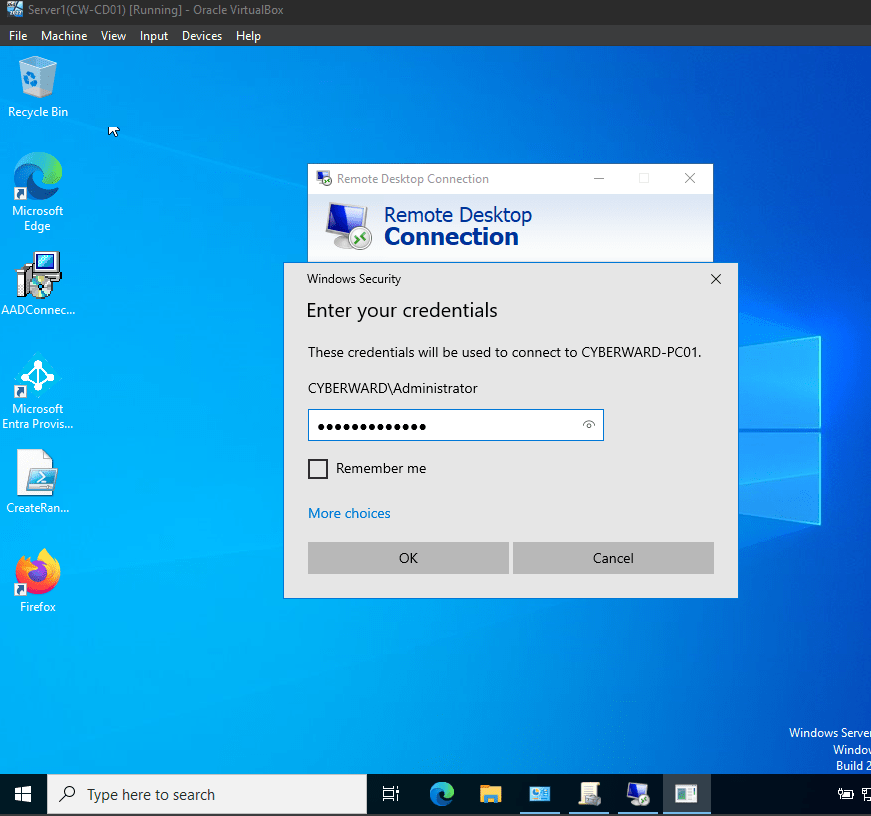
Use:
CYBERWARD\Administrator
Enter password.
Step 5 – Identify the Network Path
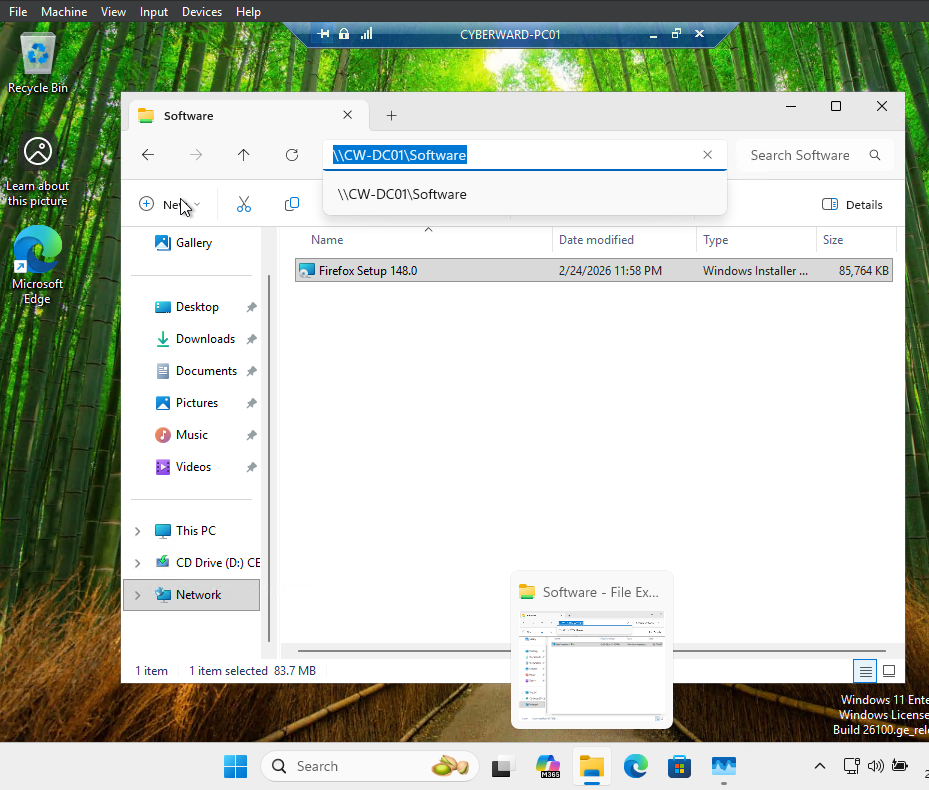
Example shared path:
\\CW-DC01\Software\Firefox Setup 148.0.msi
This is called a UNC path (Universal Naming Convention).
Make sure:
- You have read permission
- You can access it in File Explorer first (recommended test)
Step 6 – Open Command Prompt as Administrator
Inside the remote machine:
- Click Start
- Type
cmd - Right-click → Run as administrator
Step 3 – Install Directly from Network Share
You can run:
msiexec /i "\\CW-DC01\Software\Firefox Setup 148.0.msi" /qn
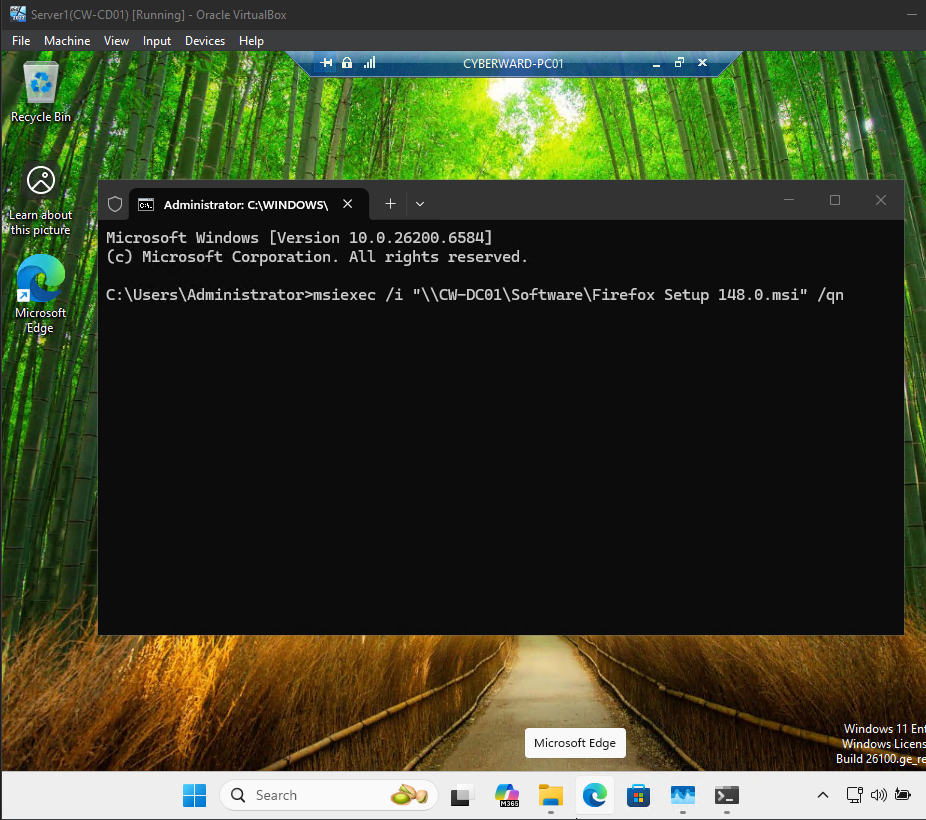
What this does:
/i→ install/qn→ silent (no interface)- Path in quotes → required because of
\\
Alternative (Recommended in Many Environments)
Sometimes it’s better to copy locally first.
Copy MSI to local temp folder:
copy "\\CW-DC01\Software\Firefox Setup 148.msi" C:\Temp\
(If Temp doesn’t exist, create it first)
Then install locally:
msiexec /i C:\Temp\Firefox Setup 148.msi /qn
🔎 Step 4 – Verify Installation
- Settings → Apps → Installed Apps
- also will appear at Desktop


 CYBERWARD
Leave a comment