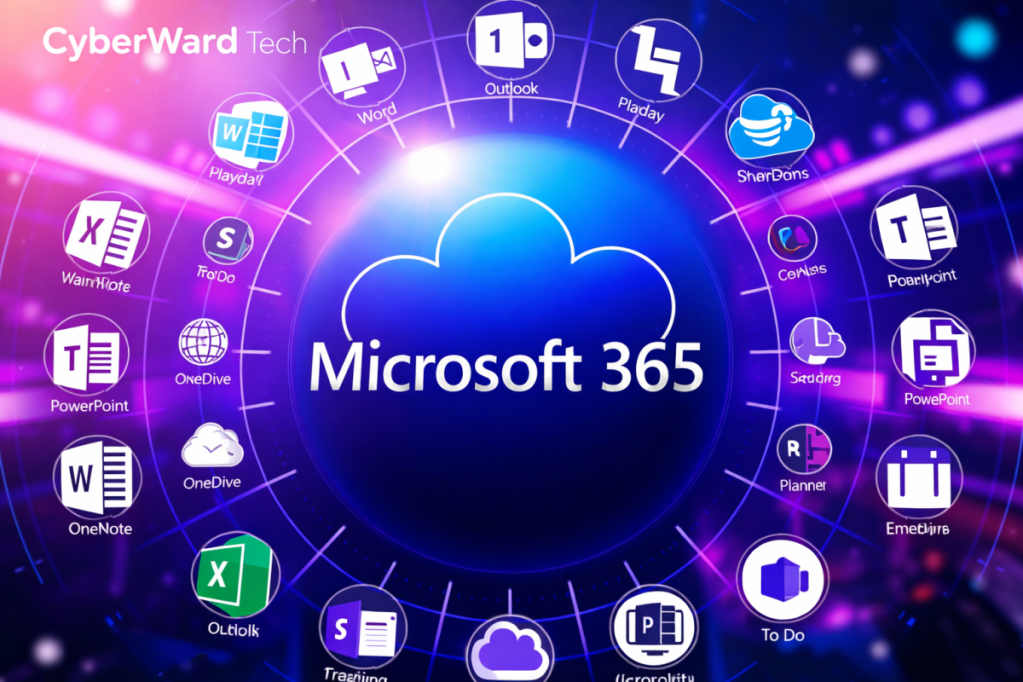
Microsoft 365 is a comprehensive suite of cloud-based applications and services designed to support productivity, collaboration, and information management for both organizations and individuals. Formerly known as Office 365, Microsoft 365 expands on traditional office tools by integrating cloud services, collaboration platforms, and enterprise-grade security features into a single ecosystem.
Core Applications
Office Applications
- Word – Document creation and editing
- Excel – Data analysis and spreadsheet management
- PowerPoint – Presentation design and delivery
- Outlook – Email, calendar, and contact management
- OneNote – Digital note-taking and information organization
Cloud Services
- OneDrive – Secure cloud storage for file access and sharing
- SharePoint – Content management and collaboration platform for team sites, document libraries, and internal portals
Collaboration and Communication
- Microsoft Teams – Centralized collaboration hub for chat, video calls, online meetings, and real-time document collaboration
- Yammer – Enterprise social networking tool for internal communication and employee engagement
Productivity and Workflow Management
- Planner – Task and project management tool
- To Do – Personal task and list management
- Power Automate – Workflow automation for repetitive processes
- Power Apps – Low-code platform for building custom business applications
Security and Administration
- Microsoft Defender – Protection against malware, phishing, and other security threats
- Azure Active Directory (Azure AD) – Identity and access management for users and devices
- Intune – Mobile device and application management to enforce organizational compliance policies
Microsoft 365 provides a unified, cloud-first approach to modern workplace productivity, simplifying collaboration while enhancing security and administrative control.
Importance of Microsoft 365 for Help Desk Roles
Proficiency in Microsoft 365 is essential for Help Desk professionals. Many organizations rely on its services for daily operations, user collaboration, and cloud-based data management. Beyond standard office applications, Microsoft 365 offers advanced tools that improve productivity, enable secure remote work, and streamline IT support tasks.
Acquiring Microsoft 365 for an Organization
Microsoft 365 can be purchased from the official Microsoft website .
From this page, organizations can review available plans and pricing options. For enterprise environments, Microsoft 365 Enterprise Standard is a suitable choice, offering a balanced set of productivity, collaboration, and security features.
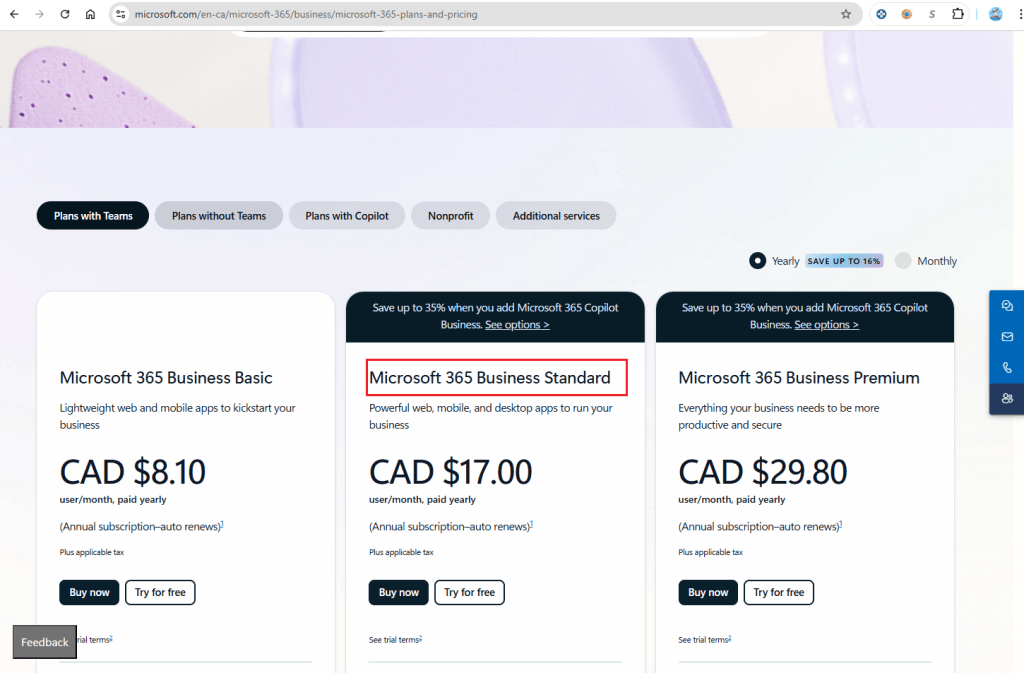
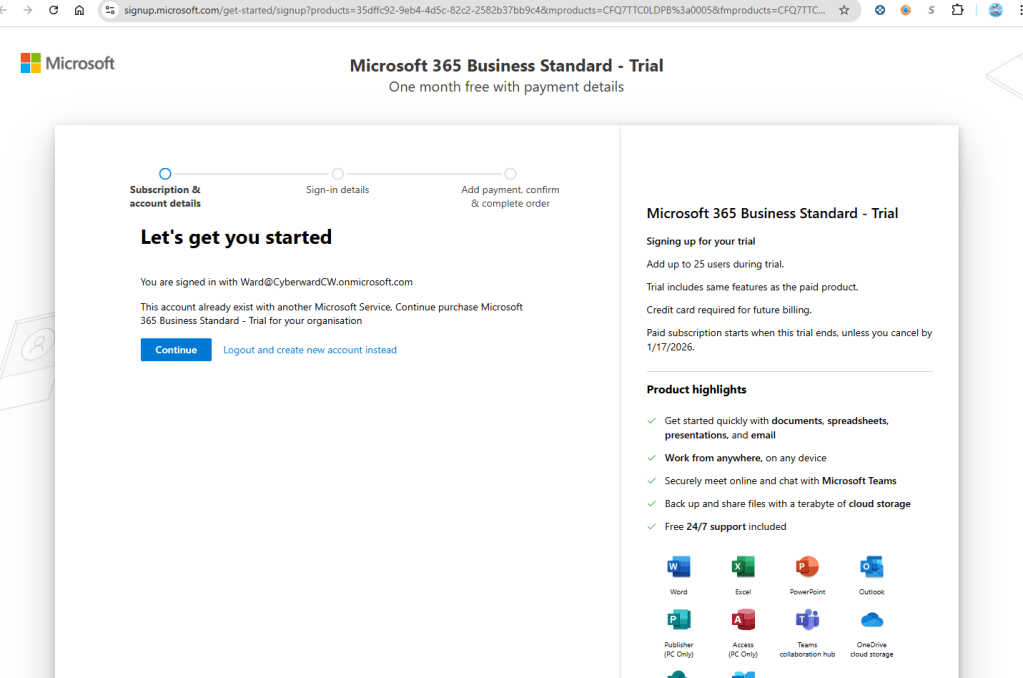
To test this setup, I will use the monthly trial version. Then, you “continue” if already have account, or create a new account.
The I will be forwarded to the Microsoft 365 Admin Center and get the following interface, choose “Microsoft 365 business standard trial”
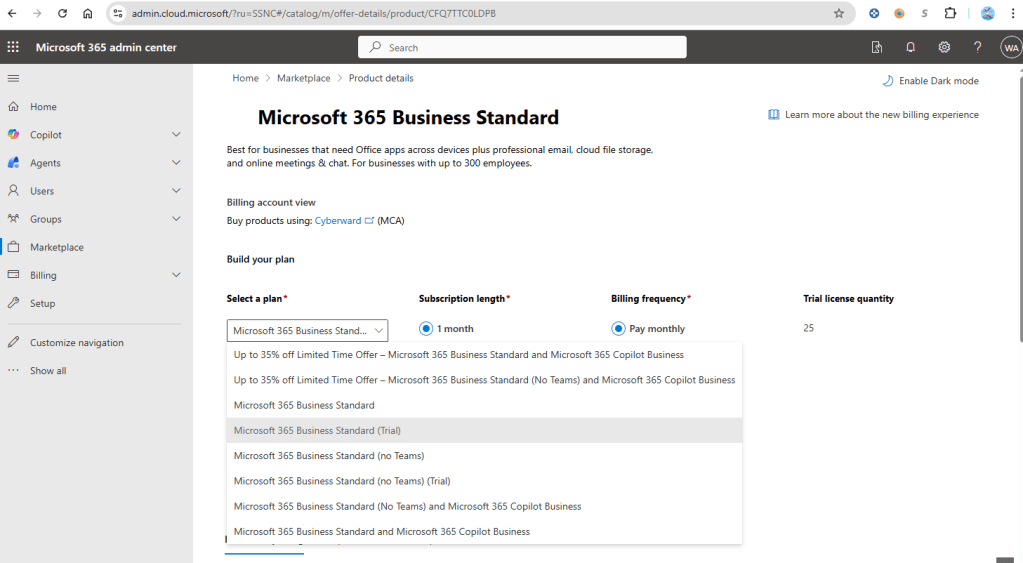
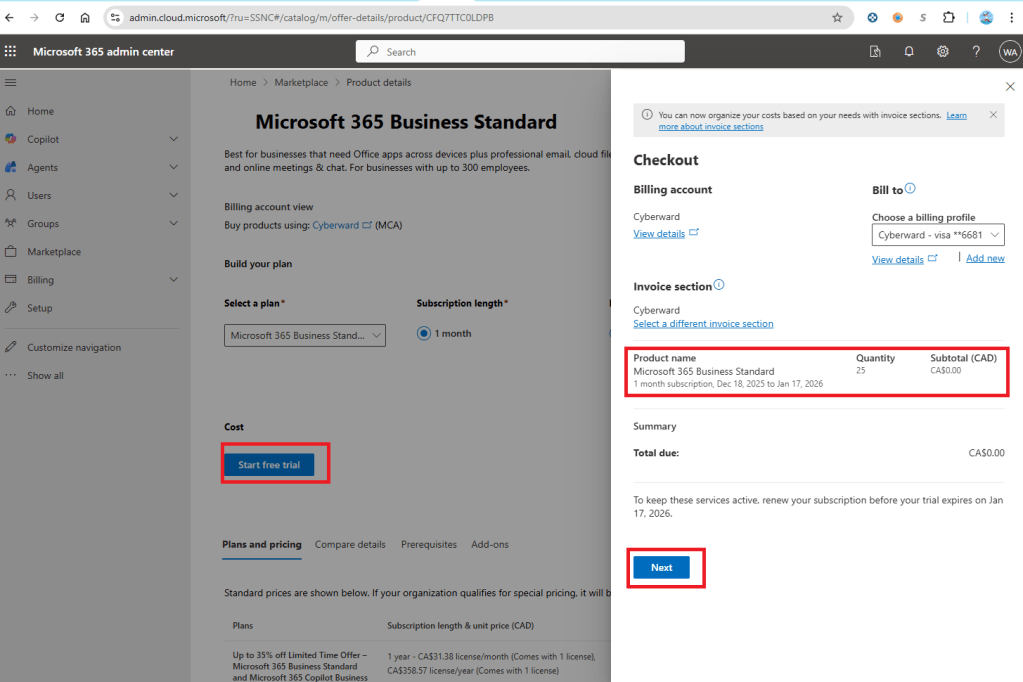
After selecting the trial, then click “get started”, checkout page will pop up, confirm your plan & payment details, then “Next”
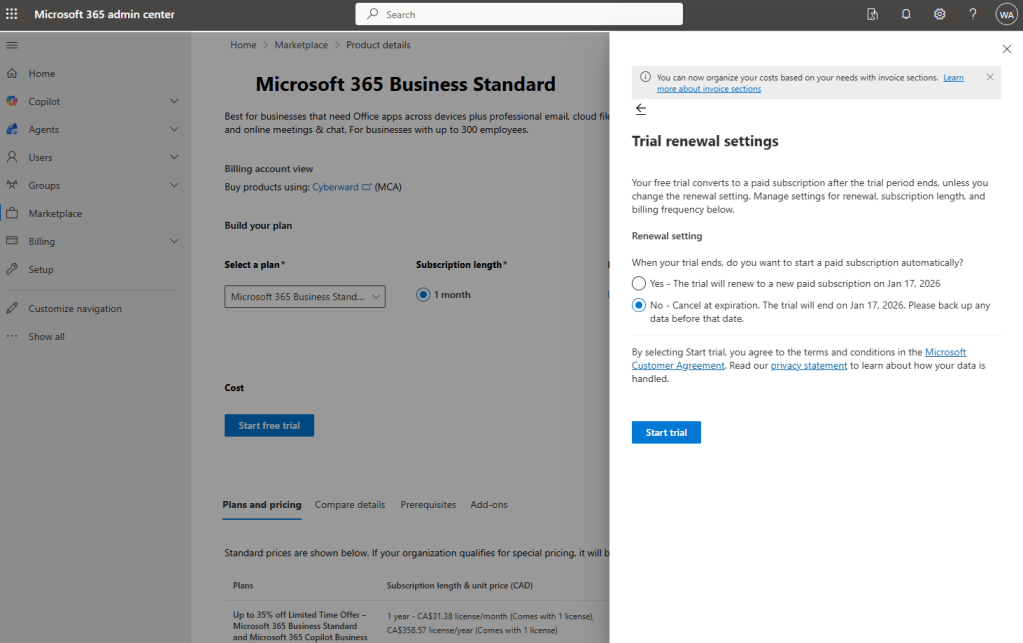
select your renewal setting, then start trial:
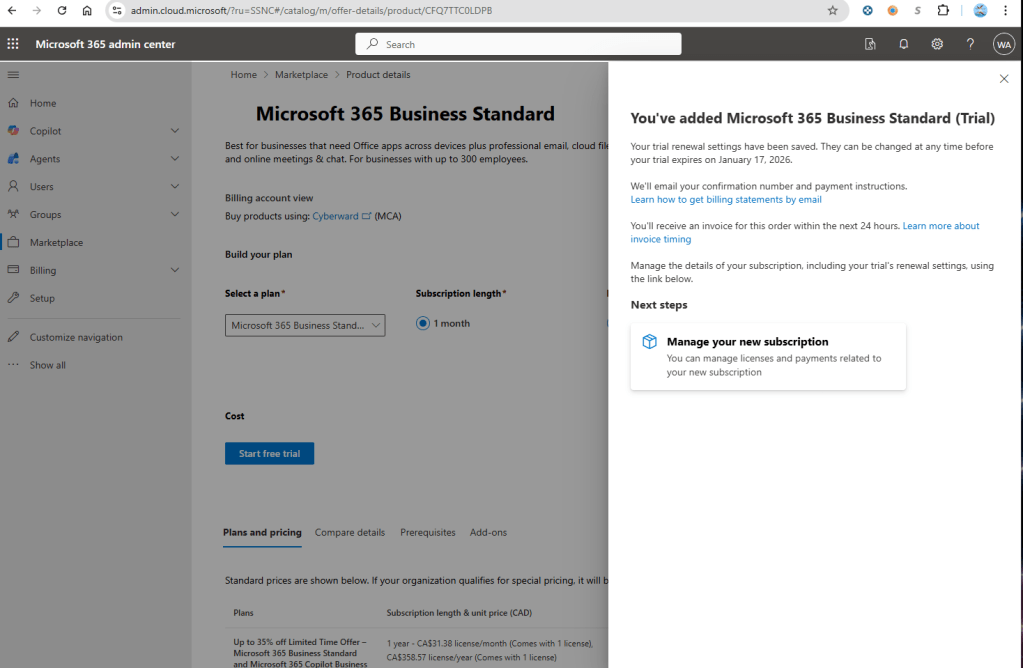
Select “Manage your new subscription”:
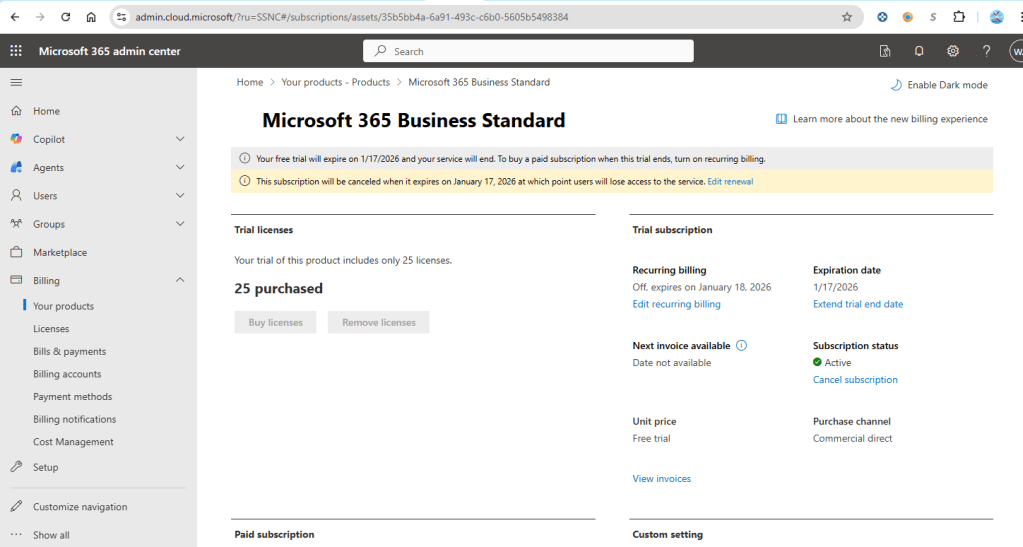
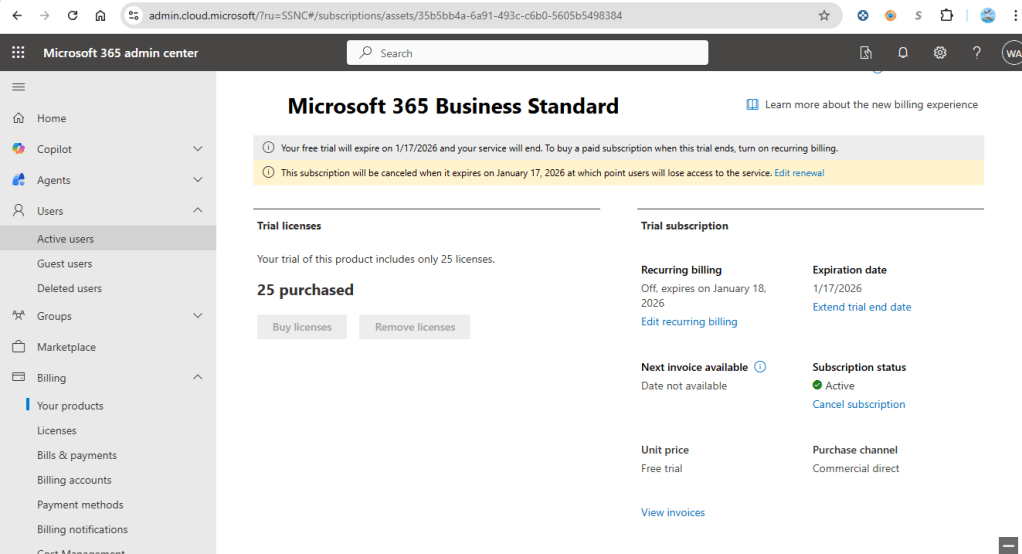
Once this step is completed, the product and the 25 corresponding licenses are acquired. These licenses are then assigned to users based on their roles within the organization.
Microsoft 365 User Creation
Steps to Create Users in Microsoft 365
First, access the Microsoft 365 Admin Center.
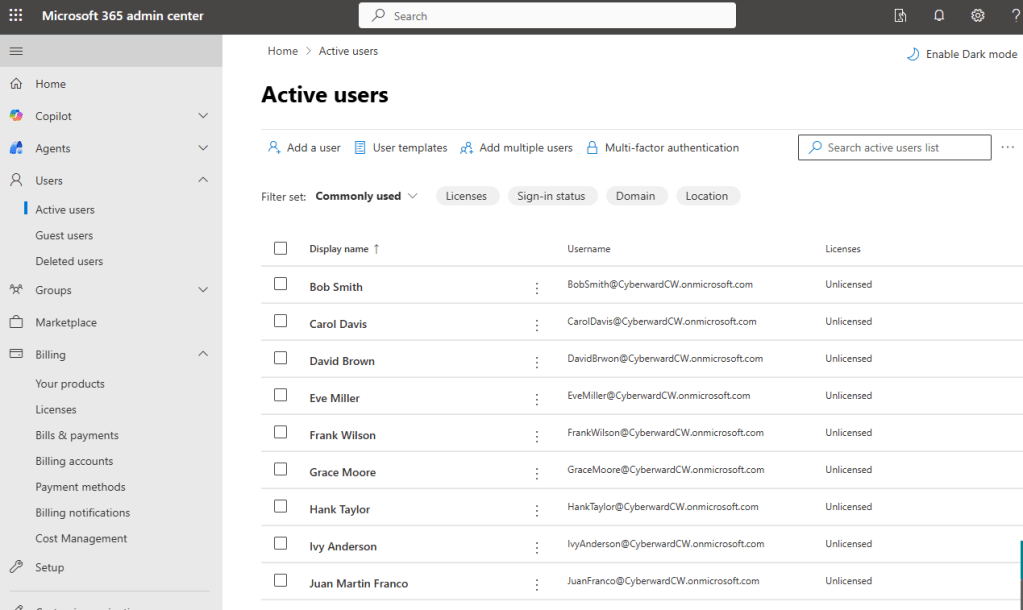
Next, from the left-hand navigation panel, select Users, and then click on Active users.
all the users that are sync with on-prem active directory will show up:
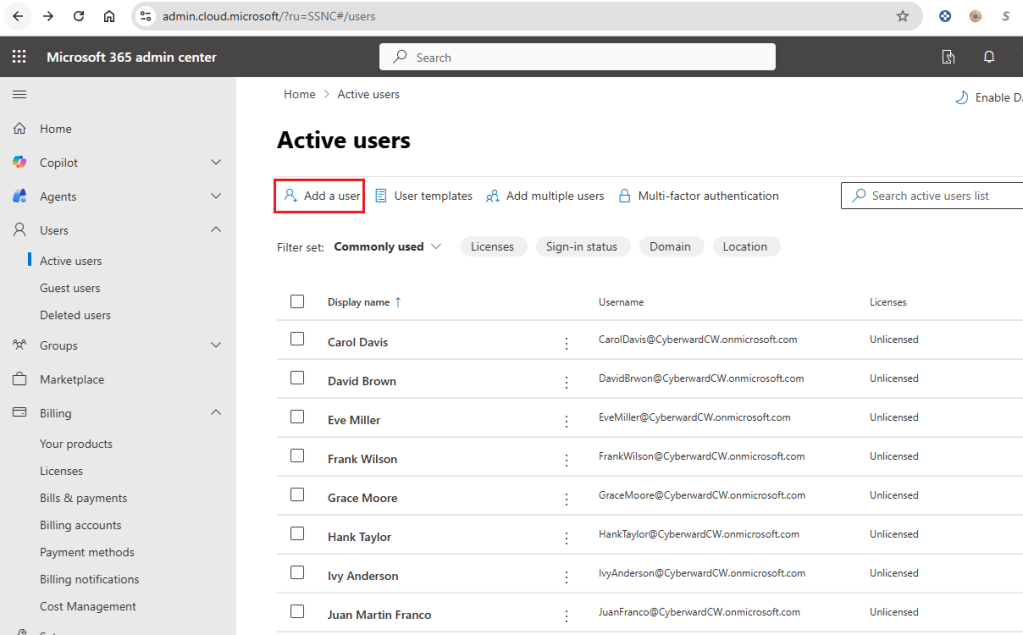
here, I will demonstrate how to create a new user and assign license
Once inside, select the “Create user” option:
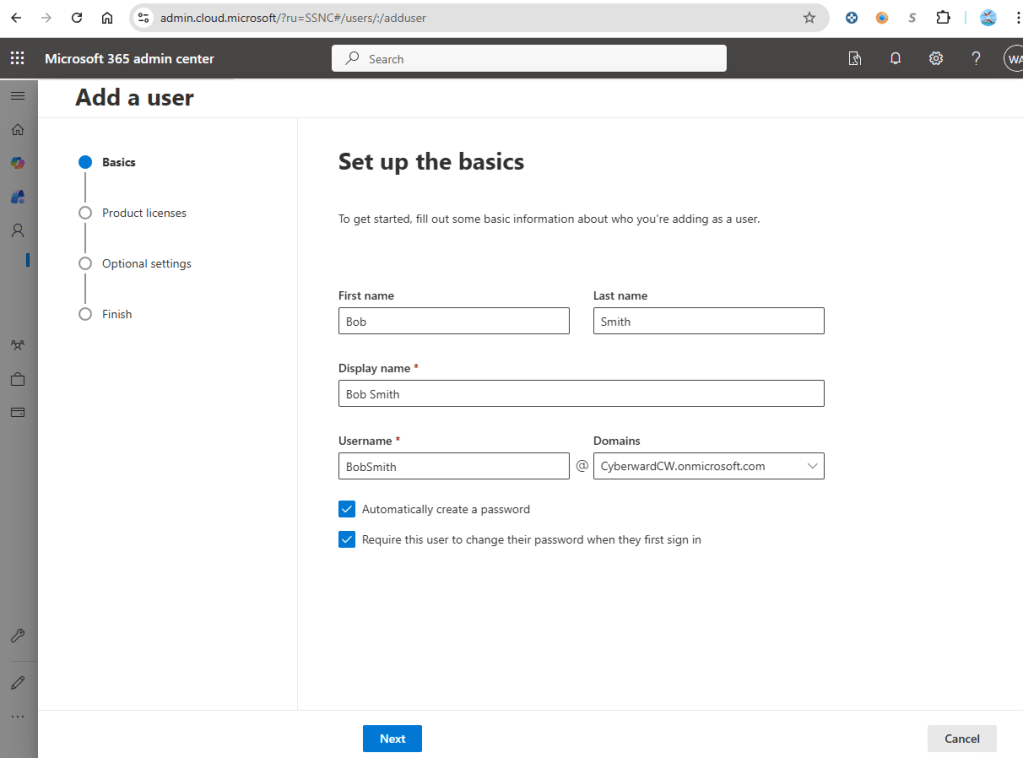
Then, I fill in the fields, indicating first name, last name, display name (which will appear in the list of active users) and the user name, with which the user will log in:
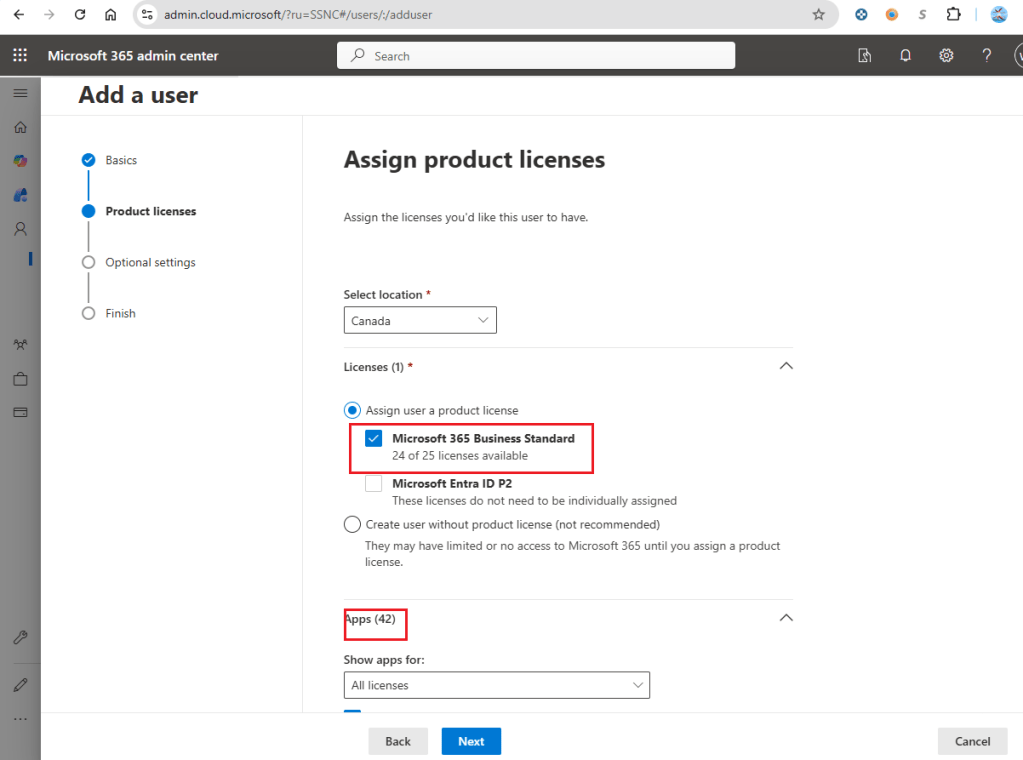
Next and most critical task is to assign a license to the user. In this case, the Microsoft 365 Enterprise Standard license is applied, along with the specific applications included in the plan.
This section allows administrators to enable or restrict access to individual applications as needed. For example, access to Microsoft Teams can be explicitly allowed or blocked based on the user’s role and organizational requirements.
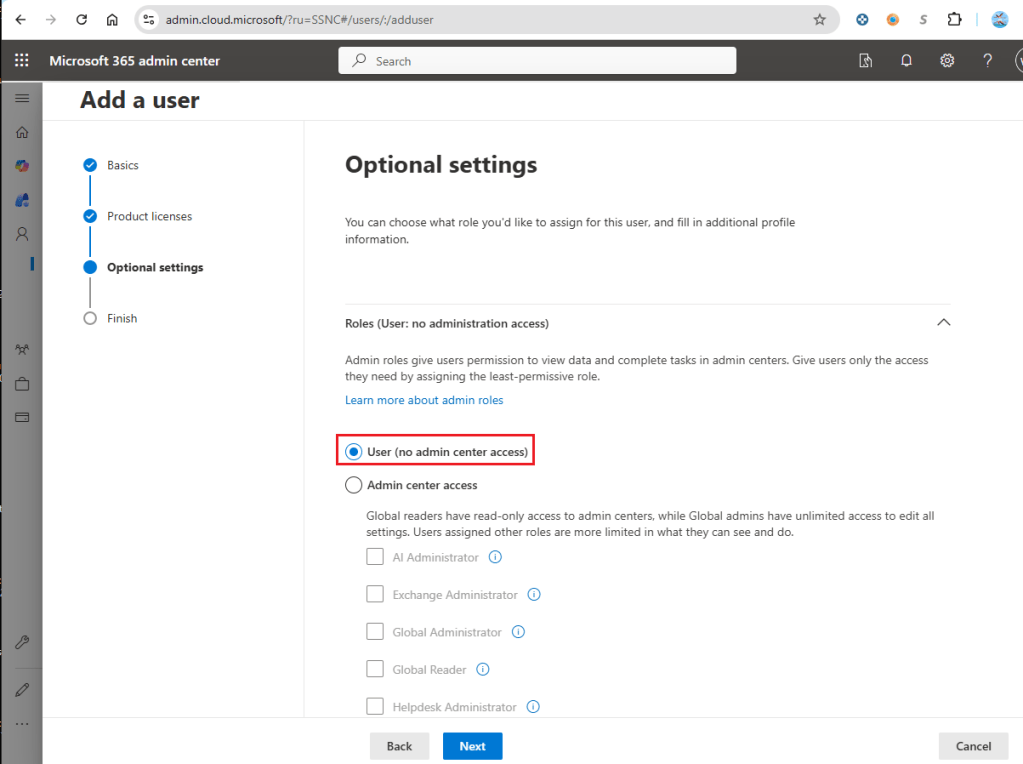
Next, in the optional configuration section, you can define whether the account will be created as a standard user or assigned administrator privileges.
If administrator access is required, you can select the appropriate administrative role, such as SharePoint Administrator, Exchange Administrator, or Teams Administrator. For full and unrestricted access to all Microsoft 365 features and services, the Global Administrator role can be assigned.
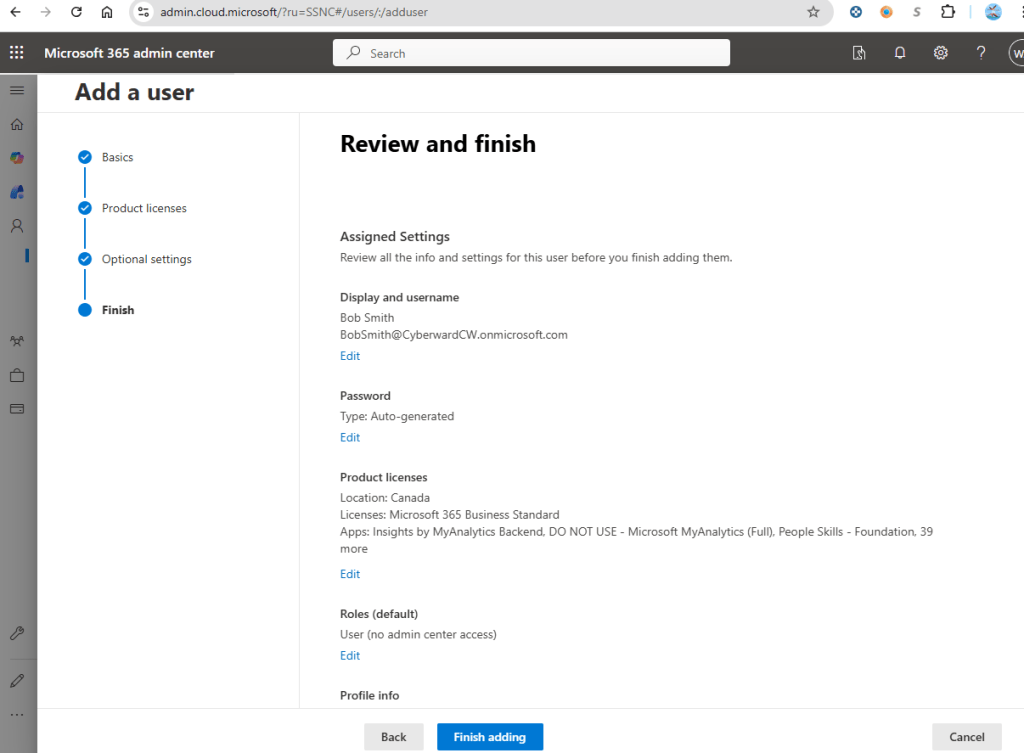
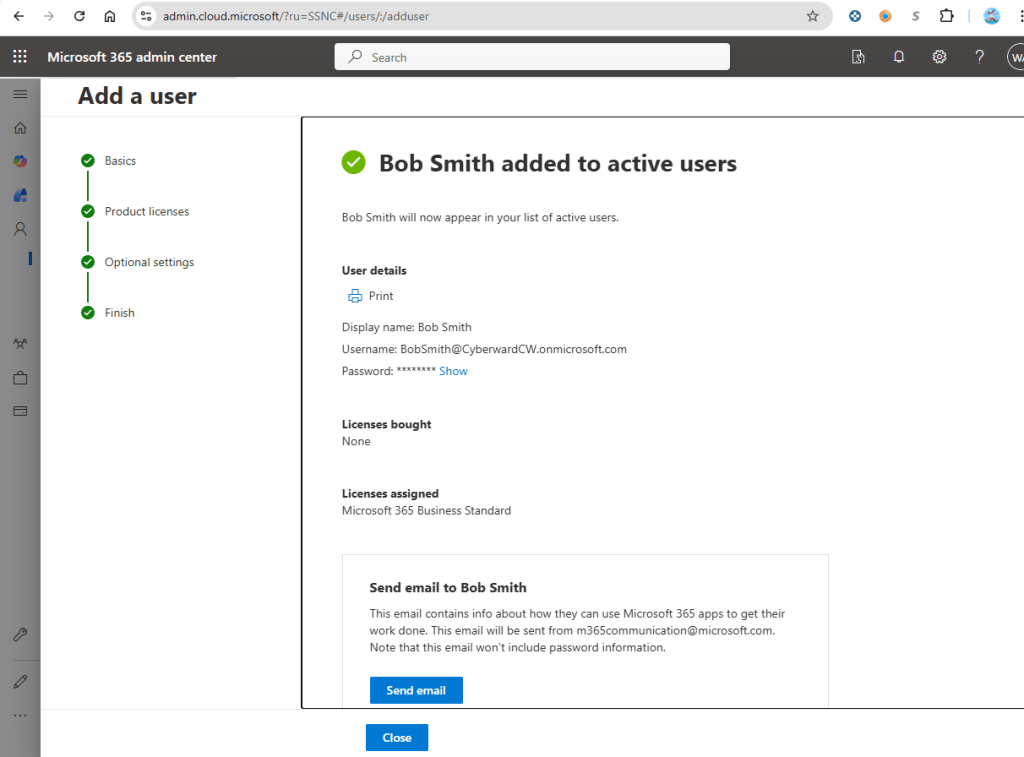
Finally, confirm that all the data is correct and finish with the user creation.
Microsoft 365 License Management
Steps to follow to manage Microsoft 365 licenses for a given user:
- First, you must choose the user to whom certain licenses will be configured.
In this case I will choose to modify the licenses for the user “Bob Smith”, so I go to “Active users” and click on that user.Then, click on “Licenses and applications”:
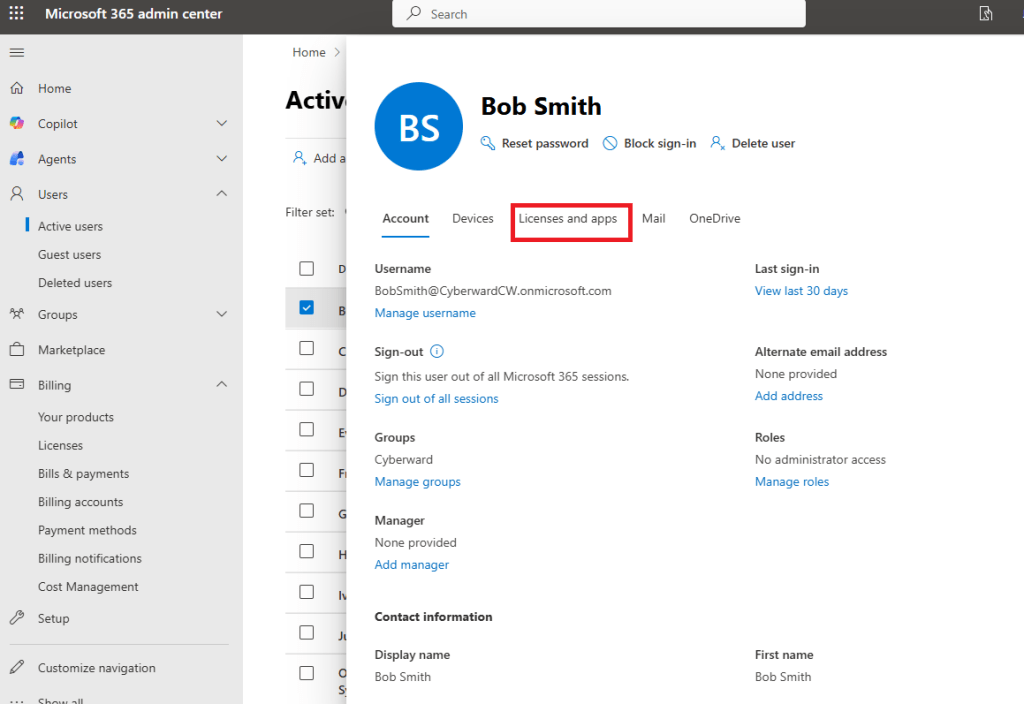
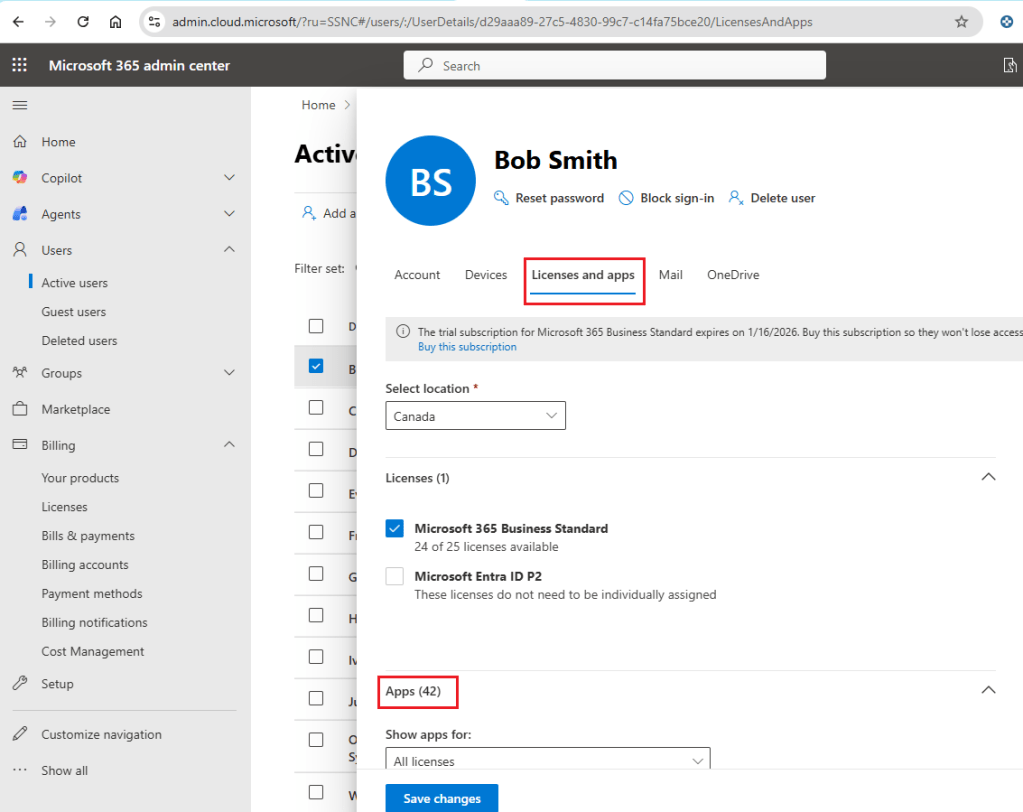
Once I am inside this section, I have the licenses and applications available at my disposal.
I can change the type of license (in this case no, because I only have a Microsoft 365 Standard Enterprise) and below the type of applications that the user can use (e.g. Teams, Sharepoint, etc).
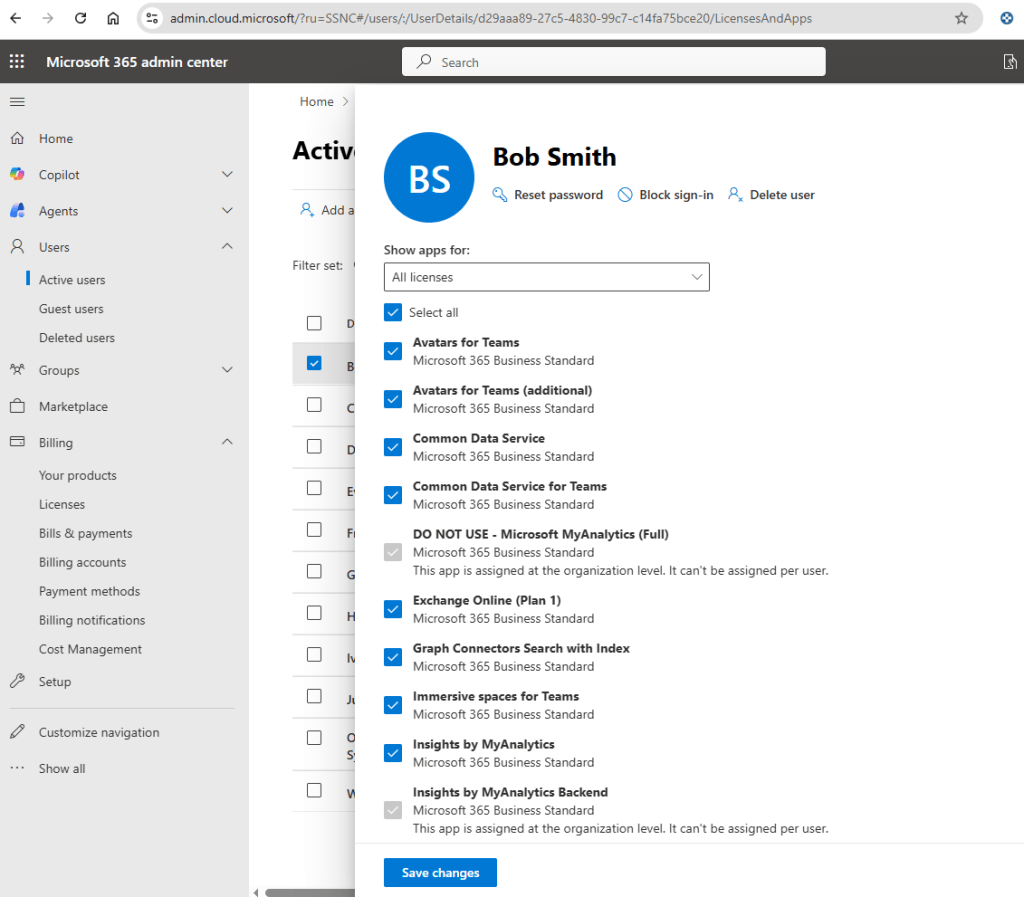
Then, just select the licenses and applications and click on “Save changes”.
Microsoft 365 Group Creation
Before creating groups, it is important to understand the different types of groups available in Microsoft 365 and the purpose of each.
Types of Groups in Microsoft 365
Microsoft 365 Group
A collaboration-focused group that provides shared access to resources such as Outlook, Microsoft Teams, and SharePoint. It is fully integrated with Microsoft 365 applications, automatically assigned an email address, and managed through Azure Active Directory for identity and access control.
Distribution List
Used exclusively for sending emails to multiple recipients at once. It does not integrate with Microsoft 365 applications and offers no additional security or access control features beyond email distribution.
Security Group
Designed to manage access to resources using roles and permissions. Security groups do not integrate with Microsoft 365 applications and are not assigned an email address. They are commonly used to enforce strict access controls.
Mail-Enabled Security Group
A hybrid group that combines access control with email functionality. While it does not integrate with Microsoft 365 applications, it includes an email address and allows administrators to both manage permissions and send messages to group members.
Once the differences between each group type are understood, you can proceed with creating the appropriate group based on organizational requirements.
Steps to Create Groups in Microsoft 365
First, access the Microsoft 365 Admin Center.
Next, from the left-hand navigation panel, go to Teams & groups, and then select Active teams & groups.
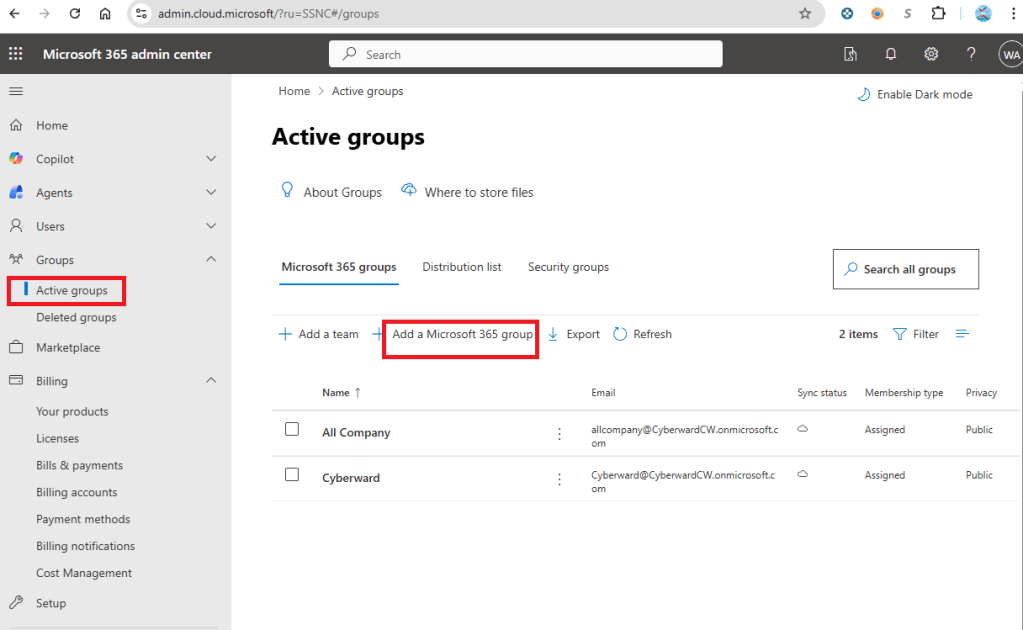
Then, we fill in the following data:
- Group name and description
- Owner/s of the group
- Group members
- Email (shared) of the group
- If the group is public or private
- If I want to connect Microsoft Teams to the group
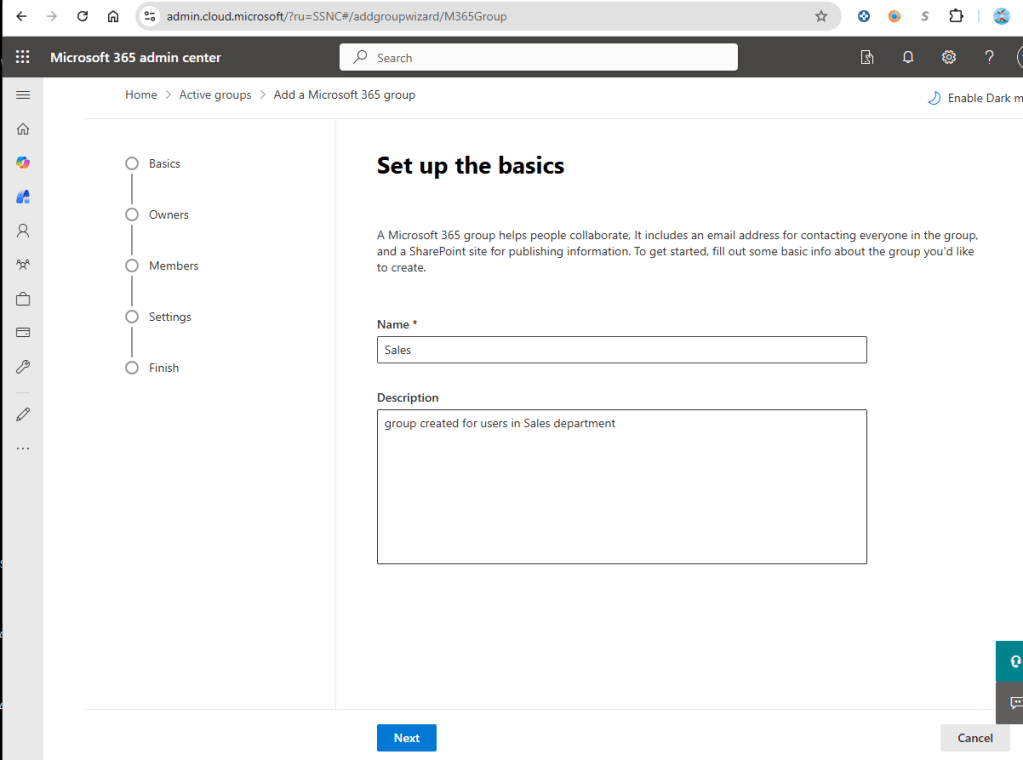
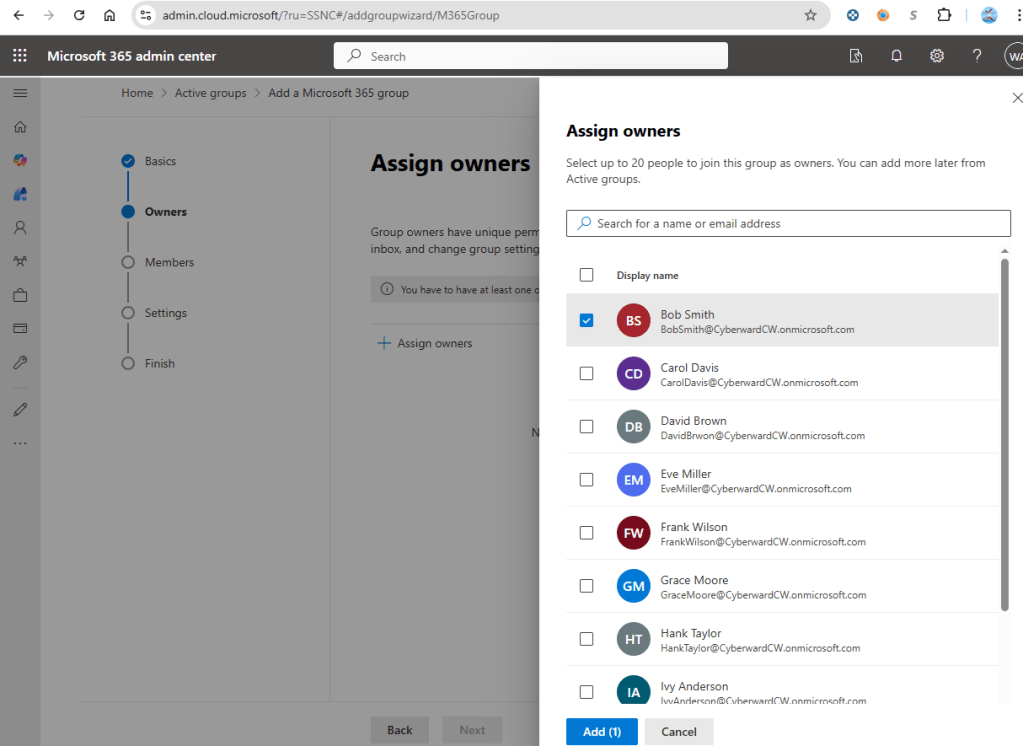
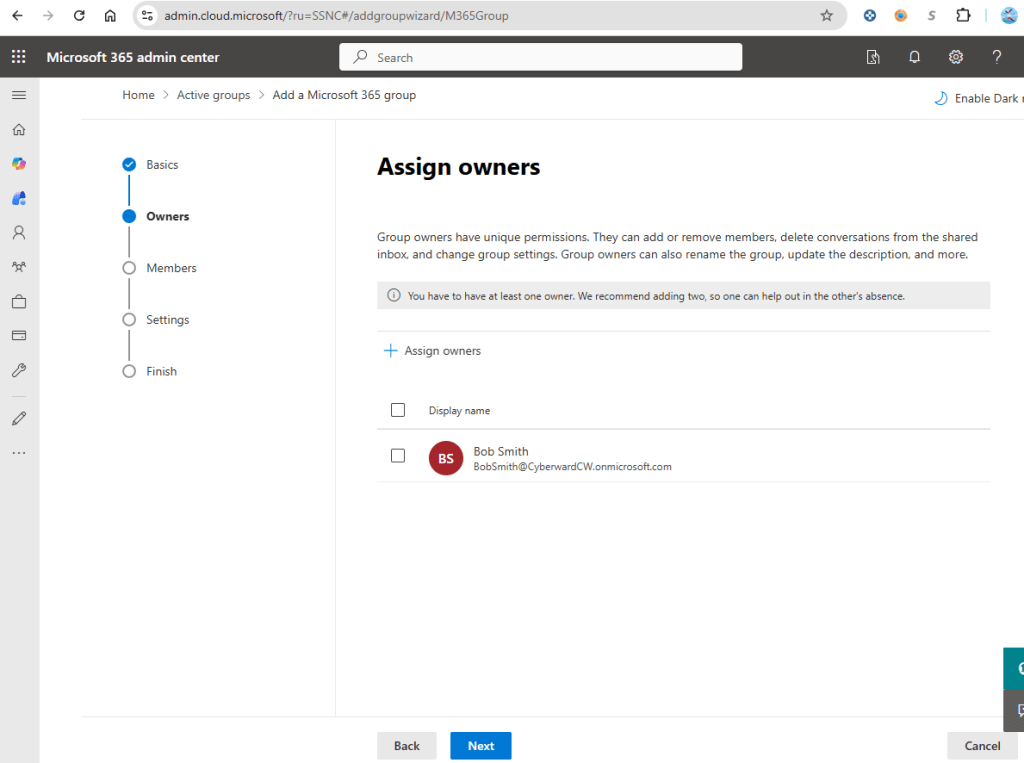

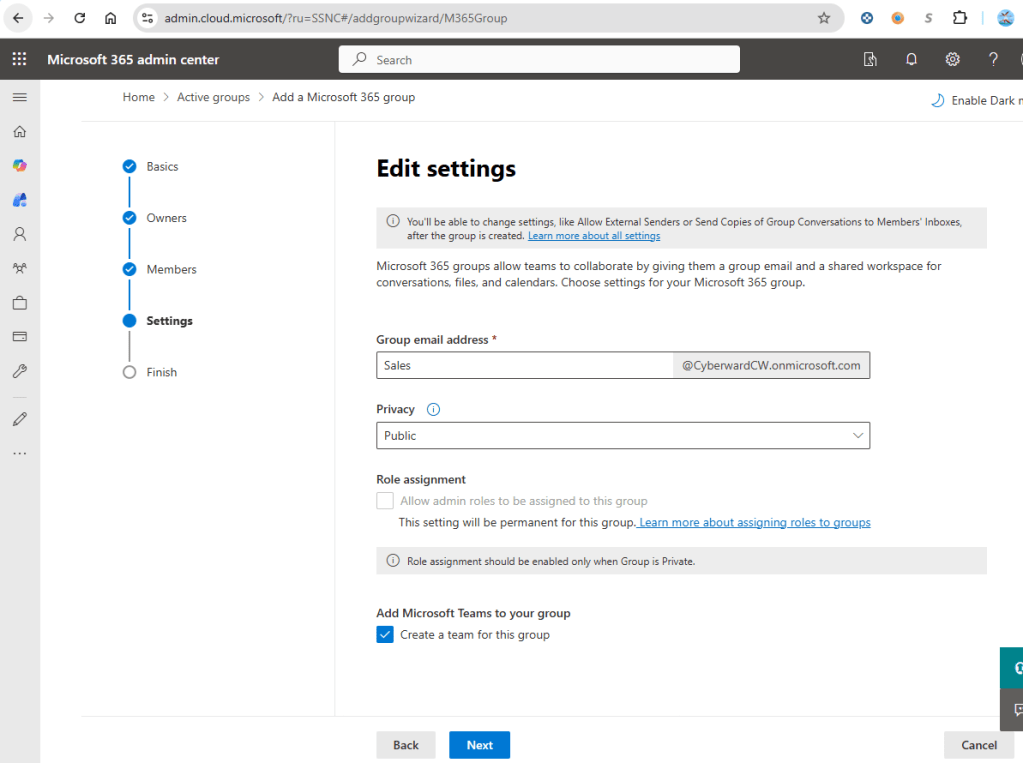
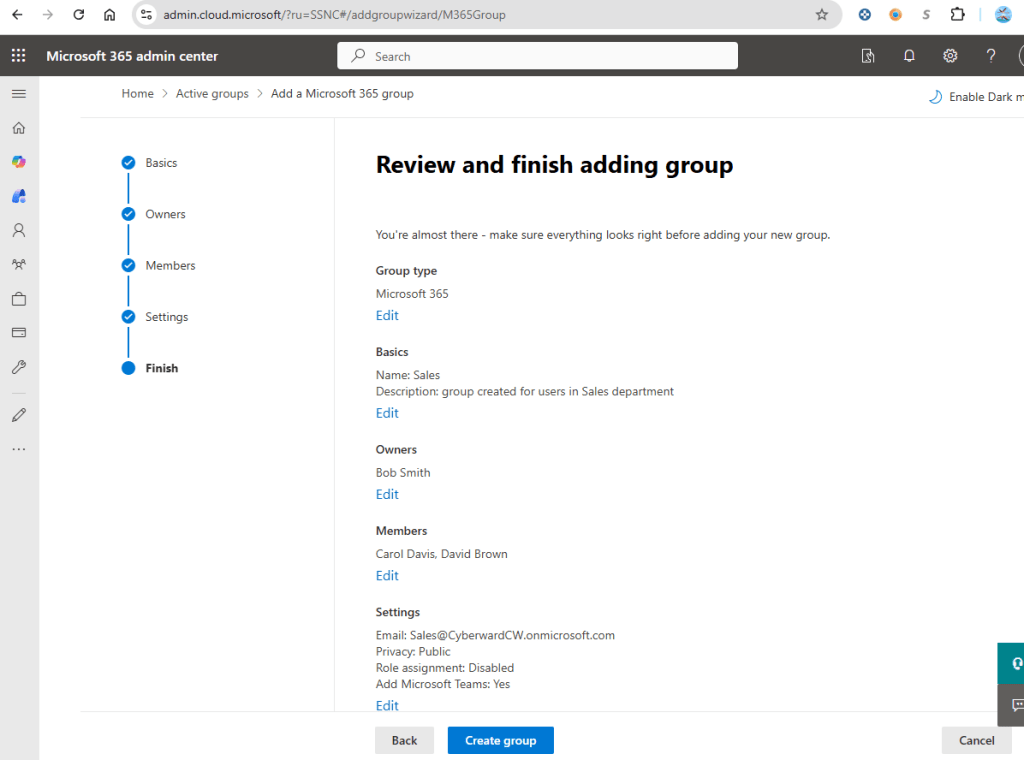
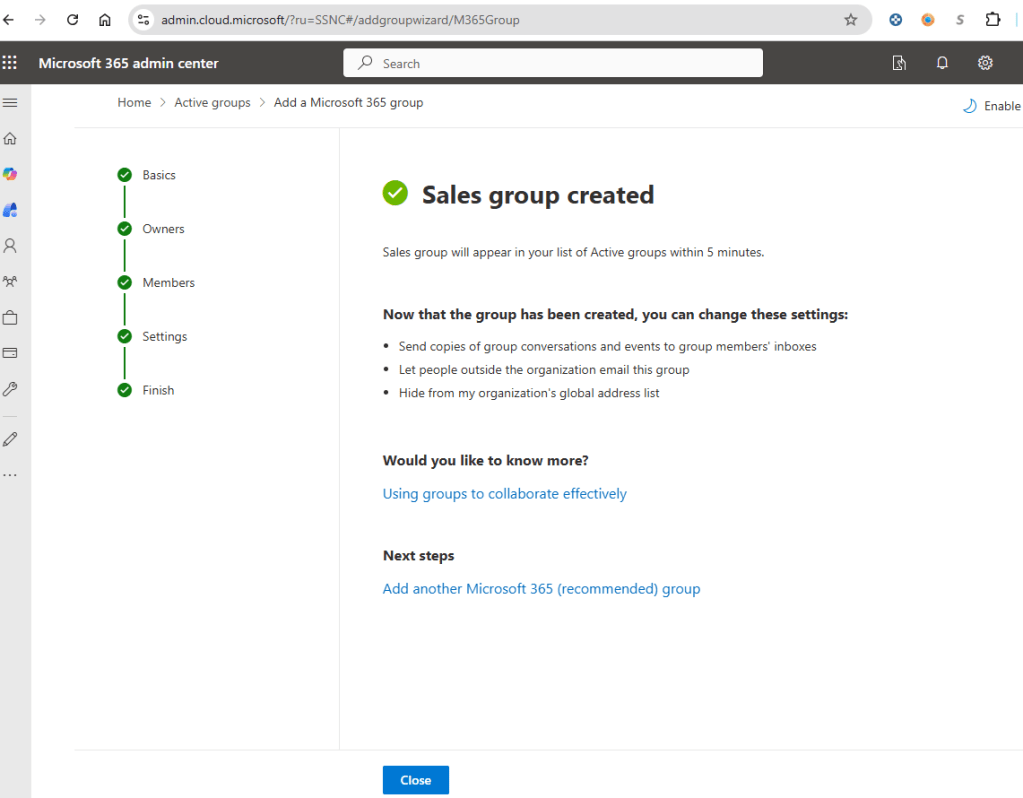
Once this is done, the group is successfully created:
Microsoft 365 Shared Mailbox Creation
A shared mailbox allows multiple users within an organization to send, receive, and manage emails from a single, centralized email address. This approach provides a cost-effective solution for team-based communication, as shared mailboxes do not require a separate Microsoft 365 license (within supported size limits). In addition to email, shared mailboxes also provide access to shared calendars and contacts, helping ensure consistent communication and efficient collaboration across teams.
Differences Between a Shared Mailbox and a Distribution List
Shared Mailbox
- Allows multiple users to read, send, and reply to emails from the same address
- Supports shared calendars and contacts
- Does not require an additional license (up to Microsoft’s mailbox size limits)
- Ideal for functional addresses such as support@, info@, or hr@
Distribution List
- Used only to distribute incoming emails to multiple individual mailboxes
- Does not provide a shared mailbox, calendar, or contacts
- Each recipient replies from their personal email address
- Best suited for announcement or broadcast email purposes
A shared mailbox is recommended when ongoing collaboration, centralized message management, and consistent sender identity are required, whereas a distribution list is better suited for simple email forwarding scenarios.
A shared mailbox can be created using either the Microsoft 365 Admin Center or the Exchange Admin Center. In this case, the shared mailbox will be created through the Microsoft 365 Admin Center.
Steps to Create a Shared Mailbox
First, access the Microsoft 365 Admin Center, then navigate to Teams & groups.
From there, select the Shared mailboxes section.
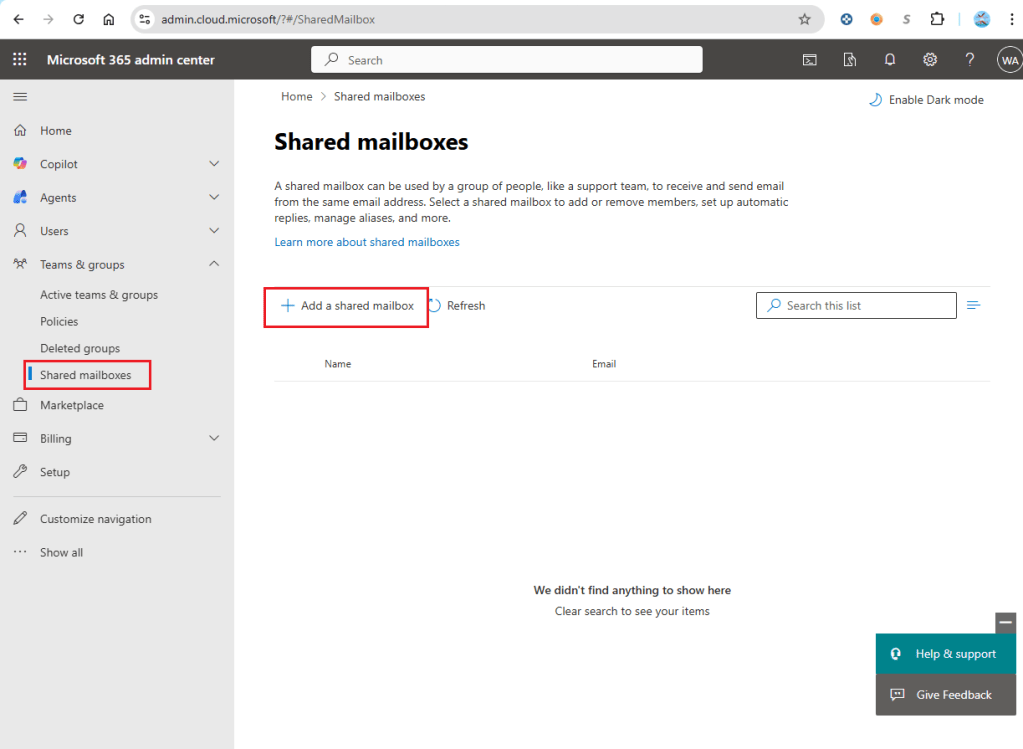
Then, click on “Add a shared mailbox” and fill in the fields with the necessary data (name and email address of the Shared Mailbox):
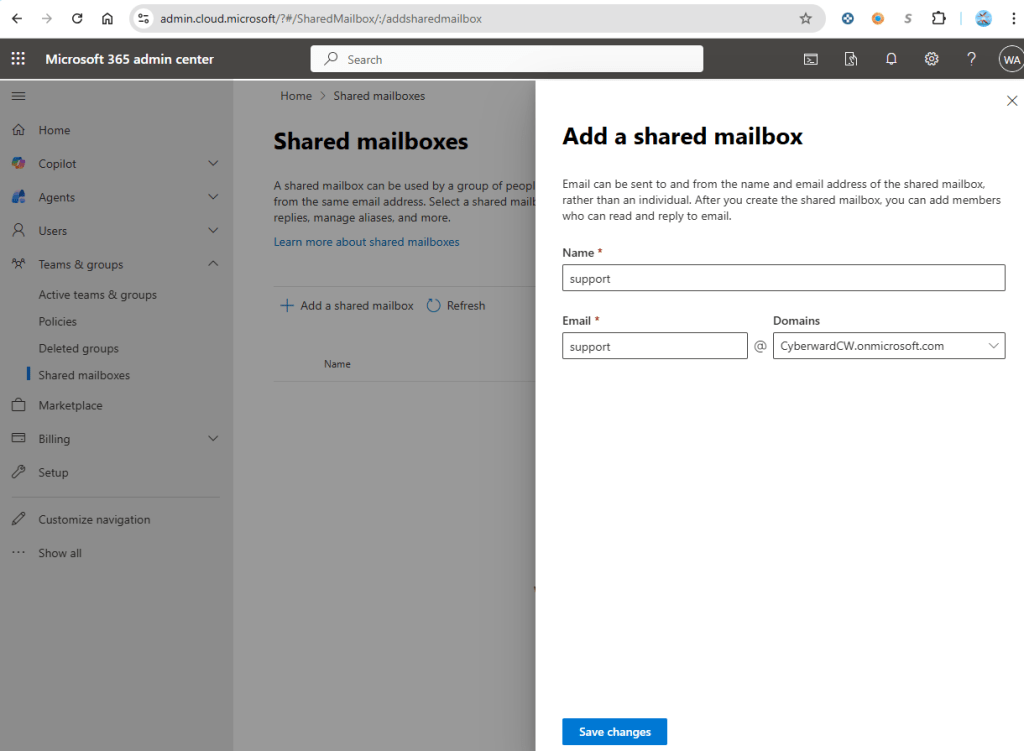
Finally, we click on “Save Changes”
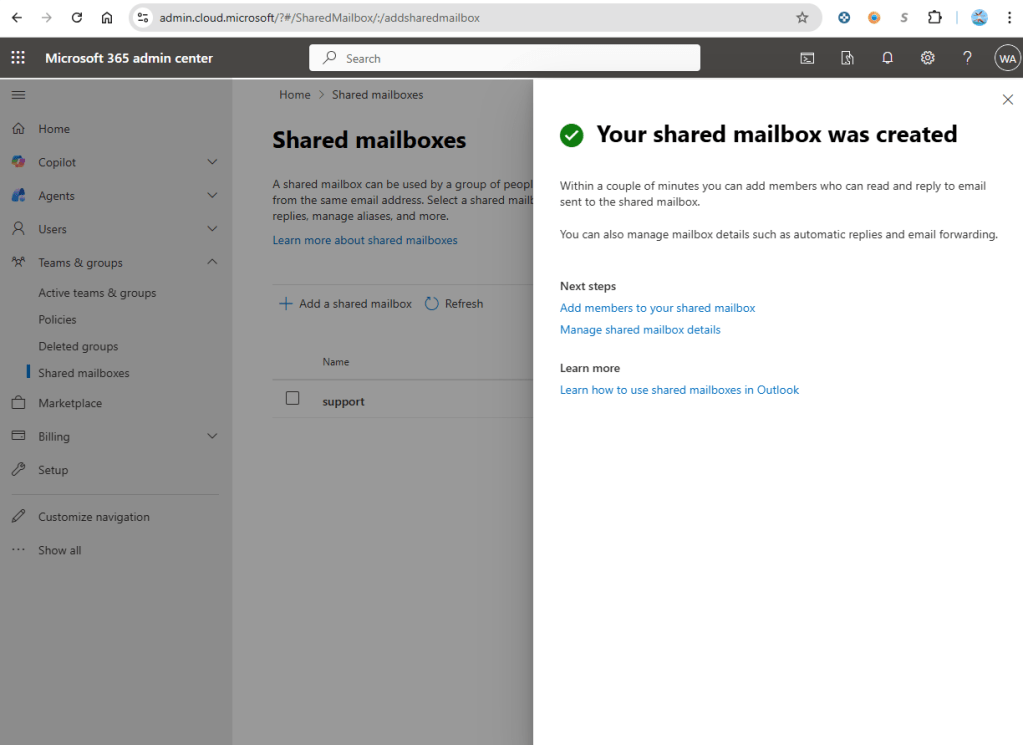
Once the Shared Mailbox is created, I can click on it and define who the members of the Shared Mailbox are, and also what permissions each one has.
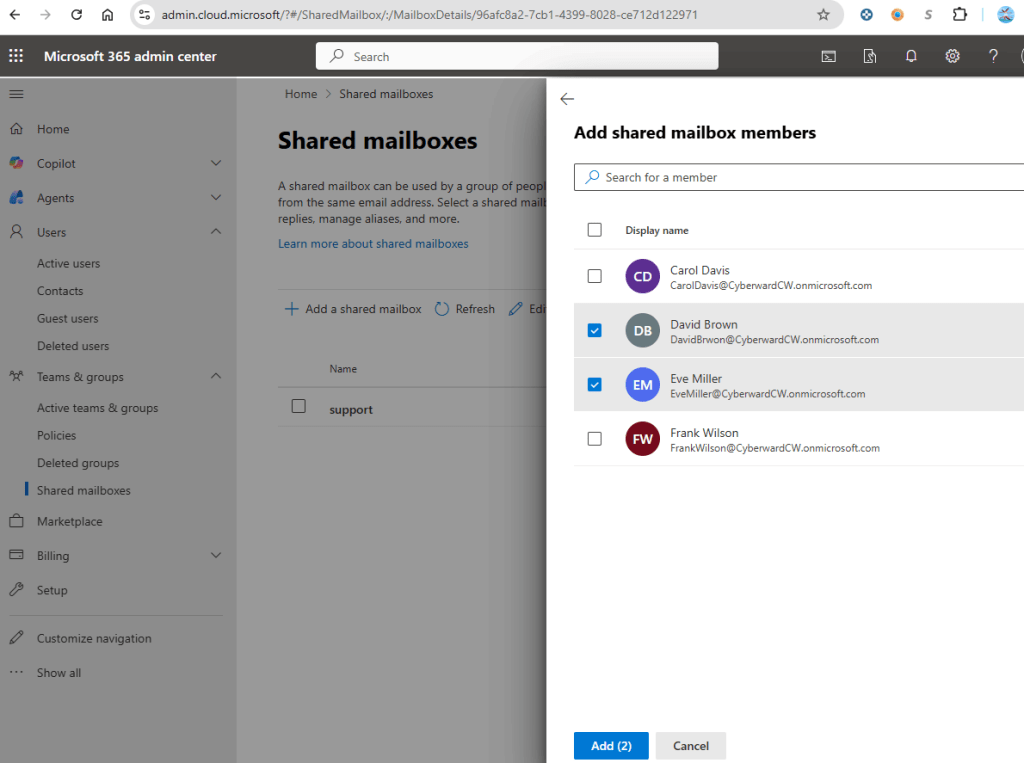
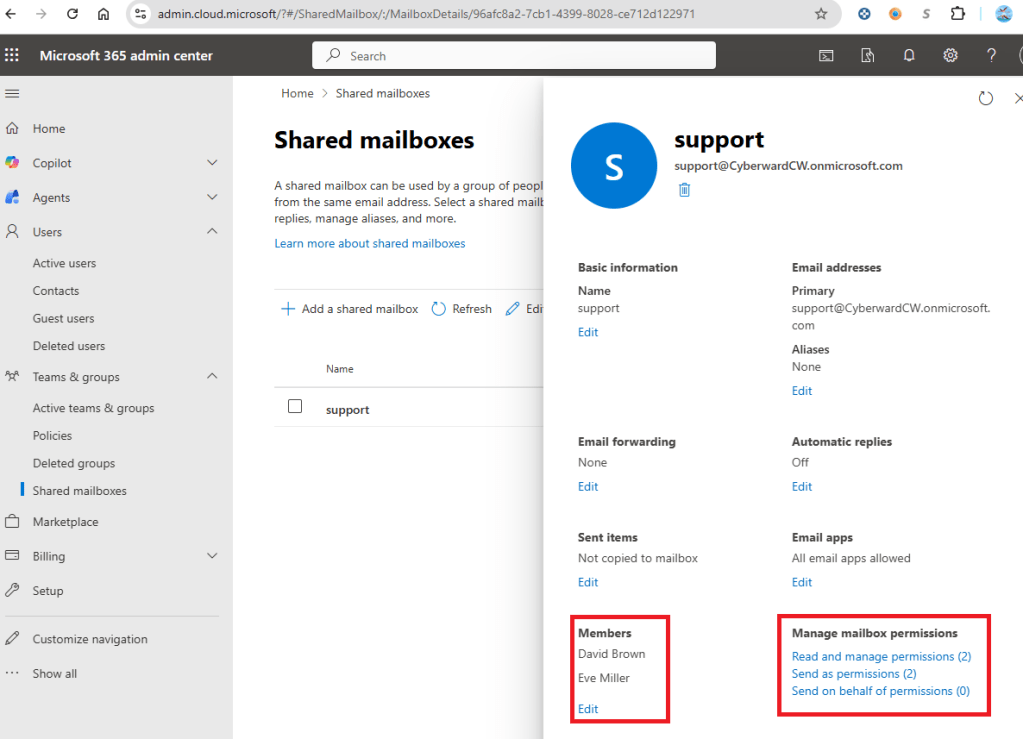
In this example, two users—David Brown and Eve Miller—have been added as members of the shared mailbox.
Within the Permissions section, there are three available access levels:
Read and Manage Permissions (Full Access)
This permission allows a user to open the shared mailbox and fully manage its contents, including viewing, reading, organizing, moving, and deleting emails, as well as managing contacts and calendars. However, this permission alone does not allow the user to send emails from the shared mailbox unless additional send permissions are assigned.
Example:
A user with Read and Manage permissions can access the shared mailbox support@company.com, review incoming messages, organize emails into folders, delete spam, and archive older conversations.
Send As Permissions
This permission allows a user to send emails as the shared mailbox. Messages sent using this permission appear to come directly from the shared mailbox address, with no indication of the individual sender.
Example:
A user with Send As permissions can send an email from support@company.com, and the recipient will see the message as originating solely from support@company.com.
Send on Behalf Permissions
This permission allows a user to send emails on behalf of the shared mailbox. The recipient will see both the shared mailbox address and the name of the individual who sent the message.
Example:
If a user sends an email with Send on Behalf permissions for support@company.com, the recipient will see it as “Alex C. on behalf of support@company.com,” clearly identifying the sender.




 CYBERWARD
Leave a comment