
Configuring DNS for Domain Connectivity
Before any client machines or additional servers can join the cyberward.local domain, their DNS settings must be configured to point to the Domain Controller (CW-DC01). This is a critical step in any Active Directory environment and is one of the most common causes of domain-join failures when overlooked.
Active Directory is heavily dependent on DNS for nearly all of its core functions. When a client attempts to join a domain, it does not search for the Domain Controller by name alone—it relies on DNS to locate the necessary Active Directory services.
There are several key reasons why configuring DNS to point to CW-DC01 is required:
1. Name Resolution
Active Directory uses DNS to resolve the domain name being joined. The client must be able to resolve cyberward.local to locate the domain and initiate the join process successfully.
2. Domain Controller Discovery
During the join process, the client needs to discover the Domain Controller to retrieve domain configuration information. DNS allows the client to identify where the Active Directory infrastructure resides on the network.
3. Service (SRV) Record Lookup
Active Directory publishes special DNS records, known as SRV (Service Location) records, which advertise services such as authentication, LDAP, and replication. Clients query these records to locate domain controllers and required services. If DNS is misconfigured, these records cannot be resolved.
4. Ongoing Communication After Domain Join
Once a system is joined to the domain, DNS continues to play a vital role. Clients must be able to communicate with the Domain Controller to authenticate users, apply Group Policies, access shared resources, and perform routine directory operations.
By configuring the DNS server on all client machines and secondary servers to point directly to CW-DC01, I ensured reliable domain discovery, successful domain joins, and stable communication with Active Directory services.
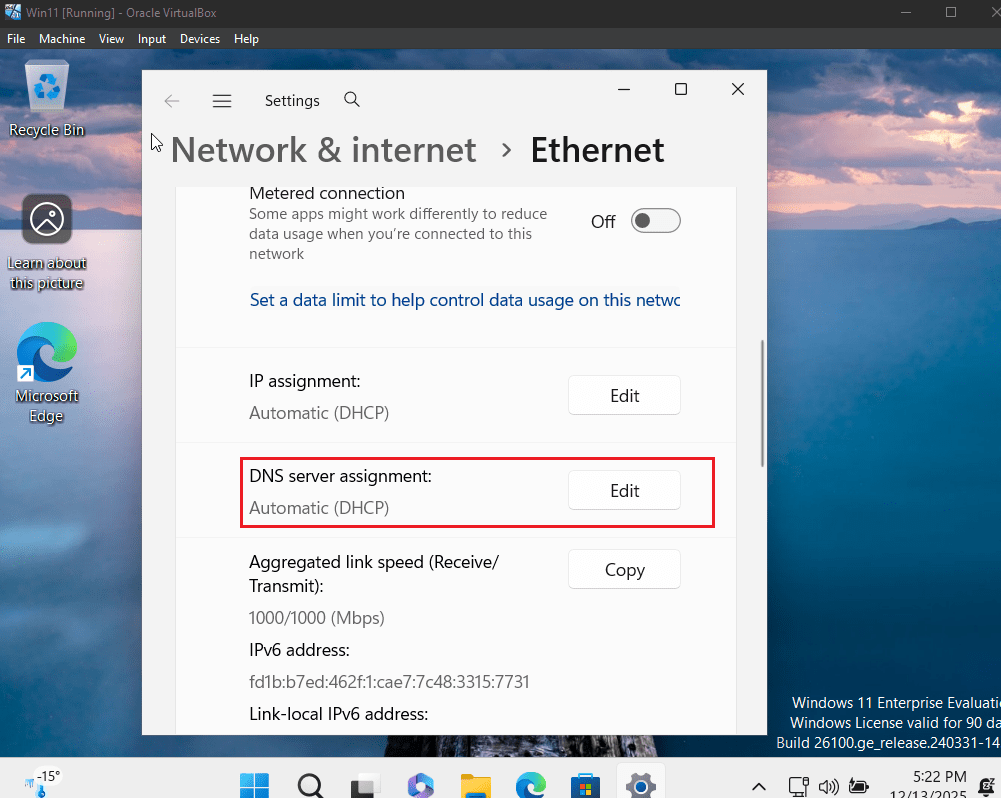
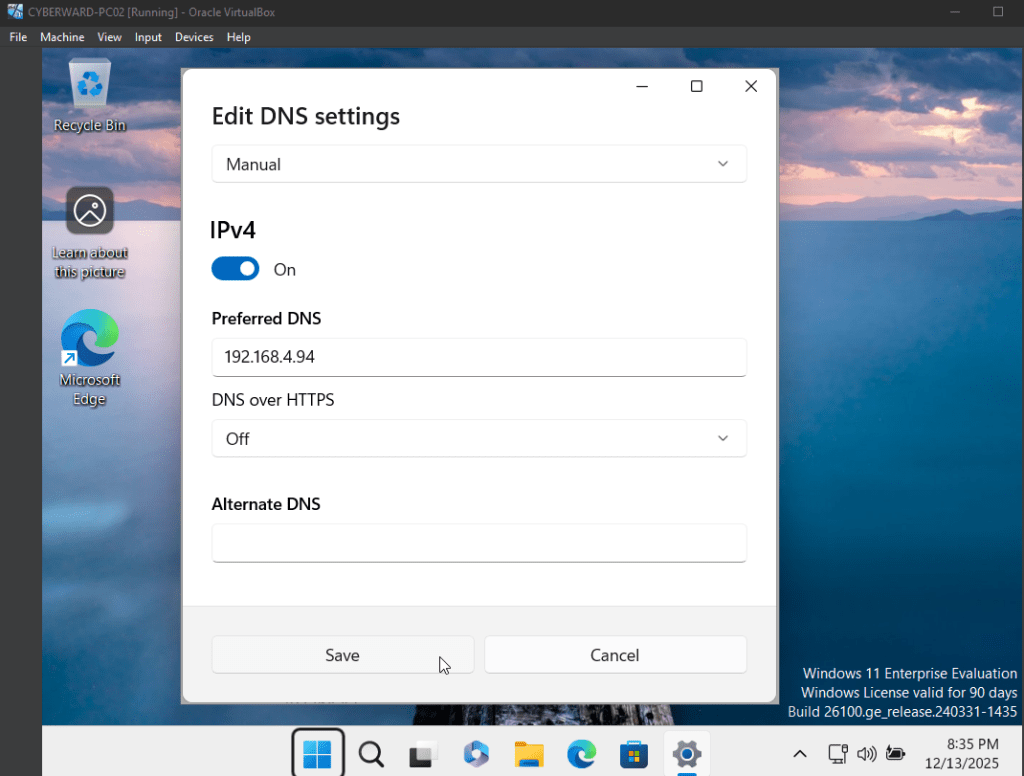
For each Client Machine, go to the network settings and set the DNS server to the IP of the domain controller, which in this case is 192.168.4.94.
System setting> Network & Internet >Ethernet Setting>DNS server assignment > Manual > Set the DC IP address(192.168.4.94)
Joining Client Machines to the Domain
To join each client machine to the domain, I opened System Properties by right-clicking Start > System and then navigating the “About this PC” Under the Computer Name section, I clicked “Domain or workgroup.”
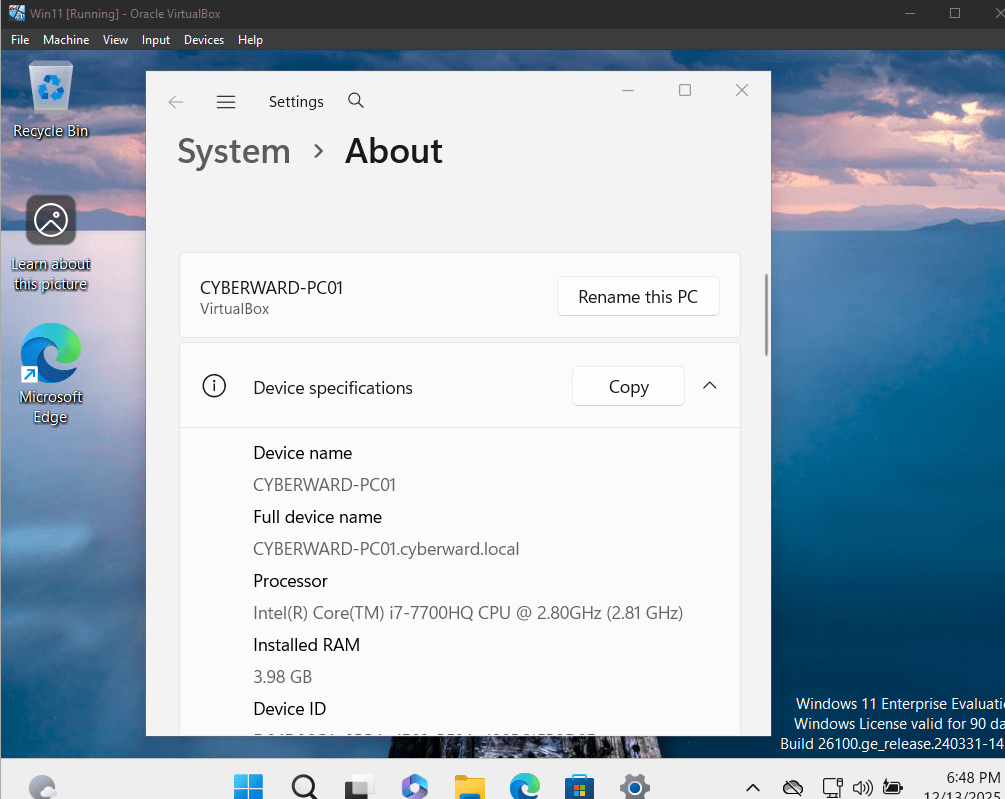
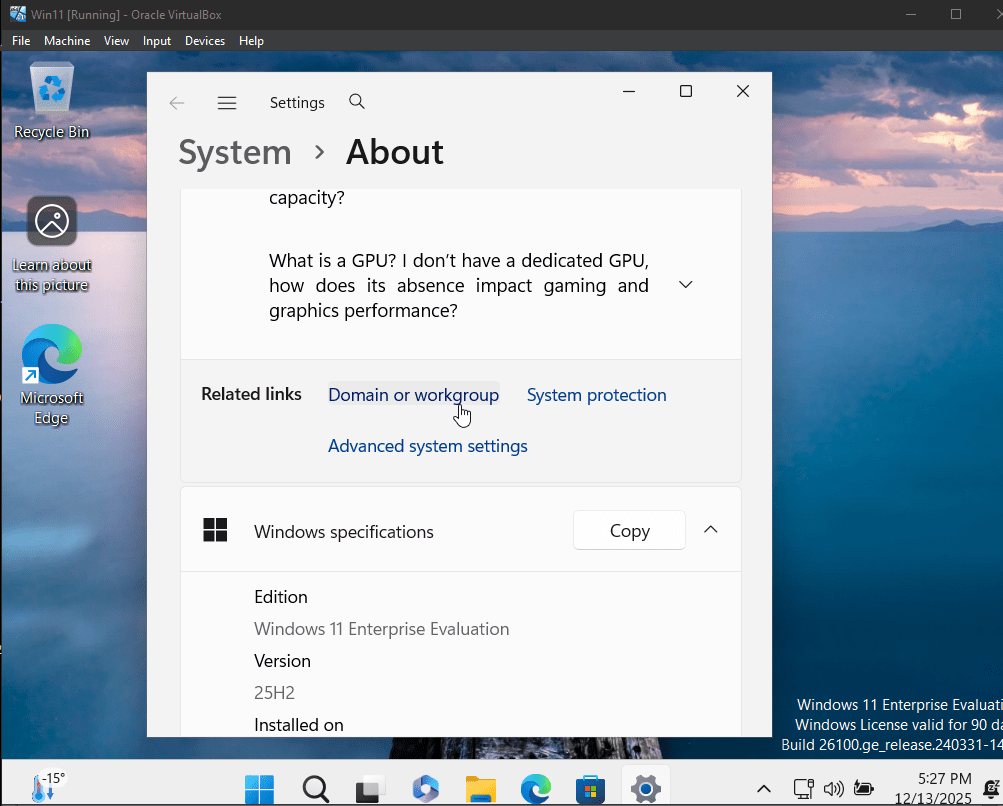
Under the Computer Name section, I clicked Change next to “To rename this computer or change its domain or workgroup.”
From there, I selected Domain, entered the domain name (for example, cyberward.local), and provided the credentials of a domain user with permission to join computers to the domain. After completing the process, I restarted the client machine as prompted.
With DNS now correctly configured, the client was able to resolve the domain name without issue, allowing the domain join to complete successfully. I repeated this process for each client and secondary server by accessing Change the name of this PC (Advanced).
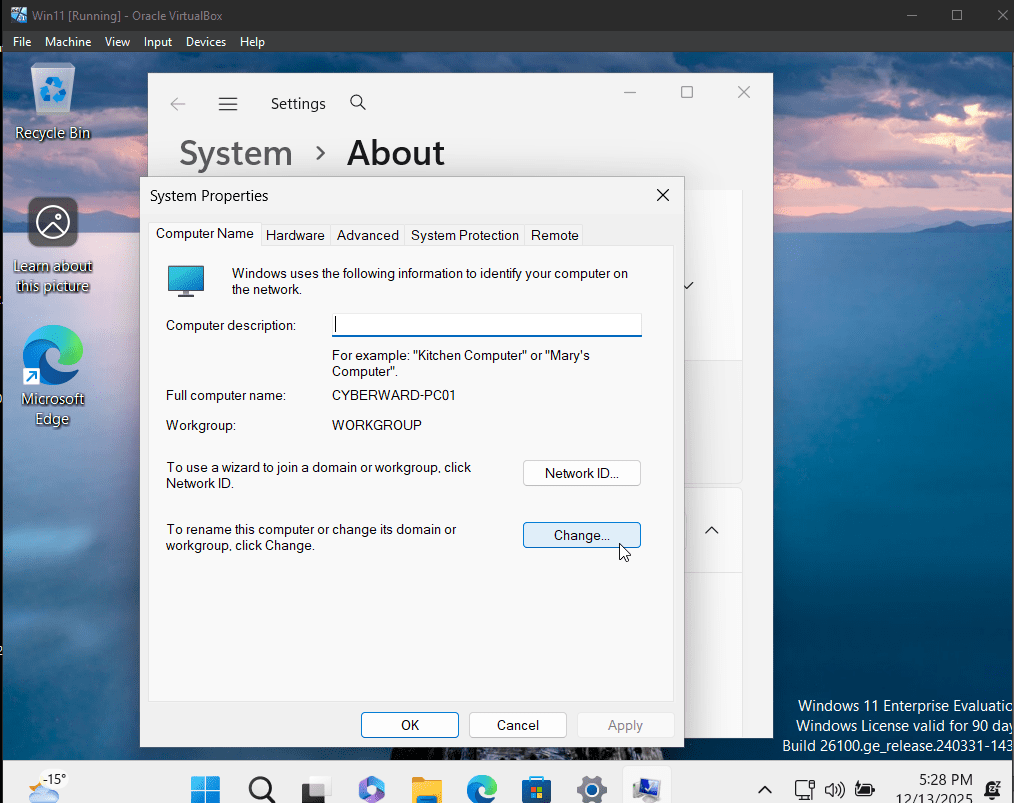
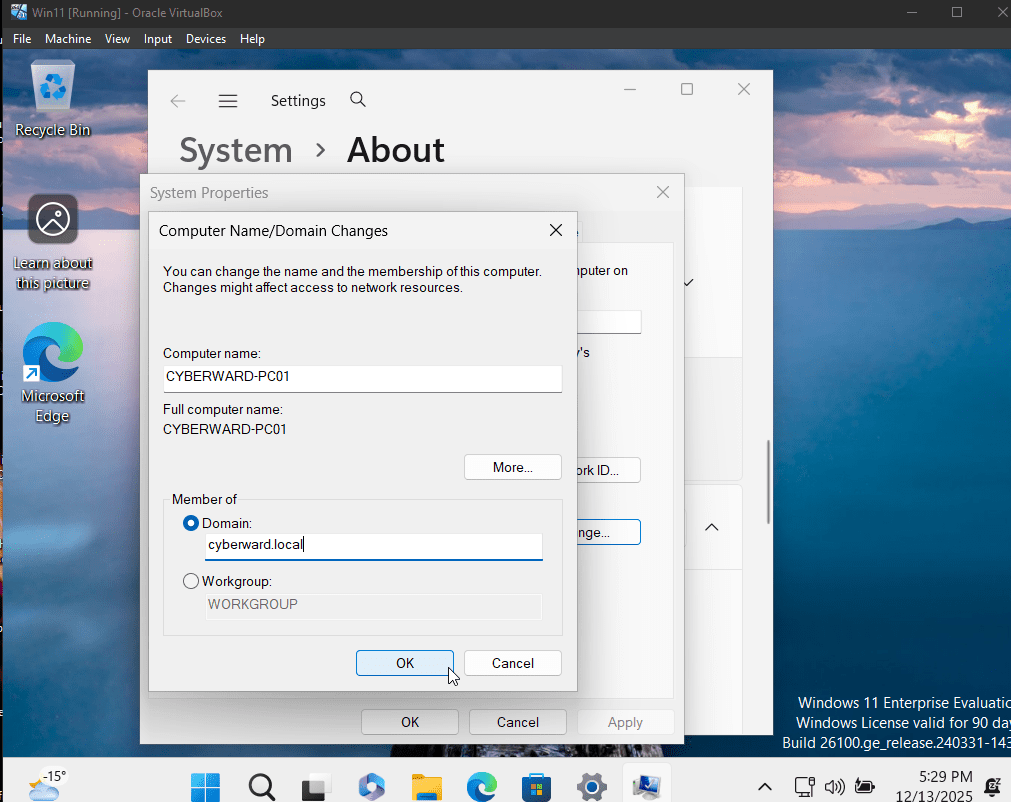
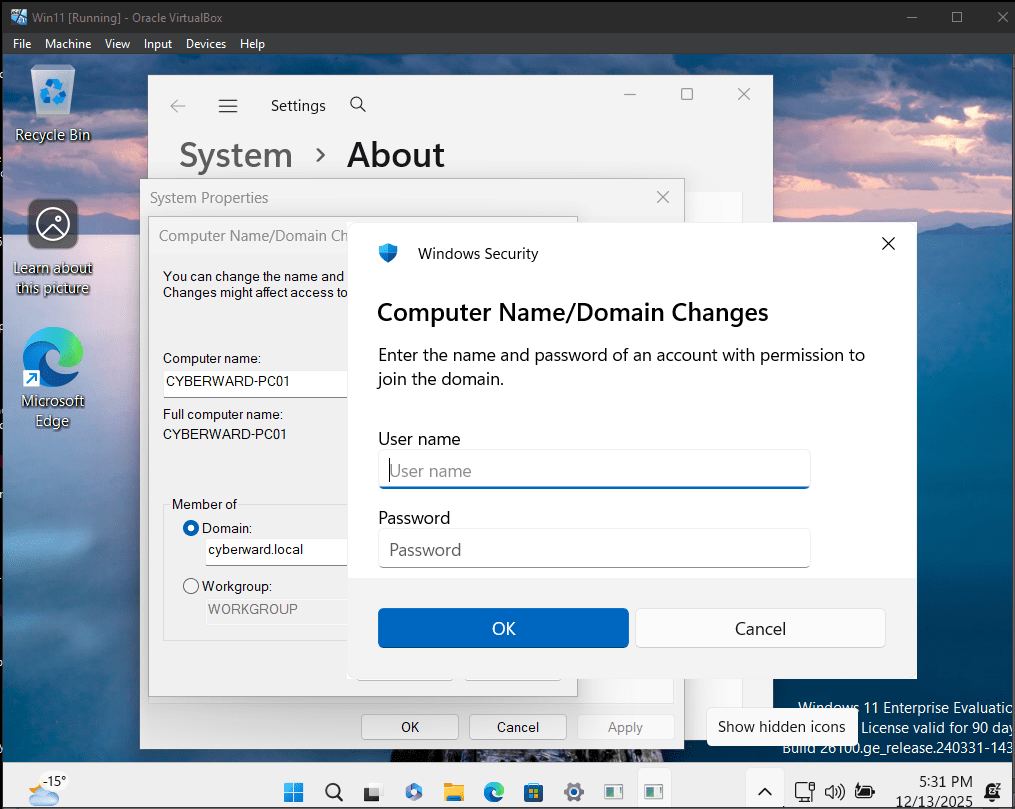
After entering the credentials, a confirmation message appears indicating that the computer has been successfully joined to the domain.
To apply the changes, restart the computer and sign in using an account that belongs to the cyberward.local domain.
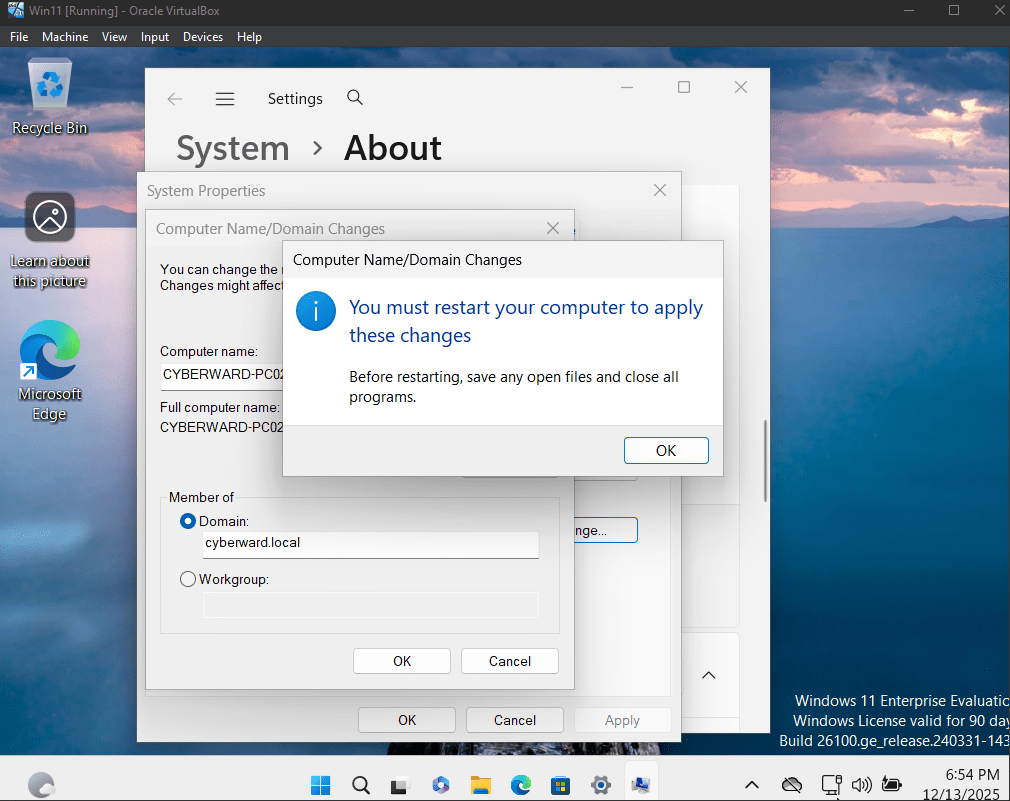
At the next login, the same message seen on the Domain Controller appears: “Sign in to CYBERWARD.” Now, users added in the domain controller can sign in using this PC.
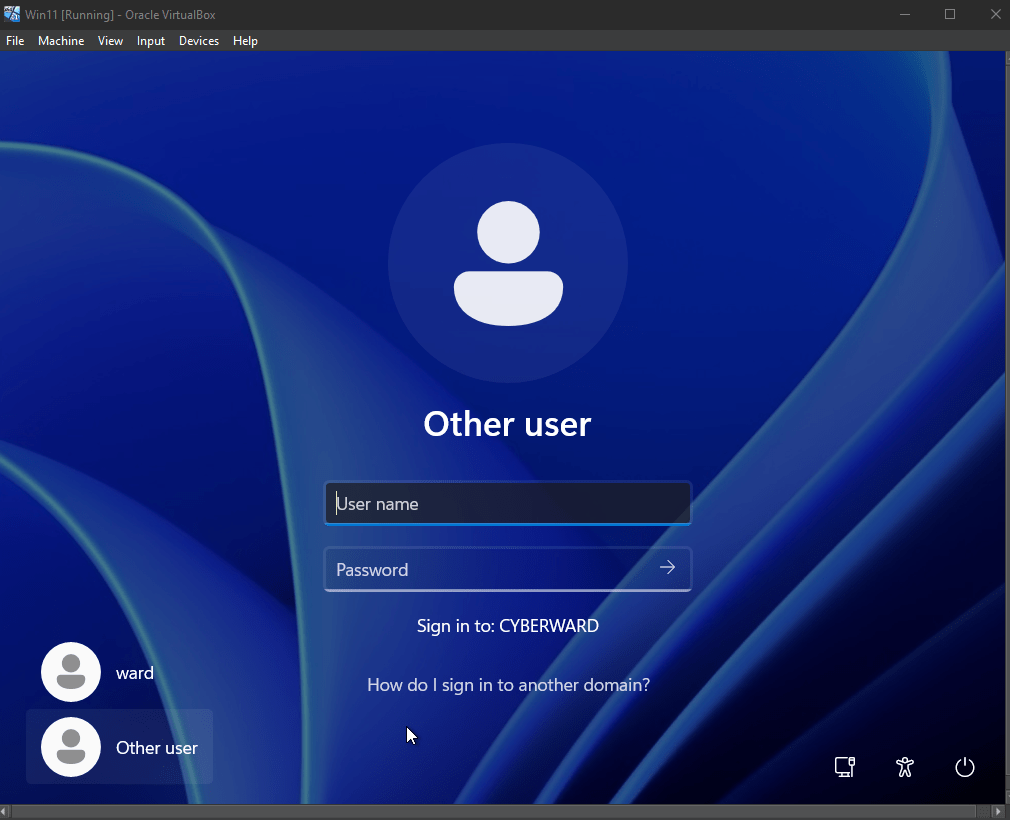
Simply enter the credentials of a domain user to complete the process. Afterward, I repeated the same domain-join steps for the remaining client machines and the additional server.
After Joining the 4 client machines & the other server(CW-SV02), you can verify their enrollment to the domain successfully, from Server Manager , Tools → Active Directory Users and Computers → Computers
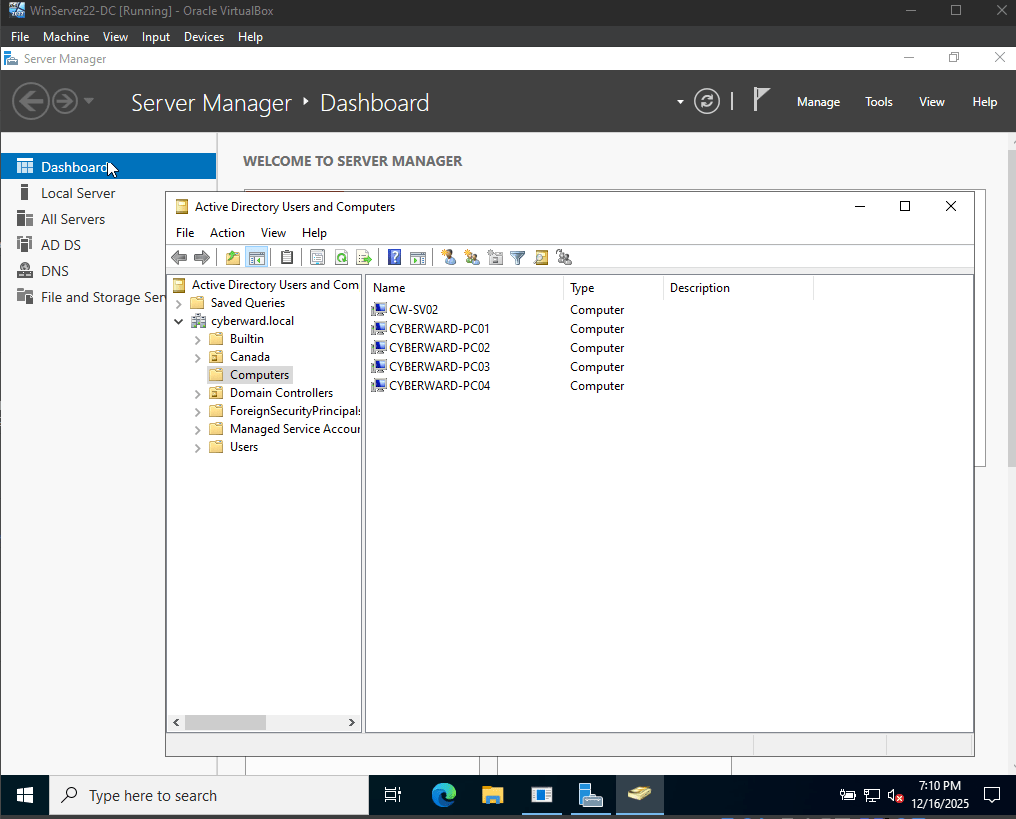
Create Organizational Units (OUs) in Active Directory for each department
Creating Organizational Units (OUs)
To organize users and resources within the domain, I created Organizational Units (OUs) for each department. This is done by right-clicking the domain (for example, cyberward.local) and selecting New → Organizational Unit, then creating OUs such as IT, Finance, Sales, HR, Marketing, , Customer Service, and Administration.
There are two ways to create OUs in Active Directory:
1. Using Active Directory Users and Computers (ADUC)
From Server Manager, I navigated to Tools → Active Directory Users and Computers. Once ADUC opened, I expanded the domain (cyberward.local), selected the appropriate location, and created the required Organizational Units.
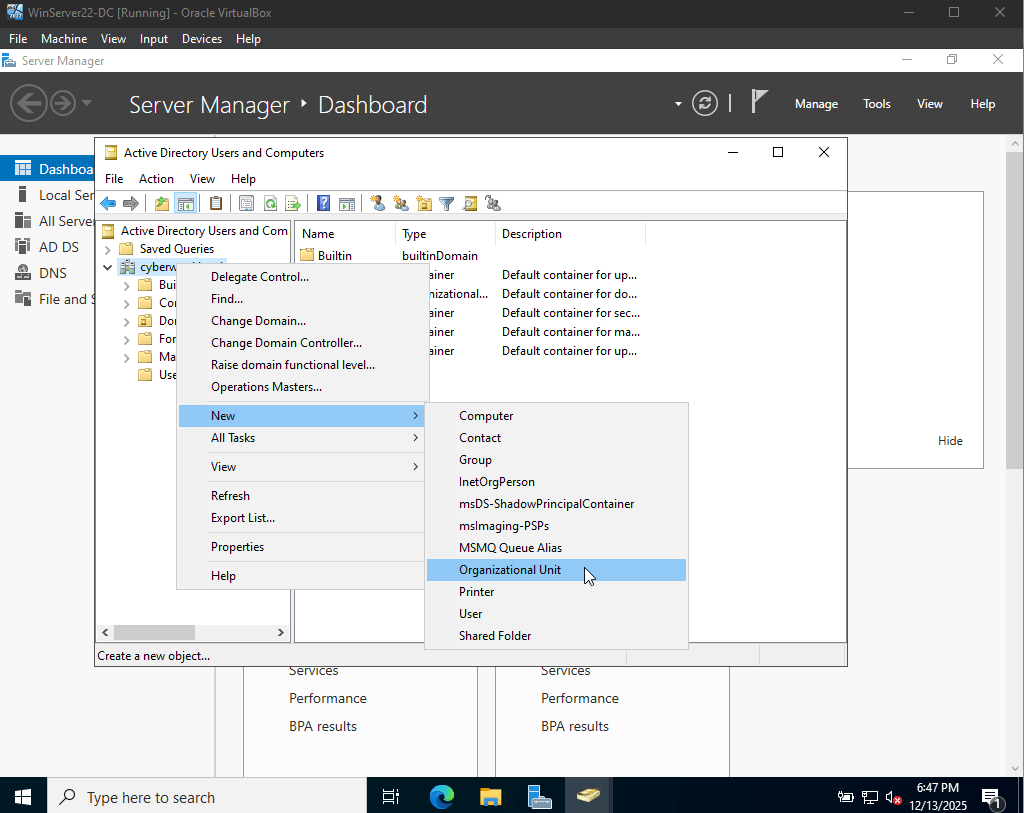
It’s important to note that Organizational Units (OUs) cannot be created inside default containers, and Group Policy Objects (GPOs) cannot be linked to containers. For this reason, OUs must be created directly within the domain or within other OUs.
In this setup, I created an Organizational Unit named Canada at the domain level. Inside this OU, I then created all department
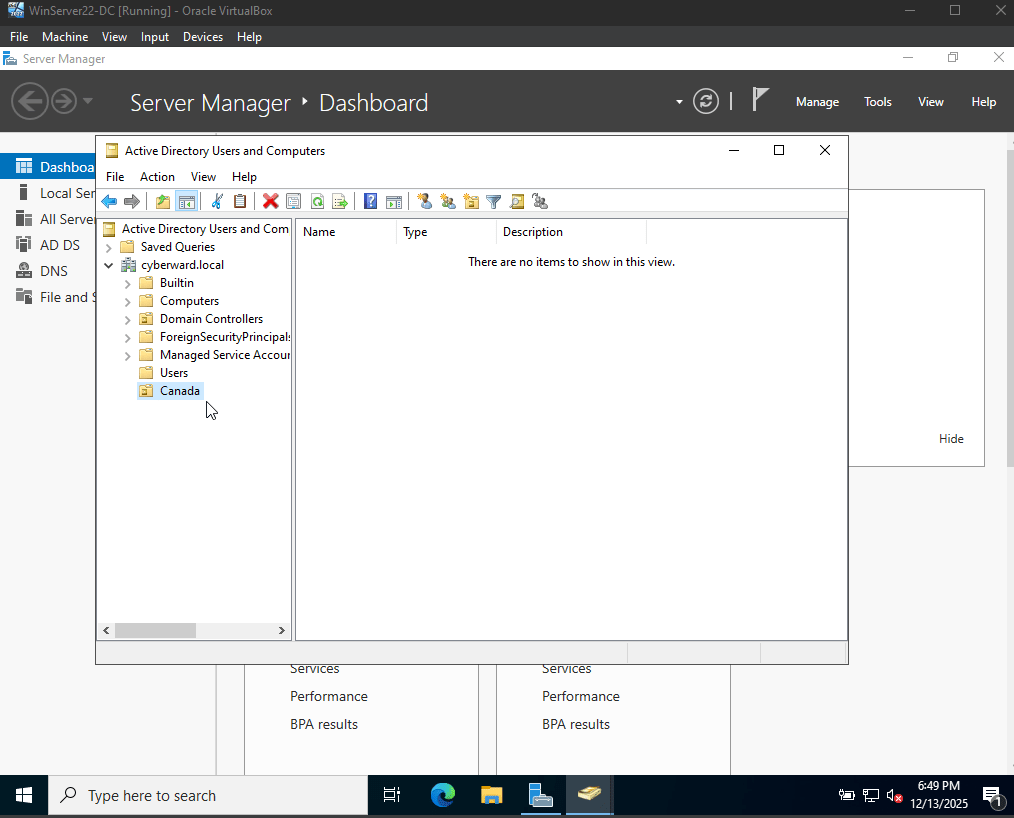

2 – Create from Active Directory Administrative Center (ADAC): To do this, I go to Server Manager, Tools, and select Active Directory Administrative Center. Then, once inside, I select the location, right-click, New, and select ‘Organizational Unit’.
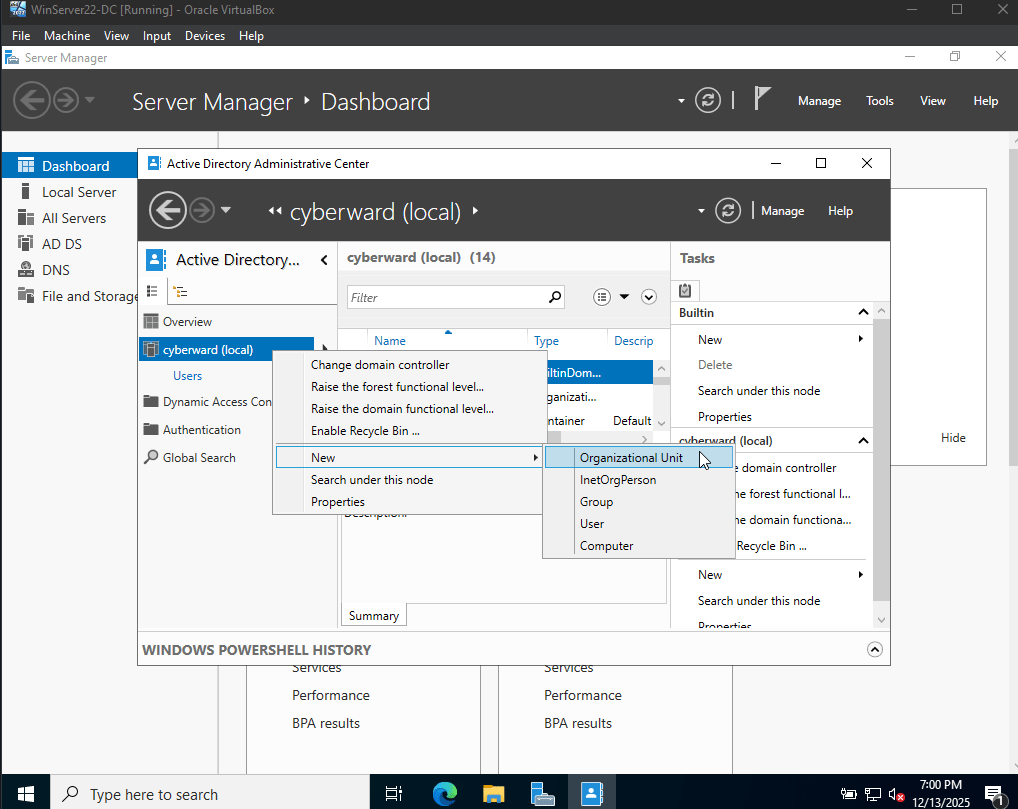
I then completed the setup by creating the remaining company Organizational Units, such as IT, HR, Finance, and other departments.
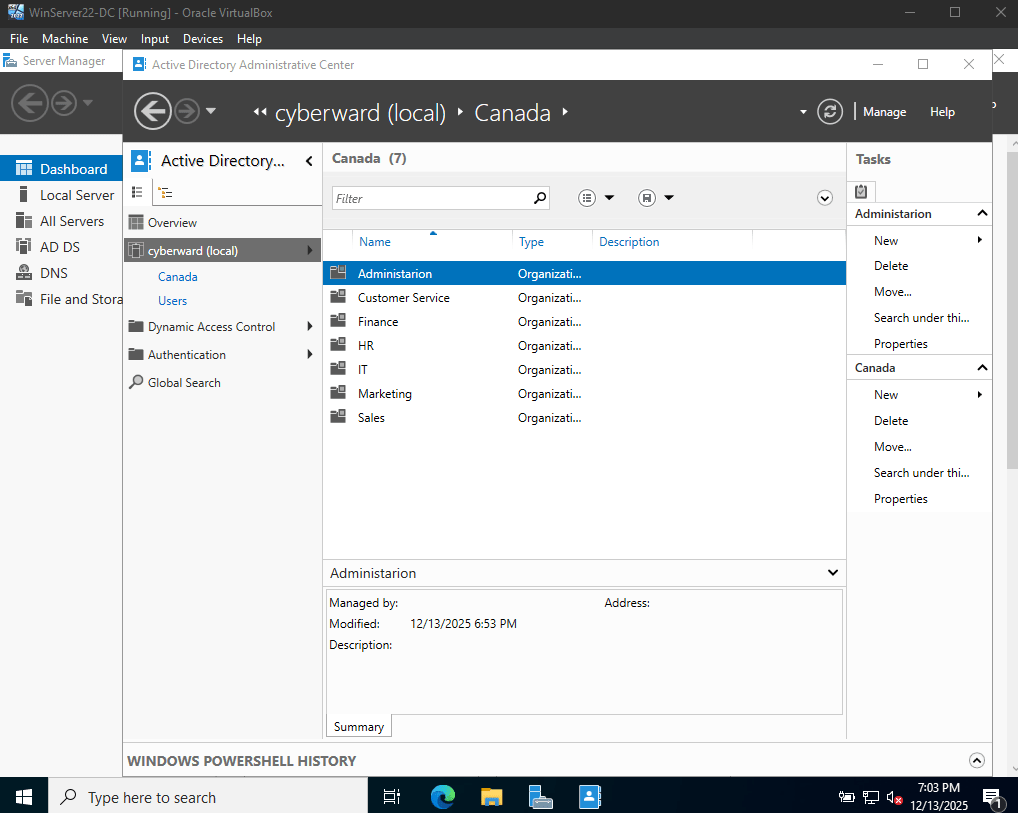
Moving User Accounts to Organizational Units
After user accounts are created, they can be organized by moving them into the appropriate Organizational Units (OUs). This is done by right-clicking the user account, selecting Move, and choosing the target OU.
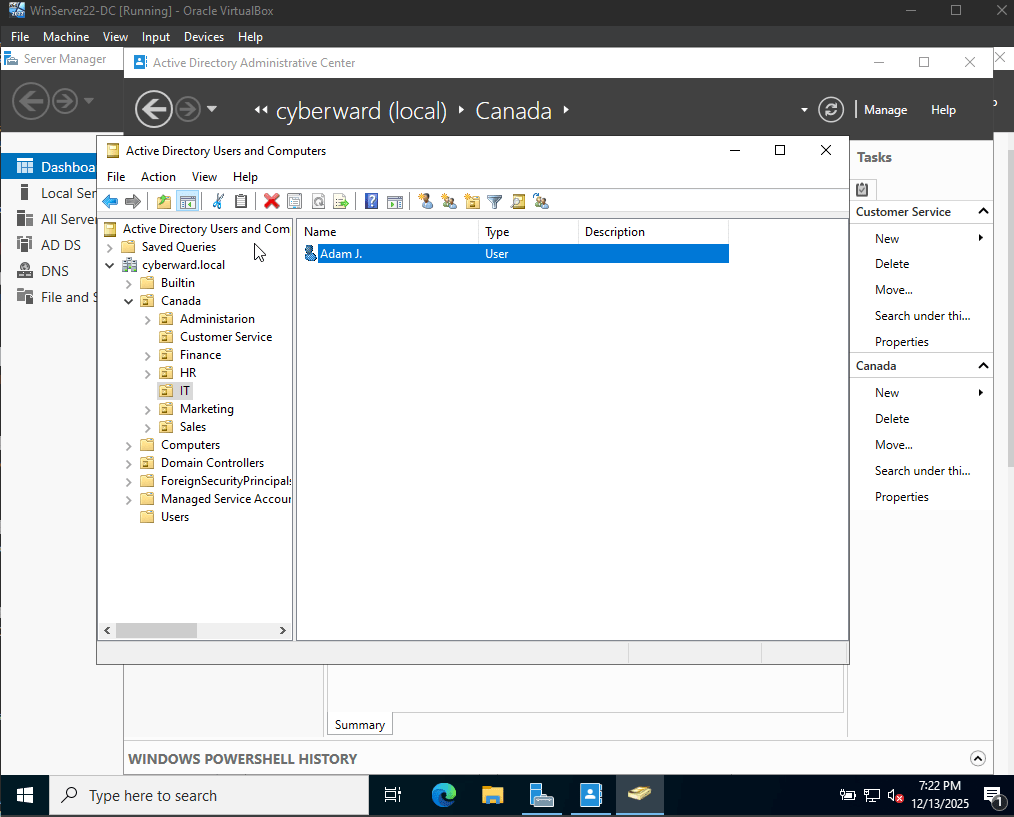
Although full user management is covered in the next section, I created a test user to complete this step. In this case, I created a user named “Adam J” under Customer Service and then moved the account into the IT Organizational Unit.
This confirms that users can be successfully managed and reorganized within the domain structure.
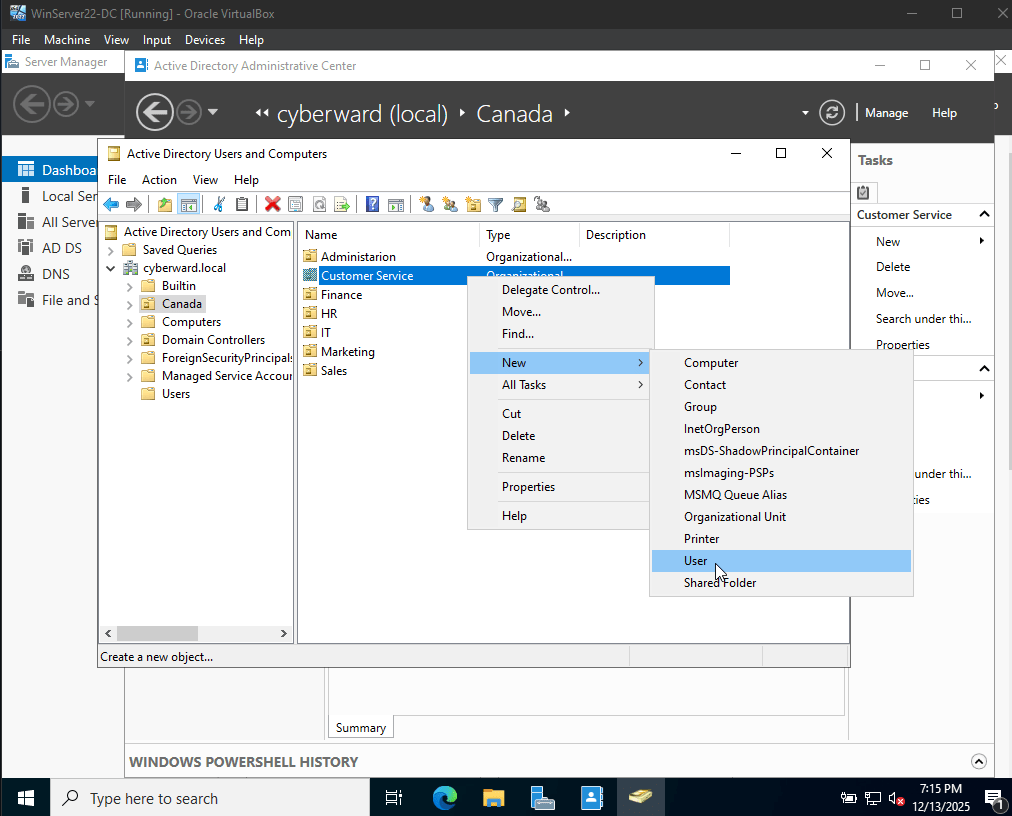
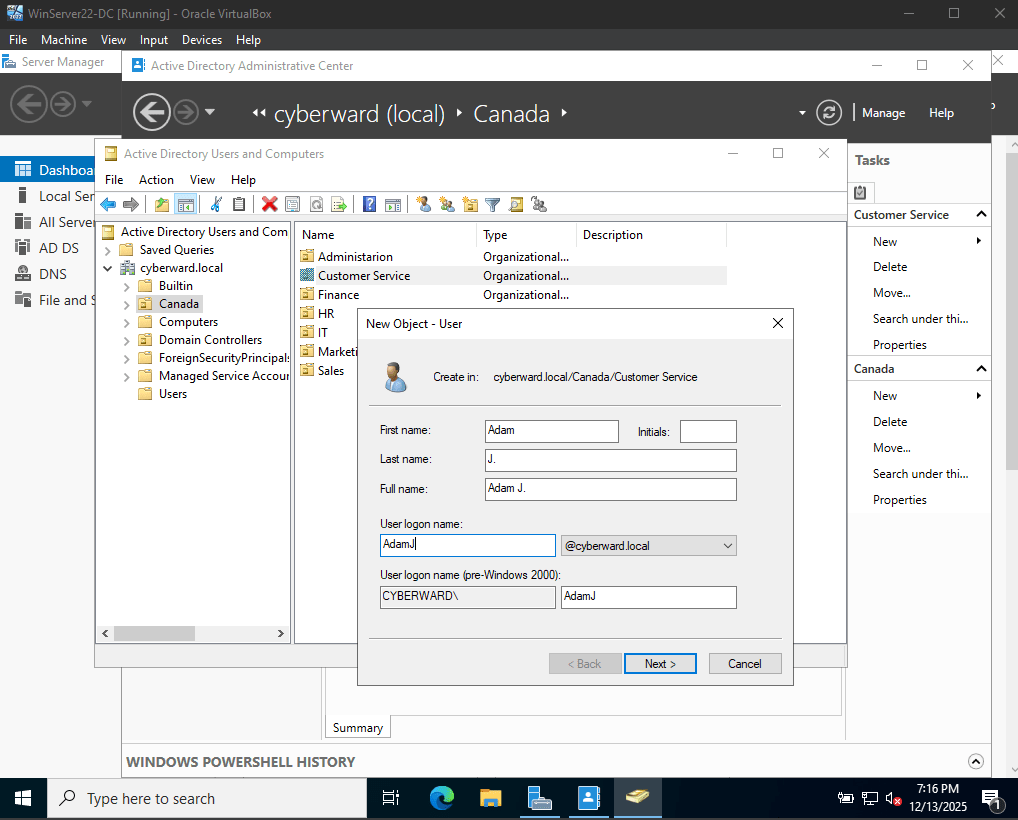
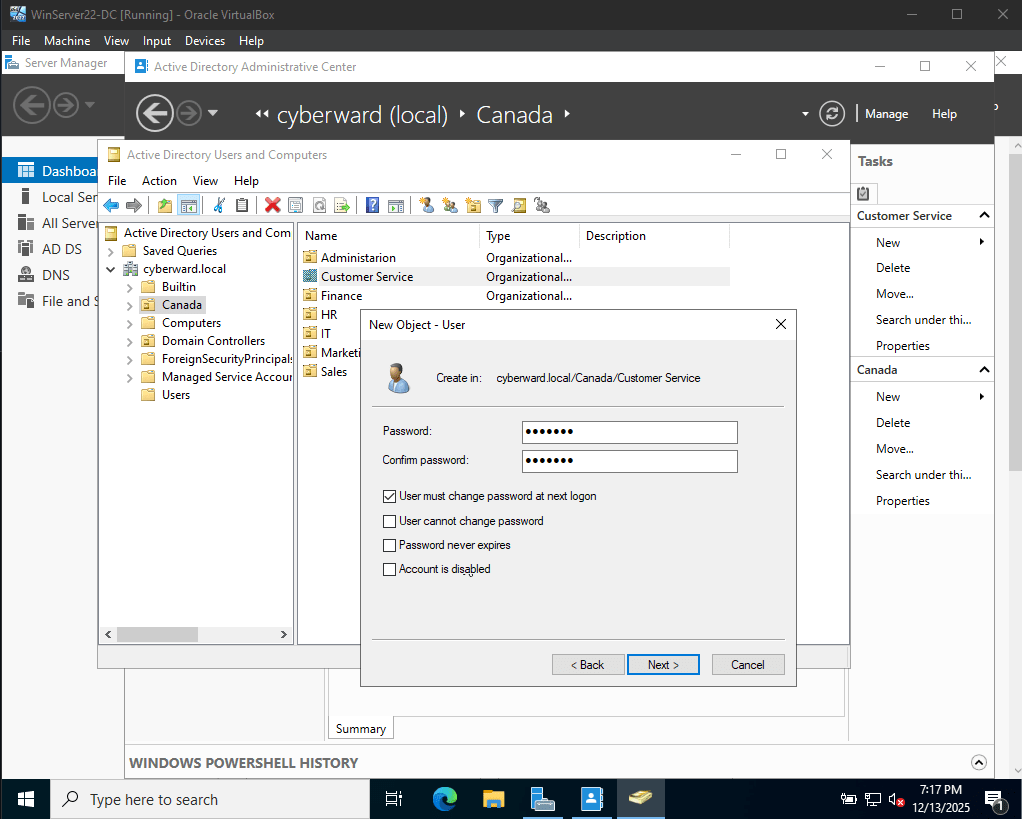
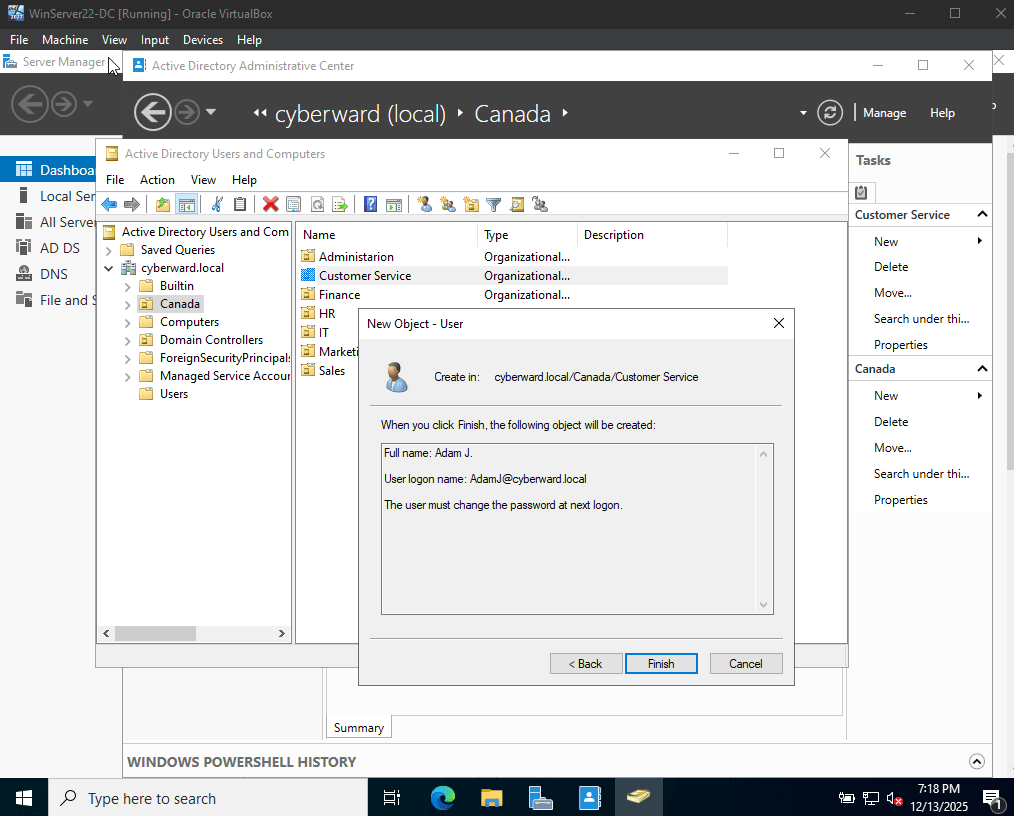
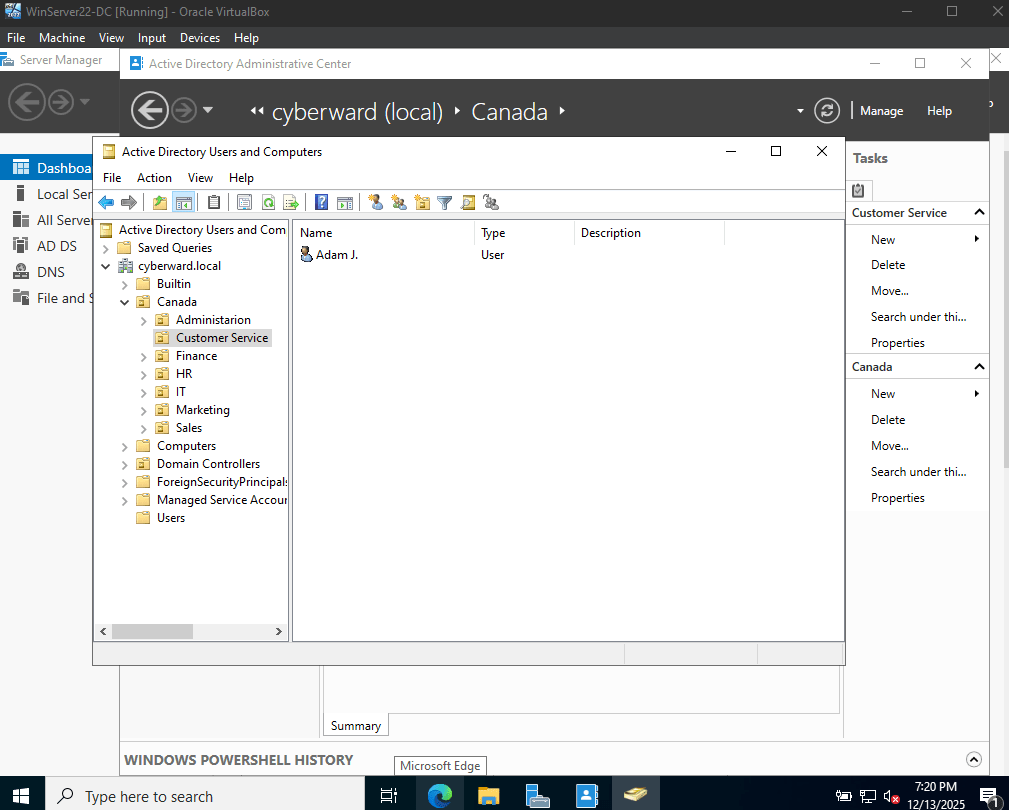
To move the user, I right-clicked the account and selected Move…. I then chose the target Organizational Unit (OU)—in this case, IT—to complete the process.
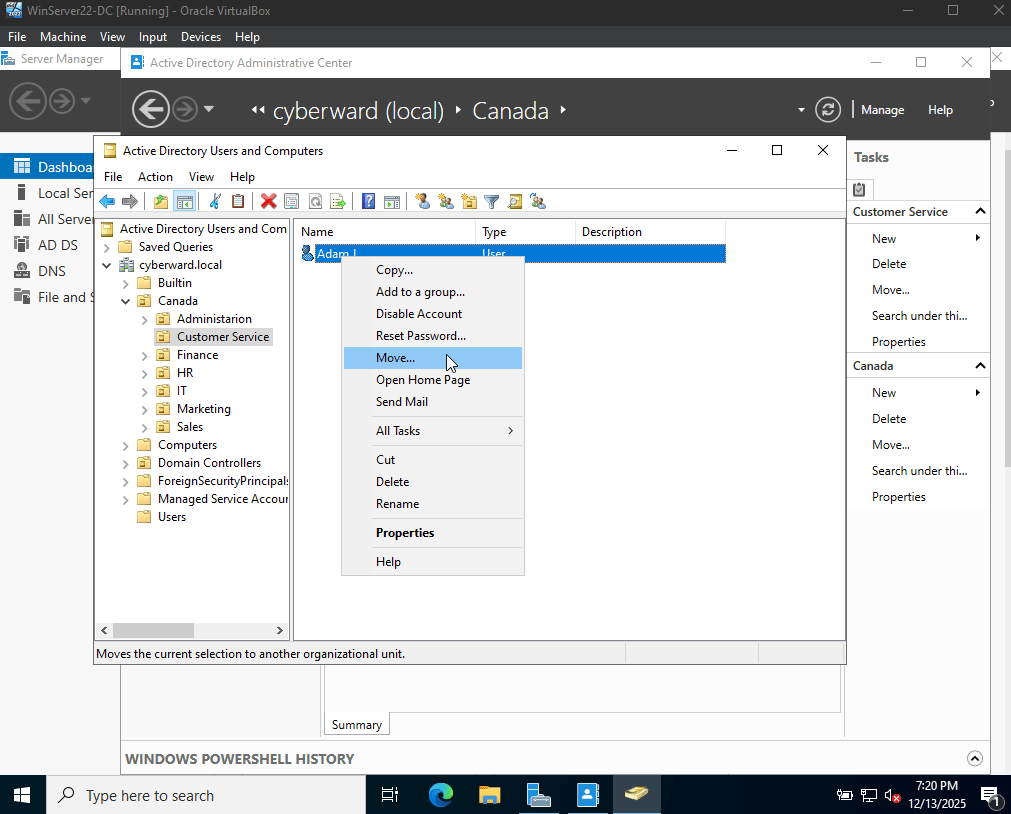
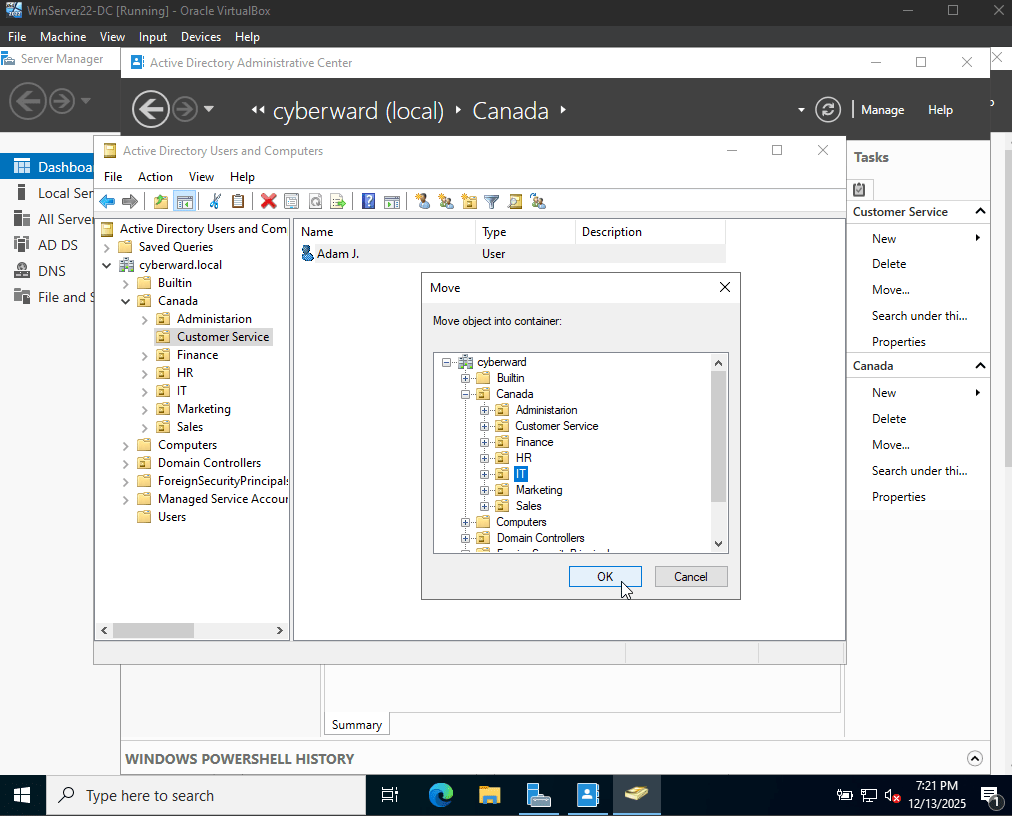
Once completed, the user was successfully moved from Customer Service to IT, confirming that the OU structure is functioning as intended.





 CYBERWARD
Leave a comment