In this phase of the project, I implemented core Active Directory administrative tasks to simulate a real-world domain environment.
I successfully:
- Created a new user account in Active Directory
- Added the user to a Security Group
- Created and configured a shared folder
- Mapped the shared folder as a network drive
To validate the configuration, I logged into a Windows 11 client machine using the newly created domain user account. From the client system, I verified:
- Successful authentication to the domain
- Proper access to the mapped network drive
- Correct enforcement of shared folder permissions
- Application of the configured security policies
This end-to-end testing ensured that both server-side configurations and client-side access controls were functioning as intended.
Part 1 — Key Concepts Explained
Before diving deeper into the implementation, it’s important to understand a few foundational concepts used throughout this lab.
a) Domain
A domain is the logical boundary of an Active Directory environment. It provides centralized authentication and management for users, computers, and security policies within an organization.
b) Security Group
A security group is a collection of users (and sometimes computers) that share the same access permissions. Instead of assigning permissions individually, administrators assign them to groups, and users inherit access through group membership. This approach improves scalability and simplifies management.
c) Shared Folder
A shared folder is a directory hosted on a server that can be accessed by authorized users over the network. Administrators control who can view, modify, or delete files within the folder.
d) NTFS Permissions
NTFS (New Technology File System) permissions define what actions users can perform on files and folders. Common permission levels include:
- Read
- Write
- Modify
- Full Control
Effective access is determined by the interaction between NTFS permissions and share permissions.
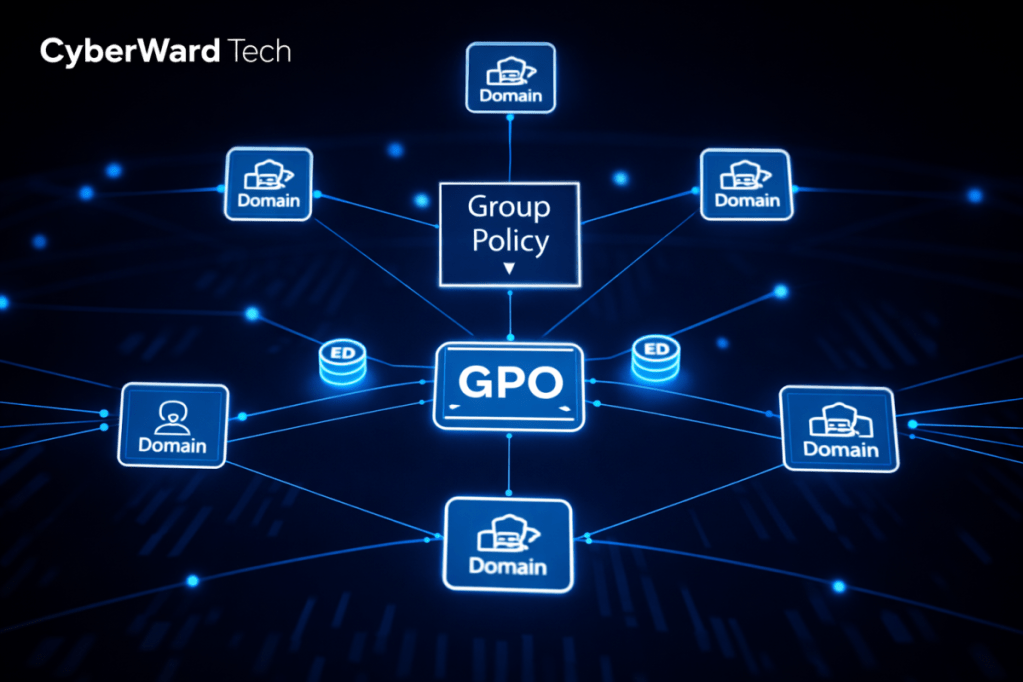
e) Group Policy
Group Policy allows administrators to centrally manage and enforce configuration settings across multiple computers within a domain.
Examples include:
- Password requirements (length, complexity, expiration)
- Login hour restrictions
- Software installation controls
- Desktop and system configuration settings
In this lab, I configured a policy to enforce password length and expiration requirements to simulate enterprise-level authentication standards.
Part 2 — Creating a Domain User
In this section, I created a new user account within Active Directory to simulate onboarding a new employee into an organization.
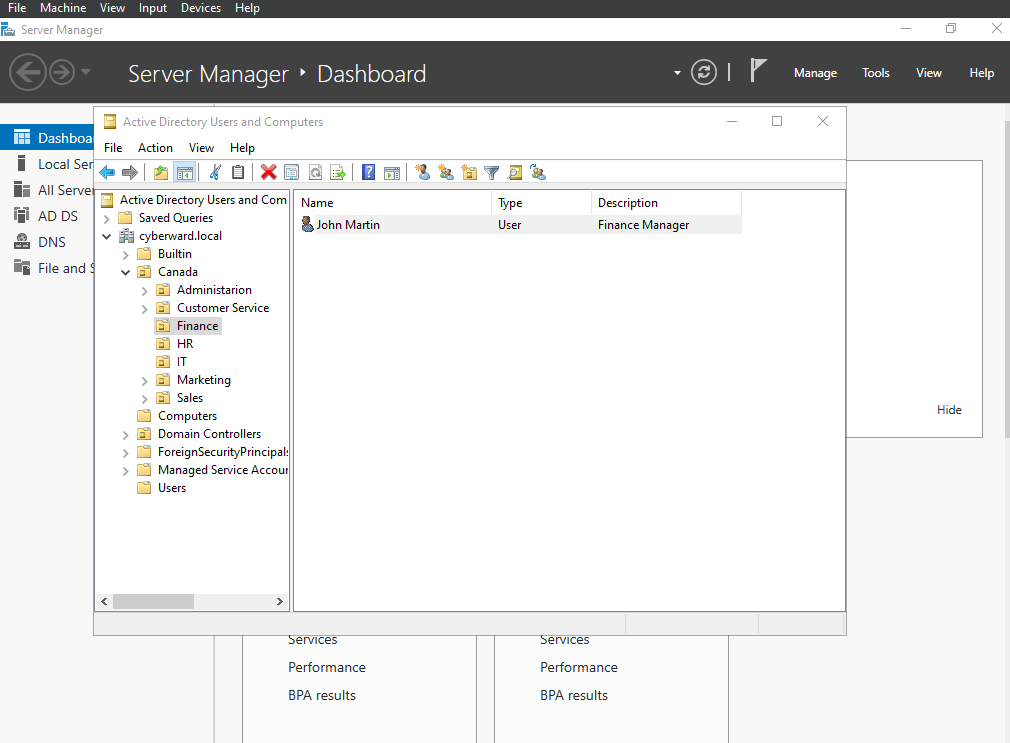
I started by heading to Active Directory Users and Computers (ADUC) and then to my created domain cyberward.local, in Finance Department, click the dropdown and right-click on users, and then ‘New’ and then ‘User’ again
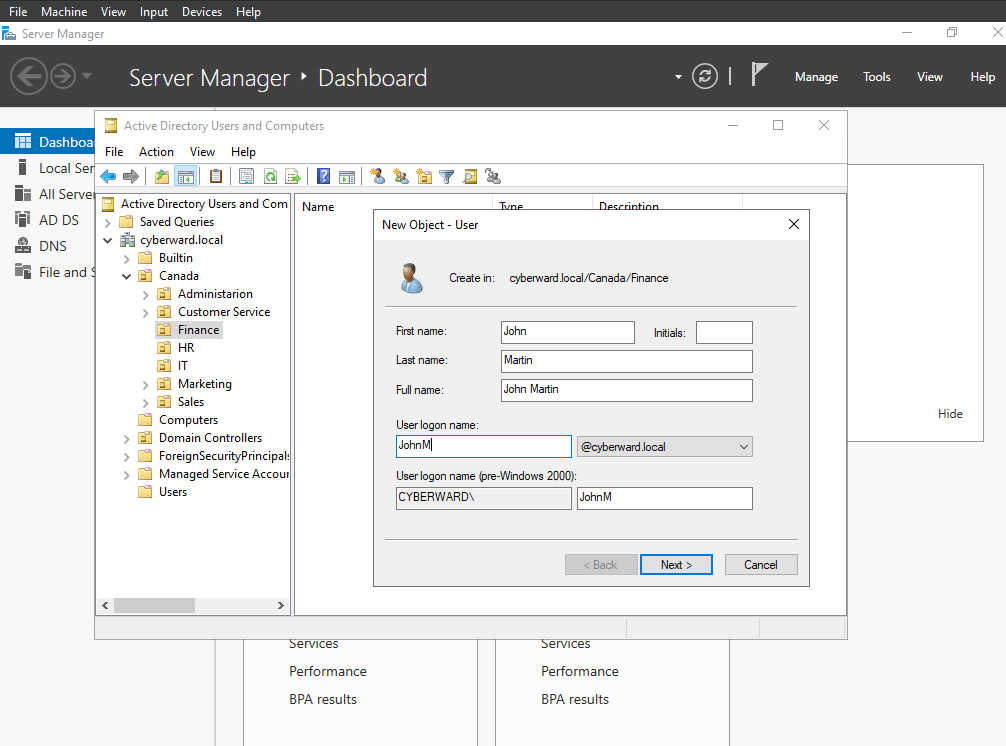
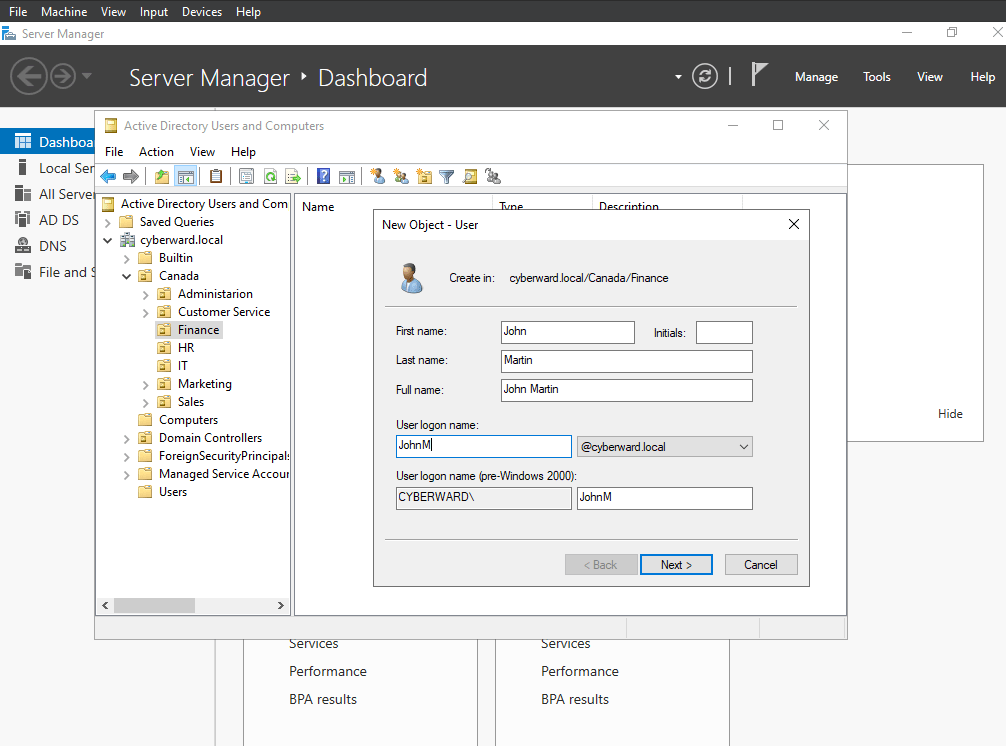
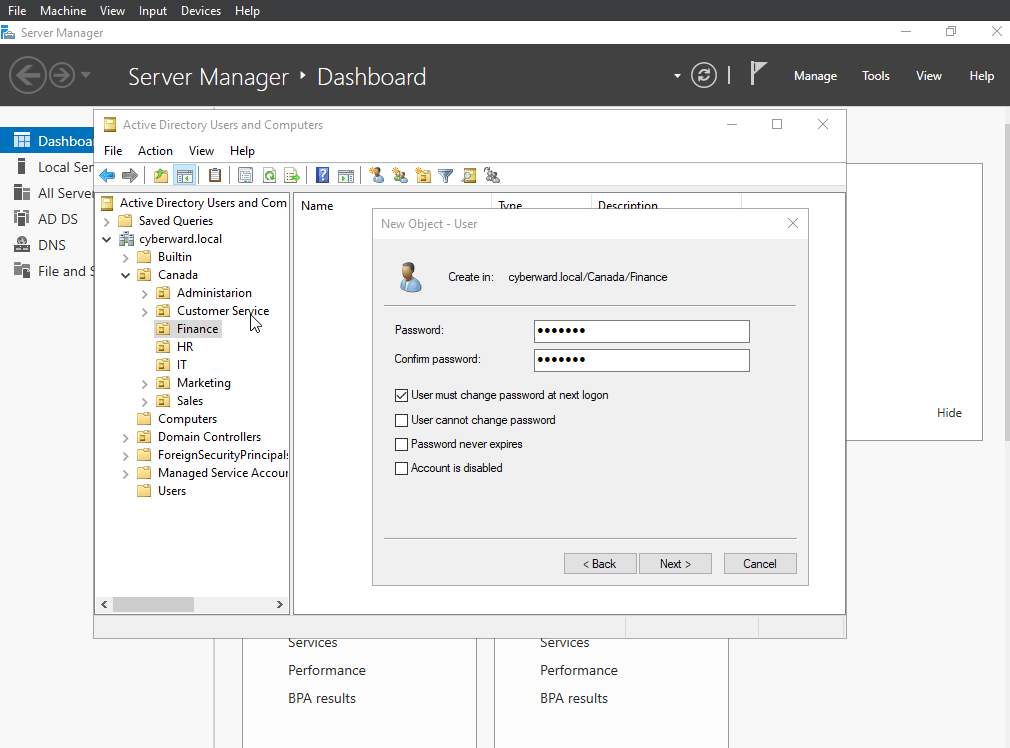
After inputing the names and the logon username, you can then choose a default password that aligns with the organisation’s password policy and it’s usually a good password policy to ensure the user changes their password immediately after the first logon.
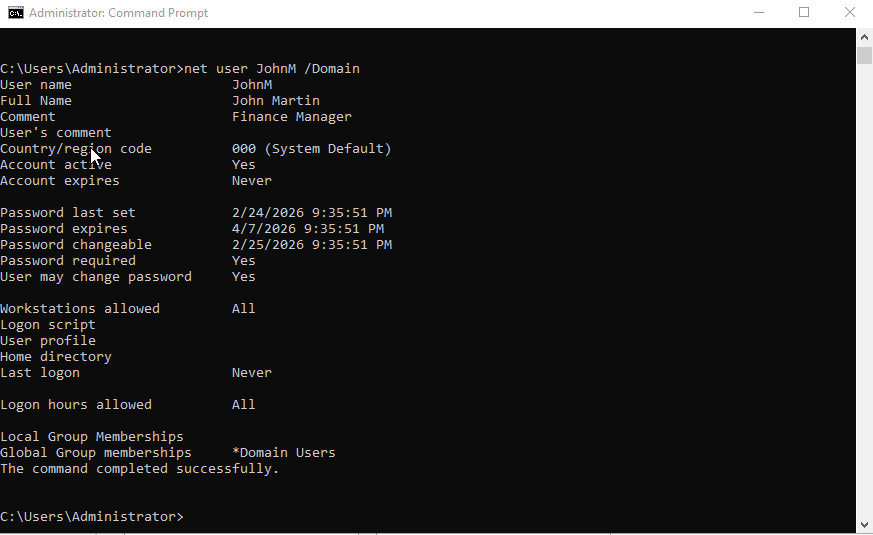
Also, We can use Command Line — net user username /domain — to get details about the user just created.
Part3 -Creating Groups and File Shares (And Mapping Network Drives)
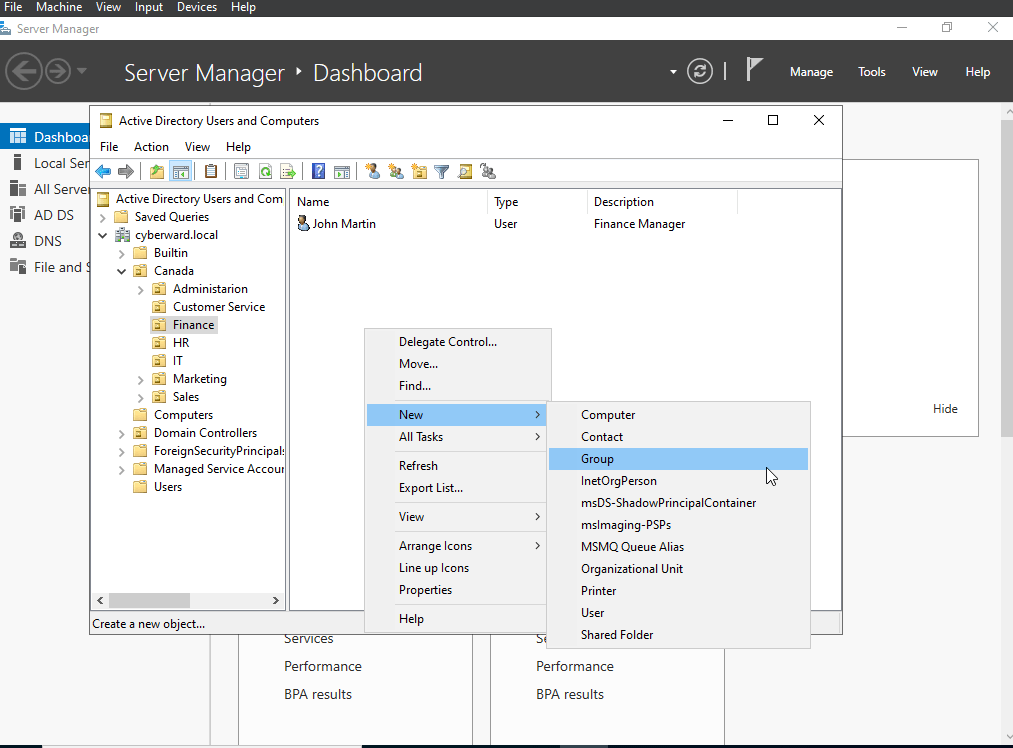
I started again with ADUC, Users → New → Group. I then created a security group ‘Finance_Dept’.
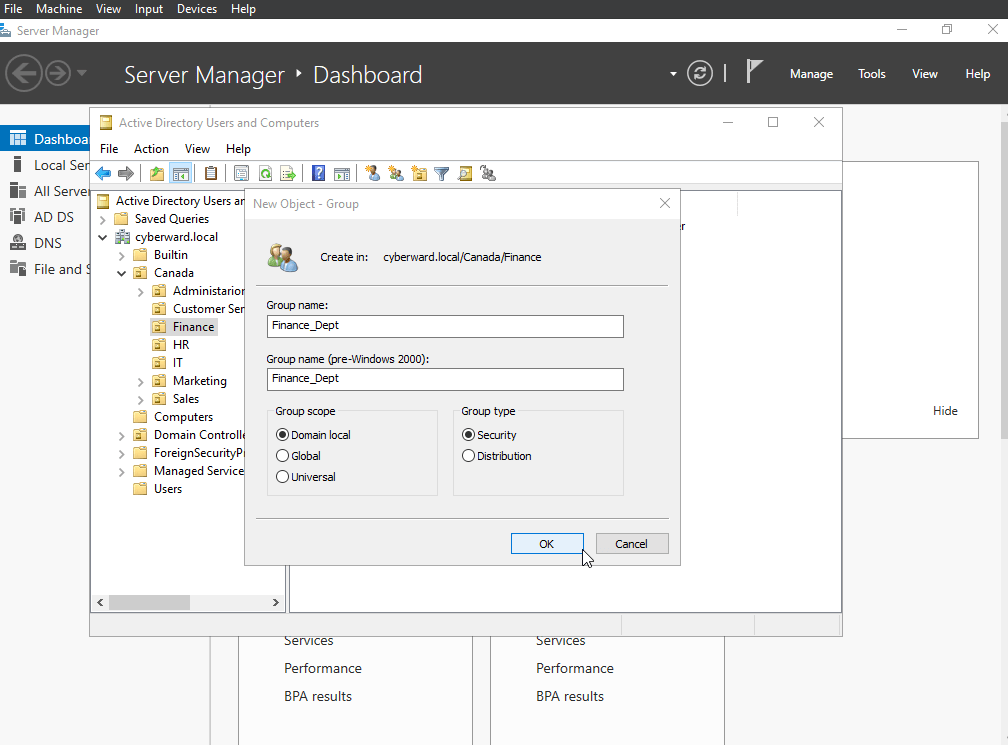
I then added my created user to the security group. This means that every security controls applied to this group will be applied to every user in that group.
to add the user, right-click > properties> Member Of>add the security Group ‘Finance_Dept’ .
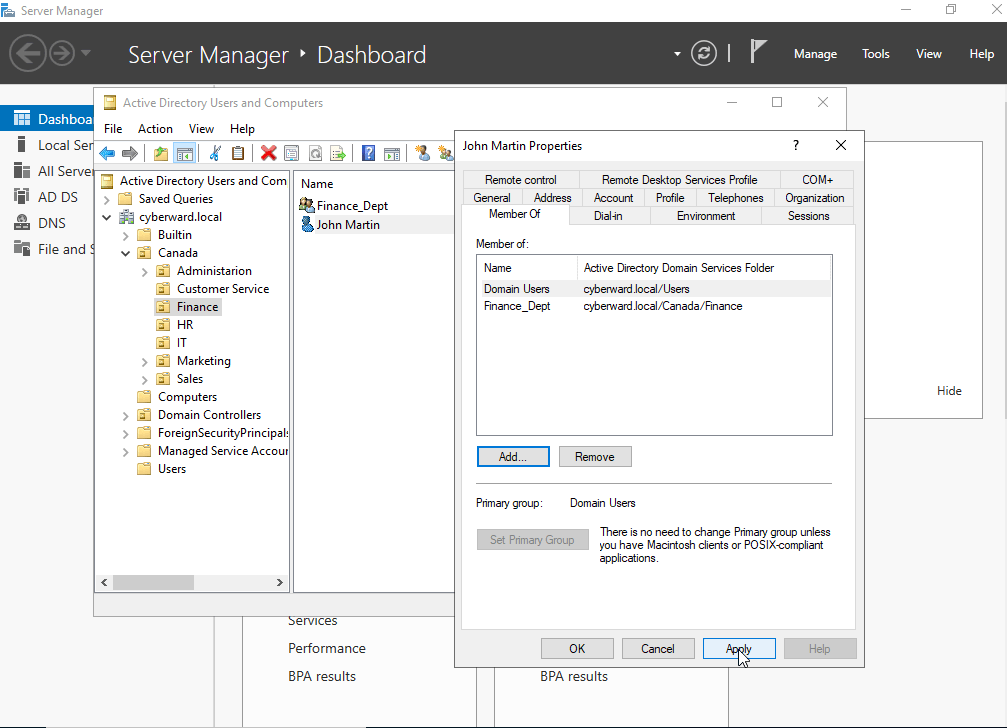
What better way to check the security group efficiency than to check with file shares.
So in AD, I created a File share, I mapped it toa network drive and then i set the permissions.
Then I right-clicked the folder → Properties → Sharing → Advanced Sharing
Checked “Share this folder”
Gave it a share name ( as “Finance_Document_Shares”)
Under Permissions, I made sure to:
- Remove “Everyone” (for better security)
- Add the group
- Set the Share Permission to “Read”
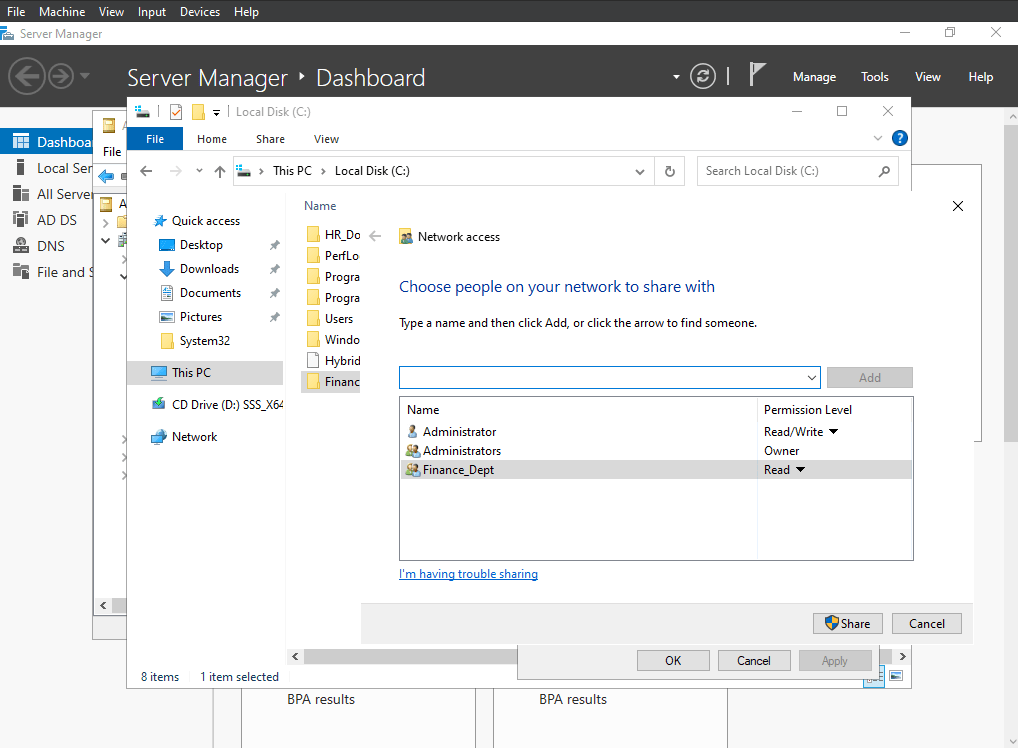
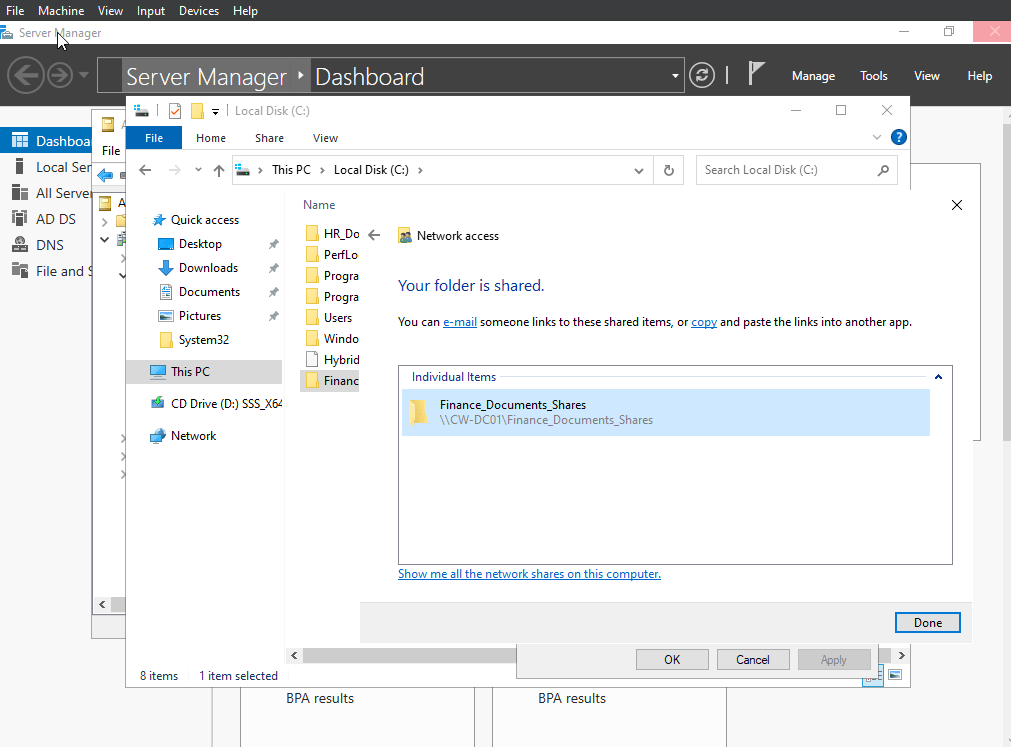
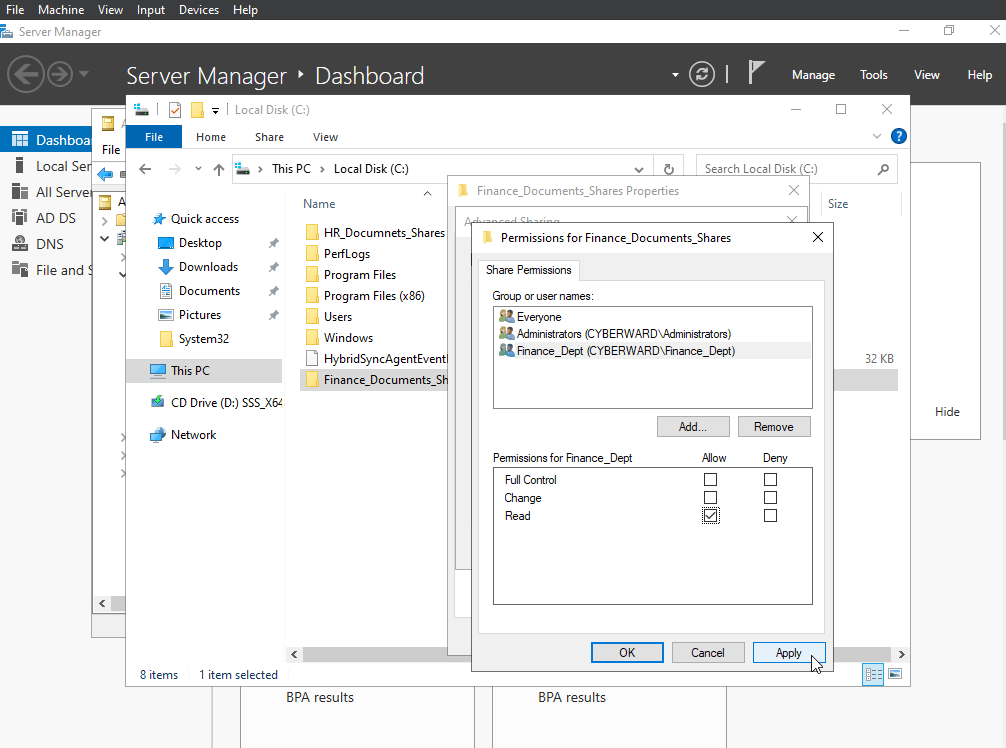
NOTE: It is very important to note that if a user belongs to multiple security groups that have different permission levels, the most restrictive of those policies will apply to the user.
I then navigated to the windows 11 where I have logged in as the user(John Martin) to view the shared file.
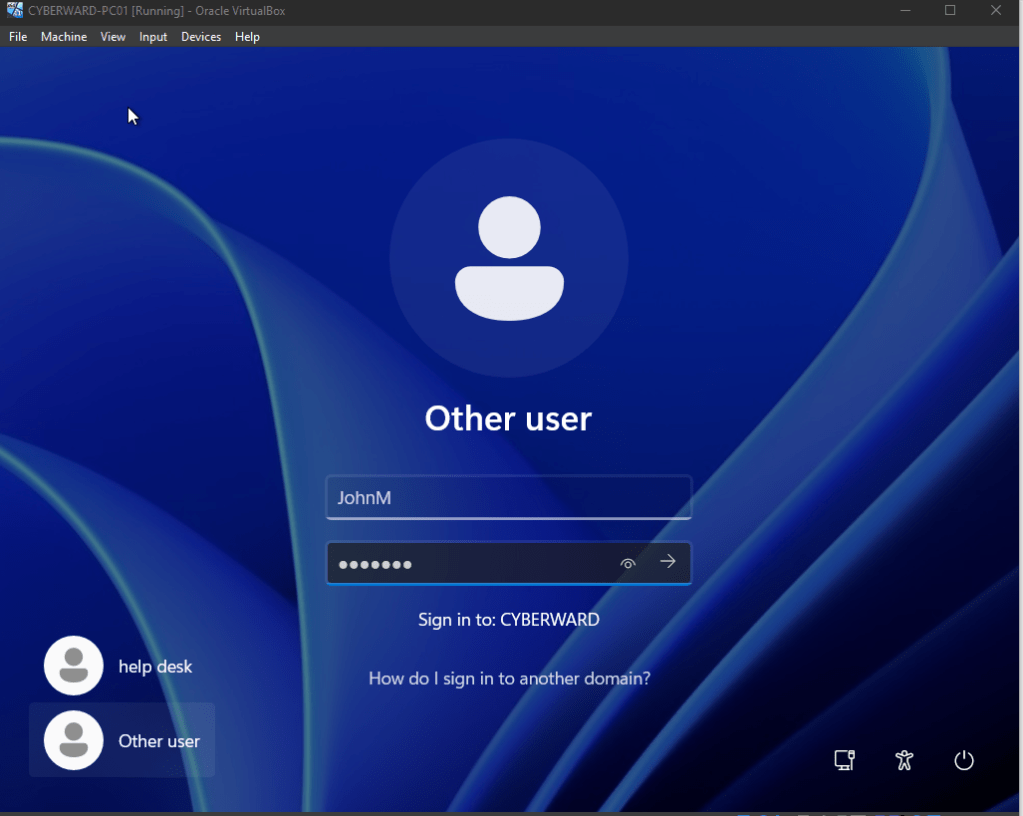
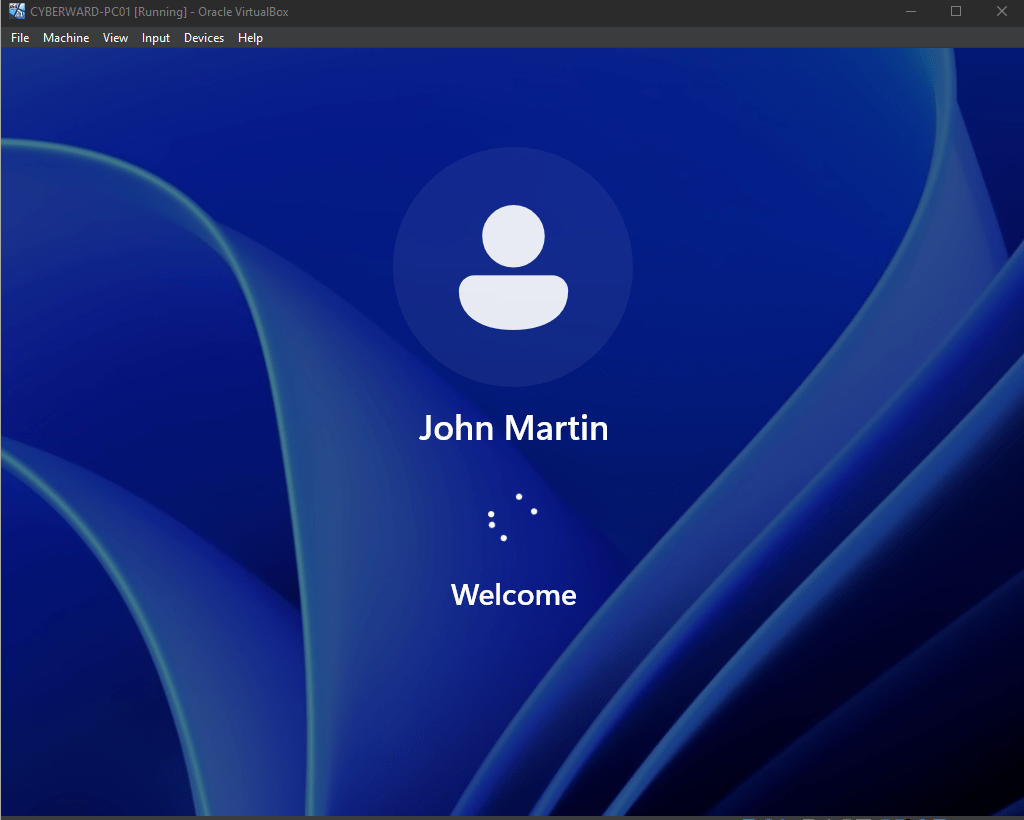
I then navigated to the windows 11 where I have logged in as the user to view the shared file. Navigated the file explorer , and then put my server name like \ServerName and then I found the shared folder.
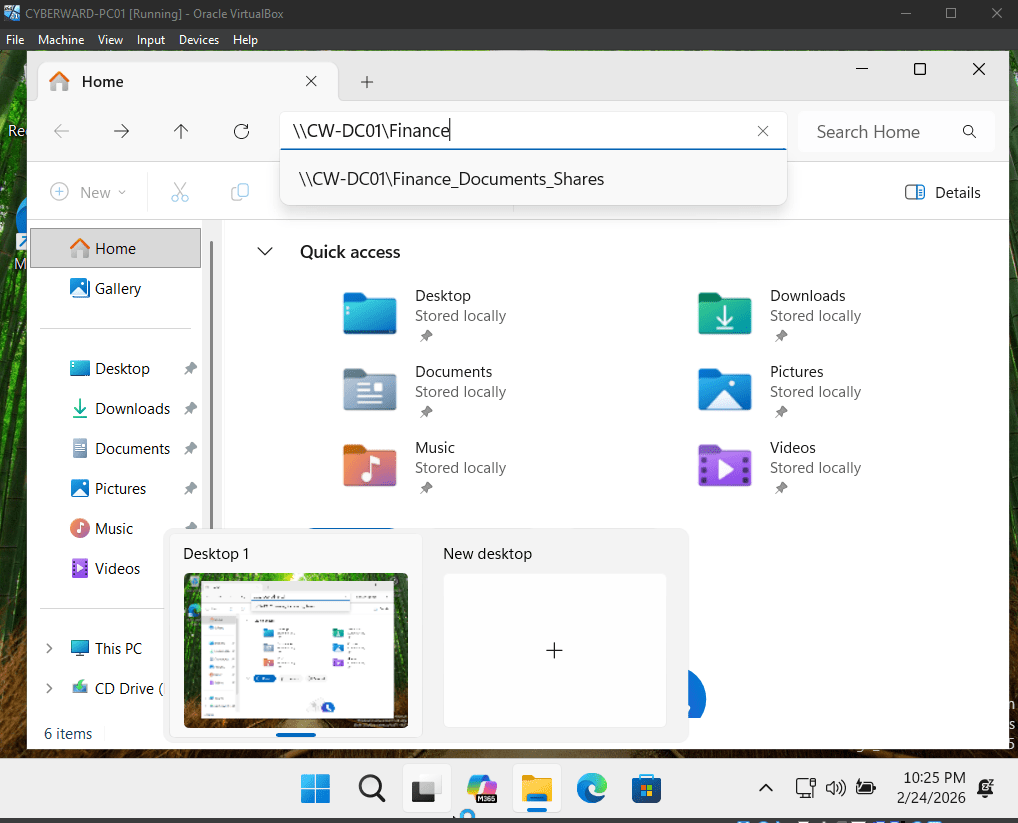
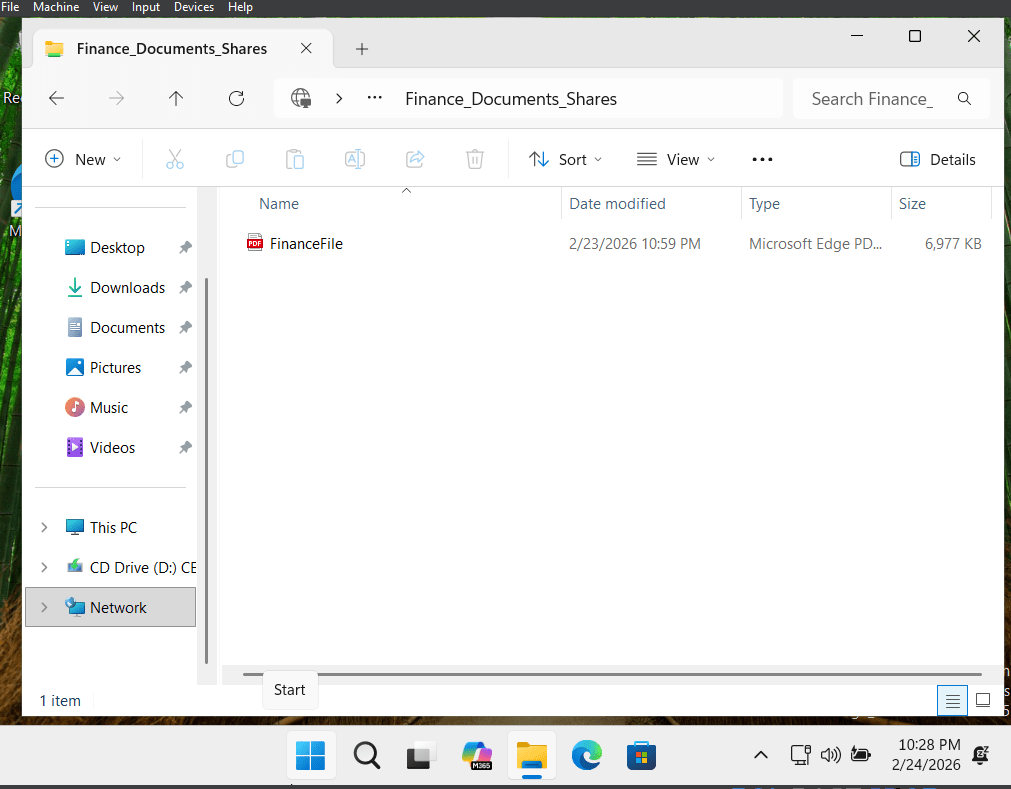
To then test the permissions, I tried to delete the file and as expected, the action was denied.
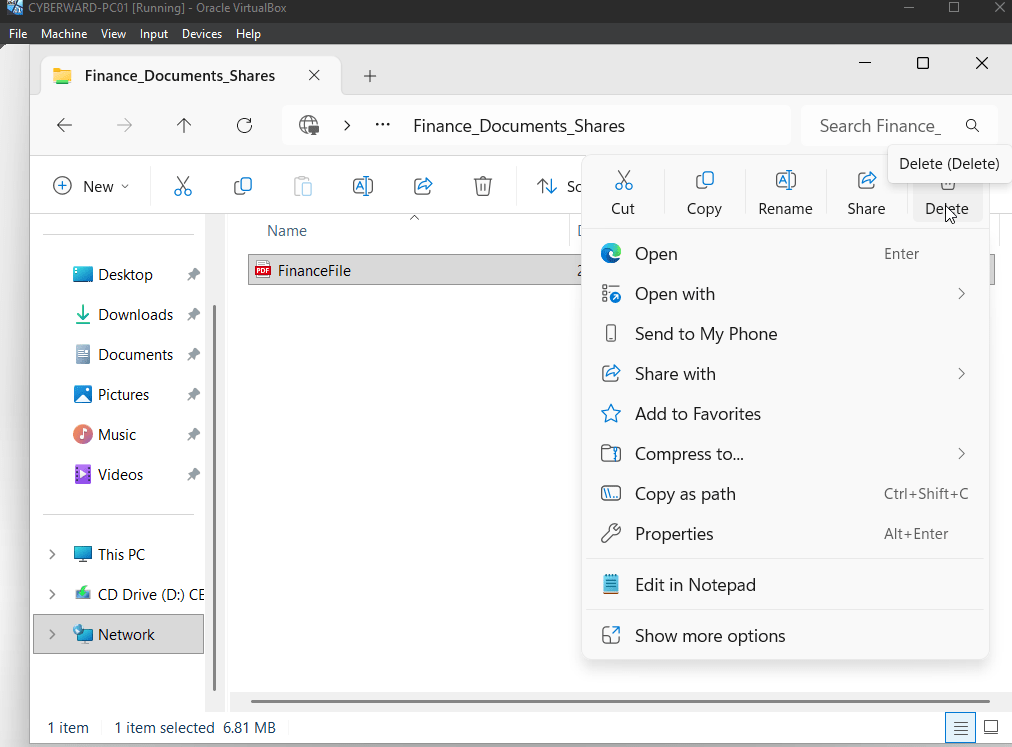
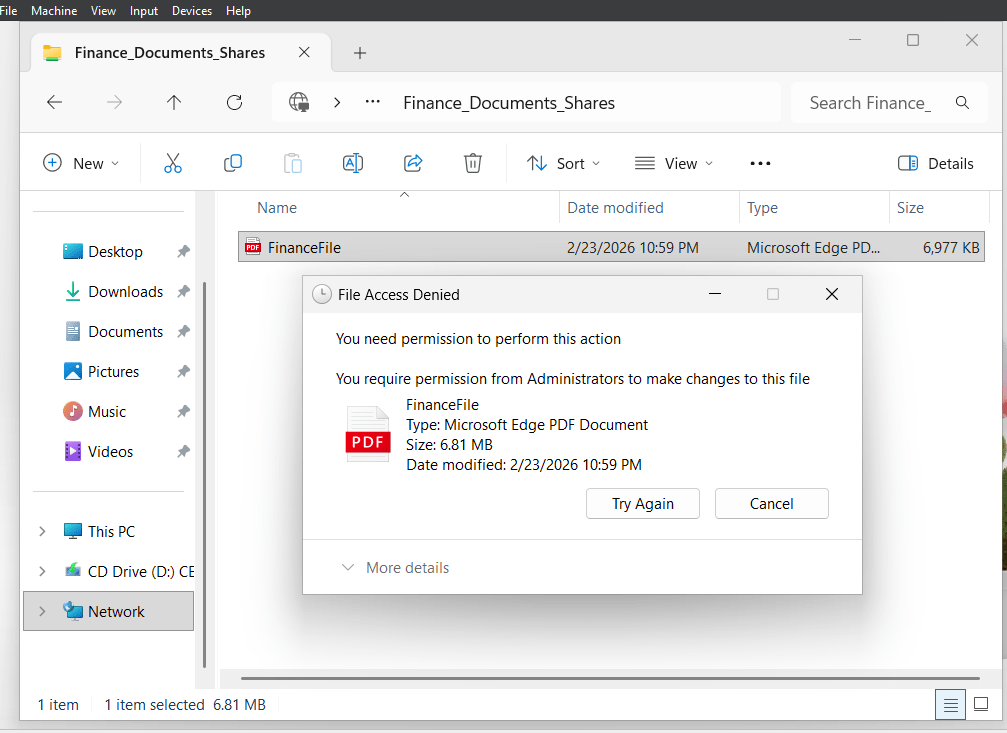
This shows how seamless and important it is to set security protocols as an administrator.



 CYBERWARD
Leave a comment