
What Is Active Directory Domain Services?
Imagine an organization with hundreds of employees, each using a different computer. If every machine had its own local users, passwords, and access rules managed separately, administration would quickly become unmanageable. Active Directory Domain Services (AD DS) is Microsoft’s solution to this problem.
AD DS provides a centralized directory where all users, computers, groups, and resources—such as printers and shared folders—are managed from one place. Instead of configuring each system individually, administrators can control access, enforce security policies, and apply rules across the entire organization from a single domain.
In real-world environments, AD DS is what allows employees to sign in to any company computer using the same work credentials, while ensuring that access is limited to what their role allows. For example, an HR intern cannot access finance systems, and security policies like password requirements and account lockouts are enforced automatically.
By centralizing identity and access management, Active Directory removes the complexity of managing systems one by one and replaces it with a structured, scalable, and secure approach—bringing order and consistency to enterprise IT environments.
Installing Active Directory Domain Services (AD DS)
Installing Active Directory Domain Services is a fairly straightforward process. Below, I’ll outline the key steps and show what each stage looks like along the way (screenshots included where available).
Step 1: Add the AD DS Role
Open Server Manager on your Windows Server and from Manage select “Add Roles and Features” to begin the installation process.
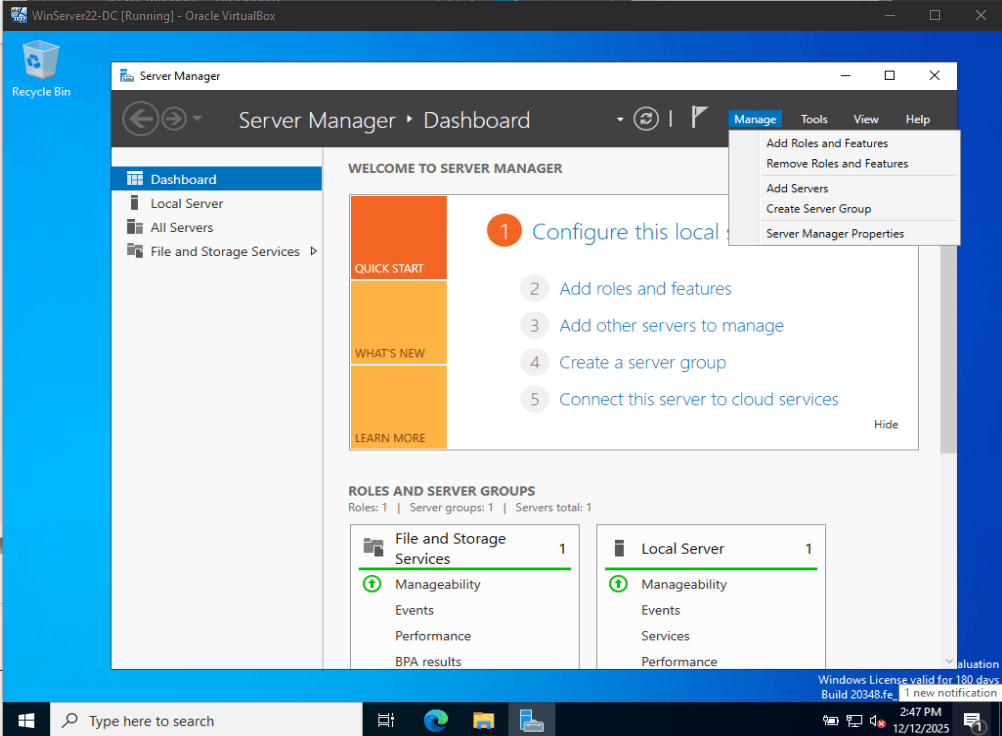
Click next
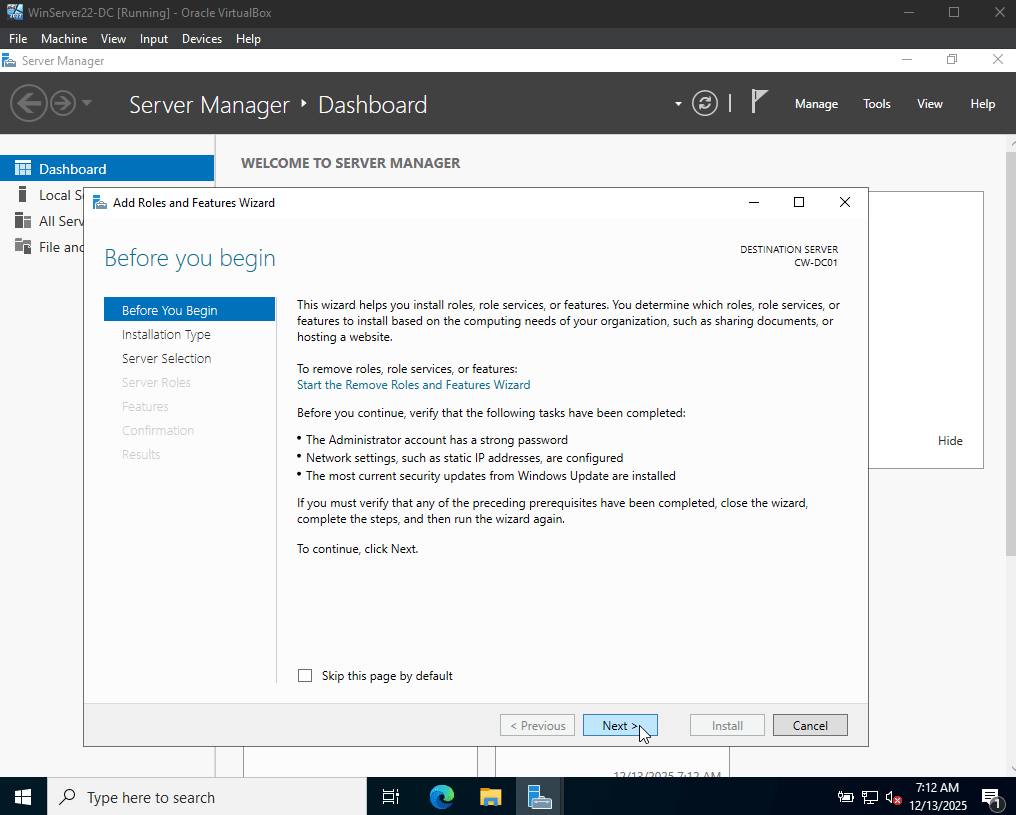
In the next window, select “Role-based or feature-based installation” and verify in the top-left corner that the destination server matched the intended system for the role installation. In this case, the target server was CW-DC01, which was correct.
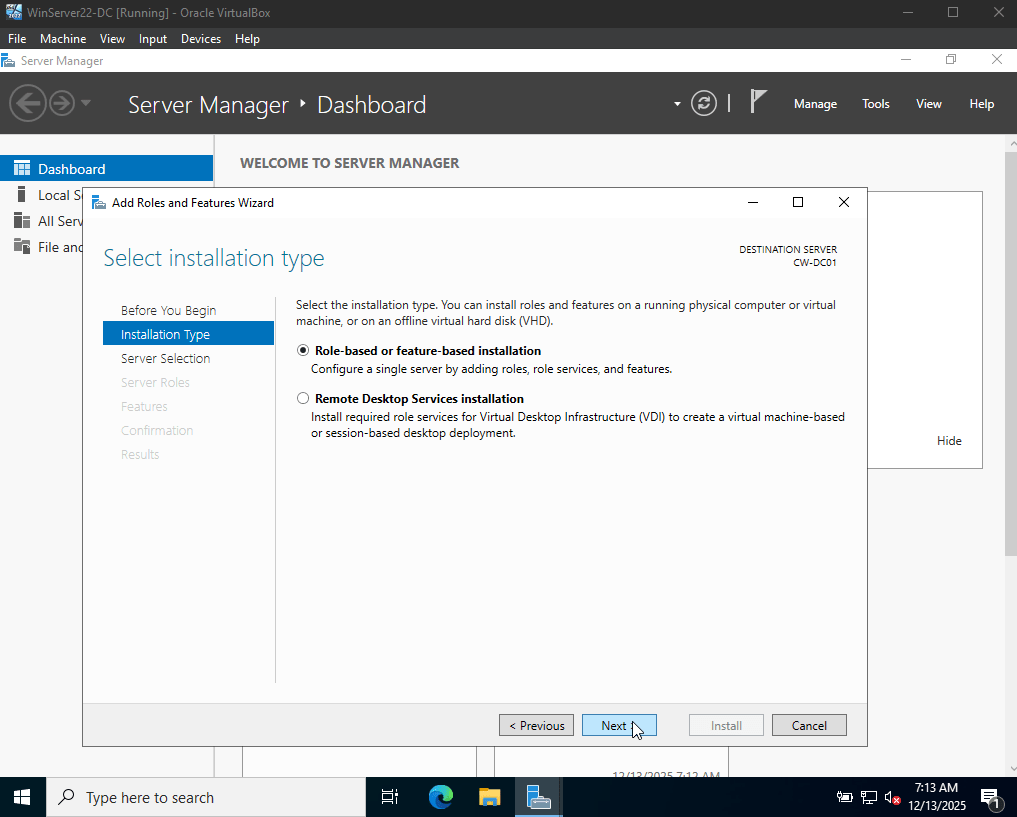
select the target server (CW-DC01) and clicked Next to continue.
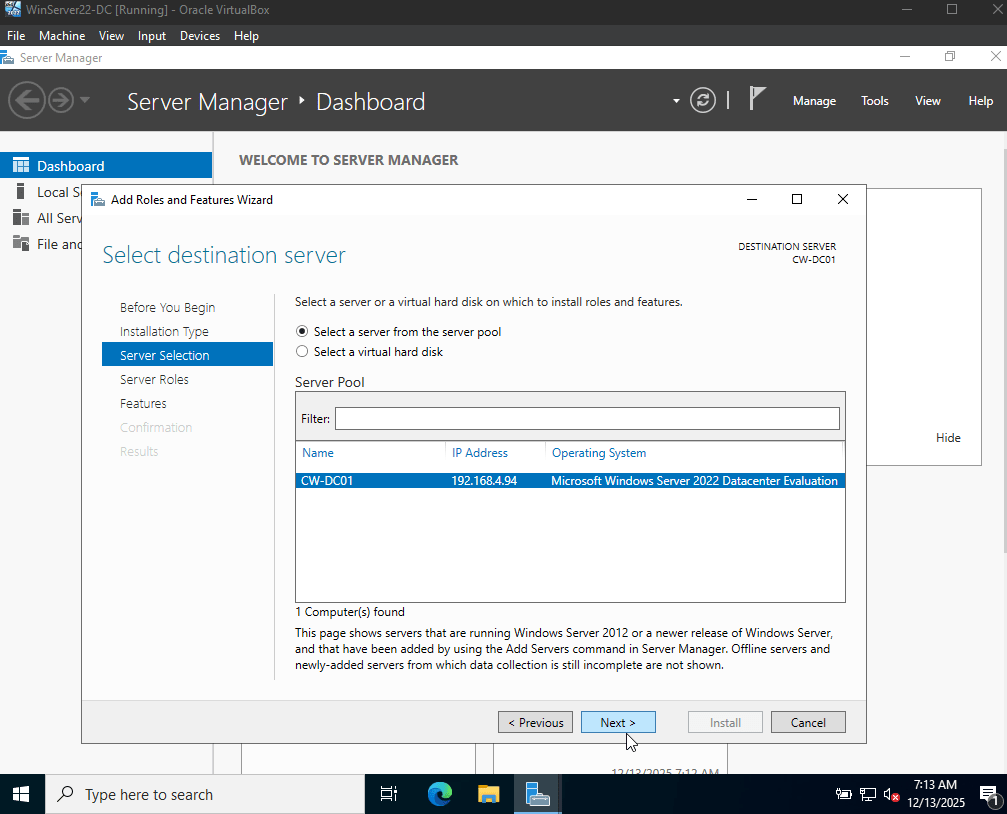
Next, select Active Directory Domain Services. Choosing this option opened an additional window that outlined the required roles and features needed for the proper installation and operation of AD DS, then click Next.
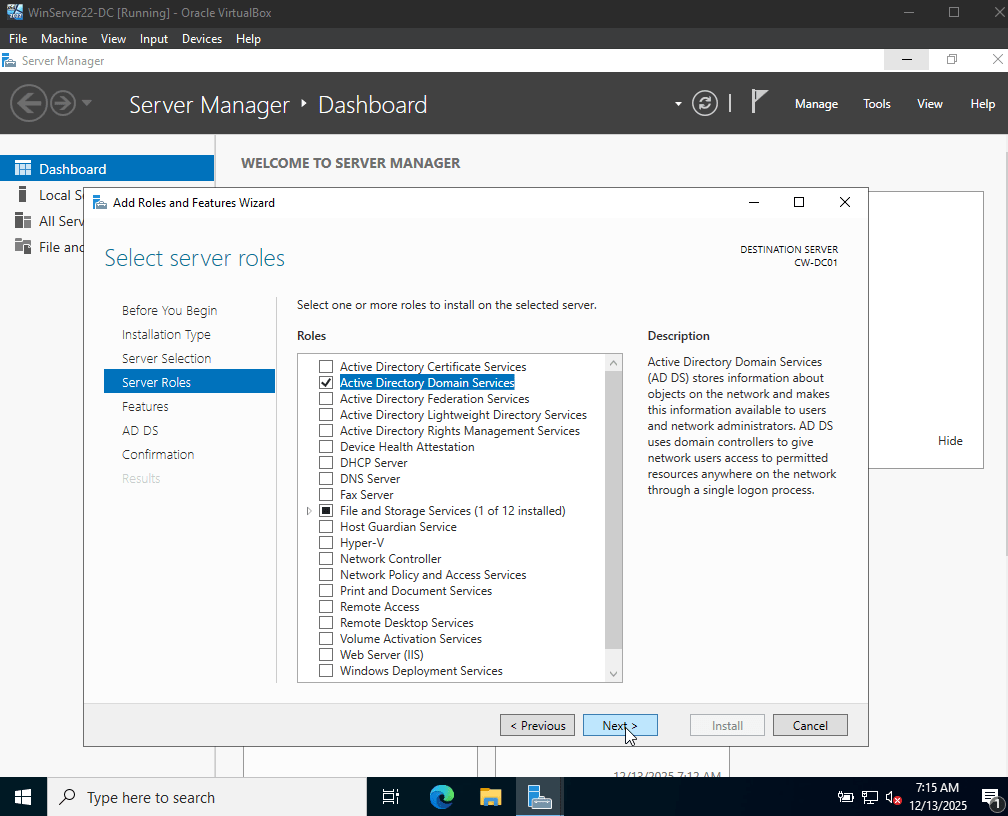
Next, the available server features were displayed. Since no additional features were required for this setup, I clicked Next to continue.
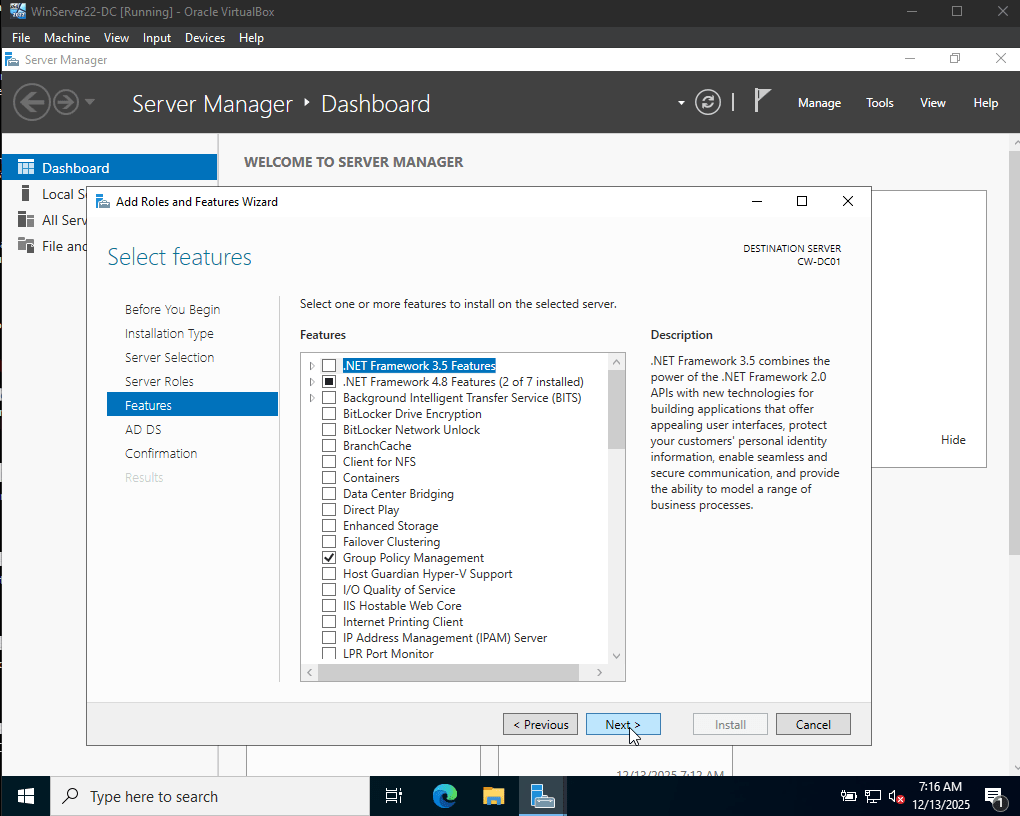
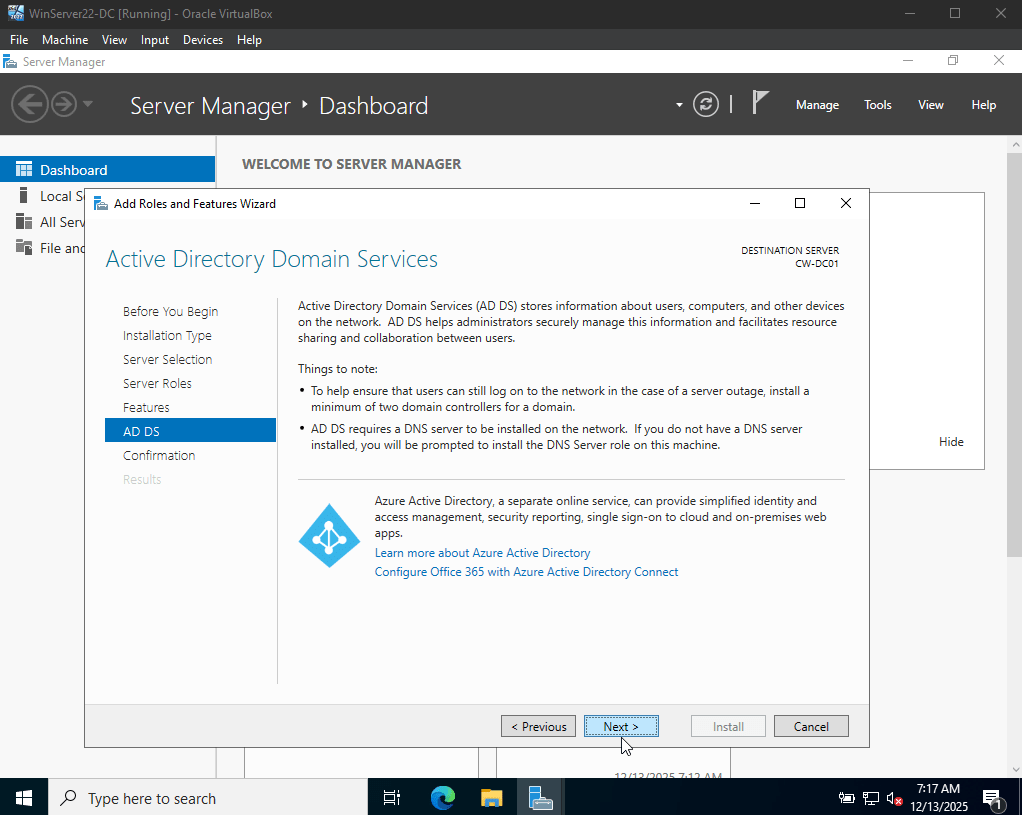
Finally, a summary of the selected roles and features is displayed. At this stage, I also have the option to allow the server to restart automatically if required to complete the installation. This option should be used with caution in a production environment, as servers should only be restarted during scheduled maintenance windows to avoid service disruption.
After reviewing the configuration and confirming that everything was correct, I clicked Install to begin the Active Directory Domain Services installation.
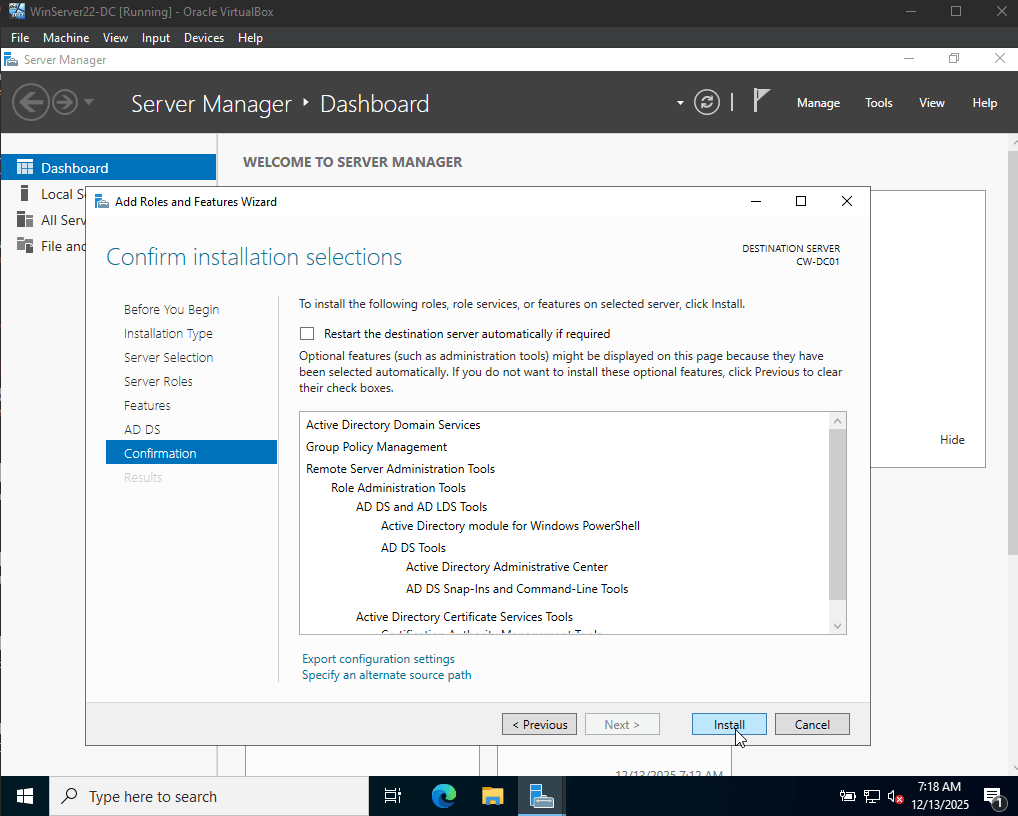
Once this is done, the installation will begin, wait for it to finish.
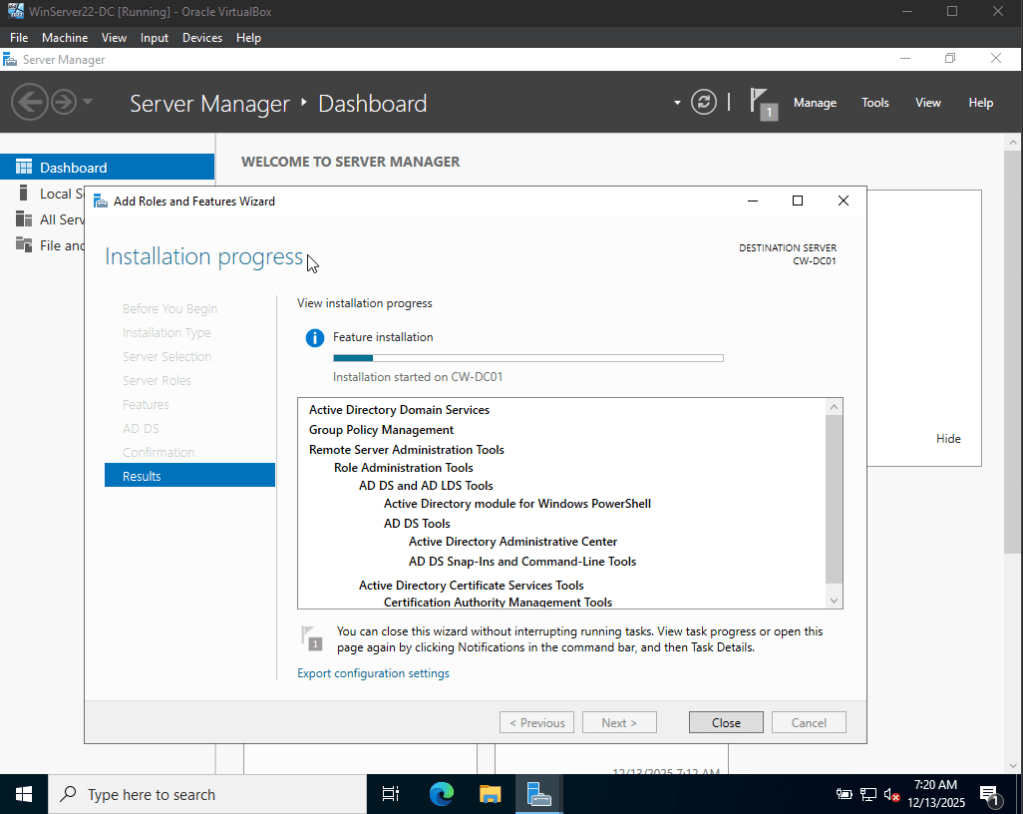
Once the installation is done, the server will restart, and Active Directory Domain Services role has been installed.
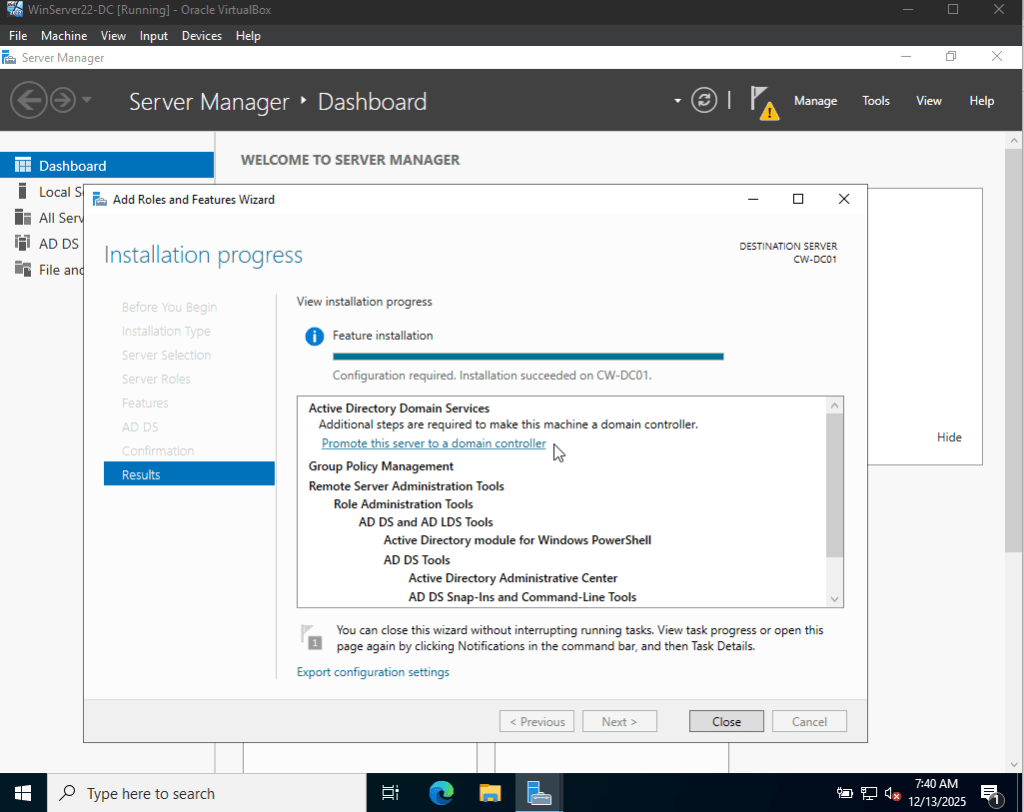
At this point, the installation is complete; however, the server is not yet a Domain Controller. Only the Active Directory Domain Services role has been installed. To complete the setup, the server must be promoted to a Domain Controller (DC), which will be done in the next step.
Step 3: Promote the Server to a Domain Controller
Once the Active Directory Domain Services role is installed, the server will prompt you to promote it to a Domain Controller. After all, a domain can’t function without one. Follow the promotion wizard, enable DNS services, and specify a domain name for your environmen
After installing Active Directory Domain Services, the next step is to promote the server to a Domain Controller. This process creates the Active Directory forest and domain, enabling centralized user and resource management.
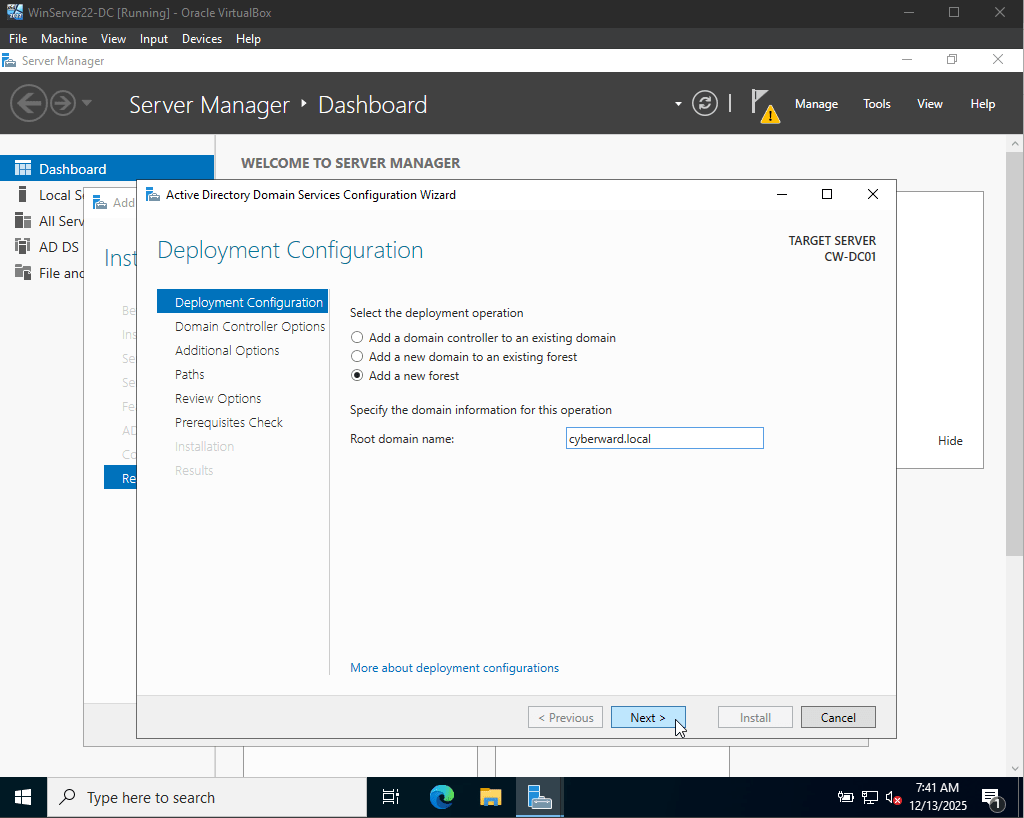
From Server Manager, click “Promote this server to a domain controller.” In the deployment configuration, choose Add a new forest and enter a root domain name (for example, cyberward.local). Complete the promotion wizard using the default settings unless specific changes are required.
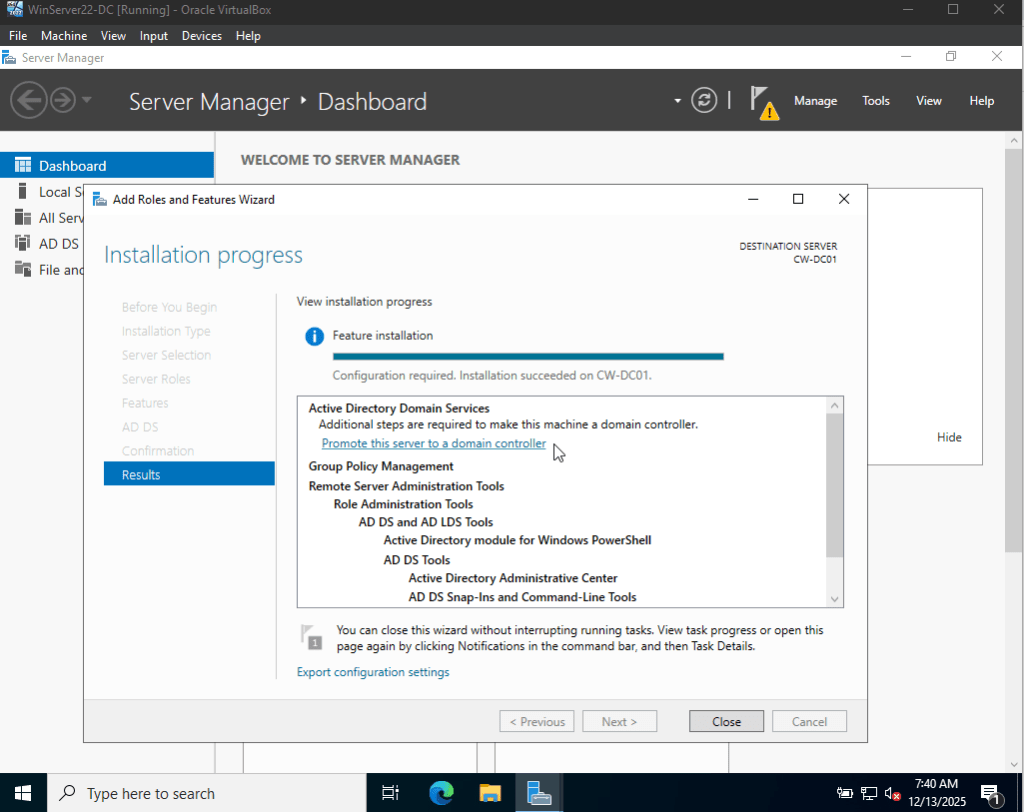
For this setup, select Add a new forest and specified cyberward.local as the root domain name.
This option creates a completely independent Active Directory environment. A forest represents the highest security and administrative boundary within Active Directory.
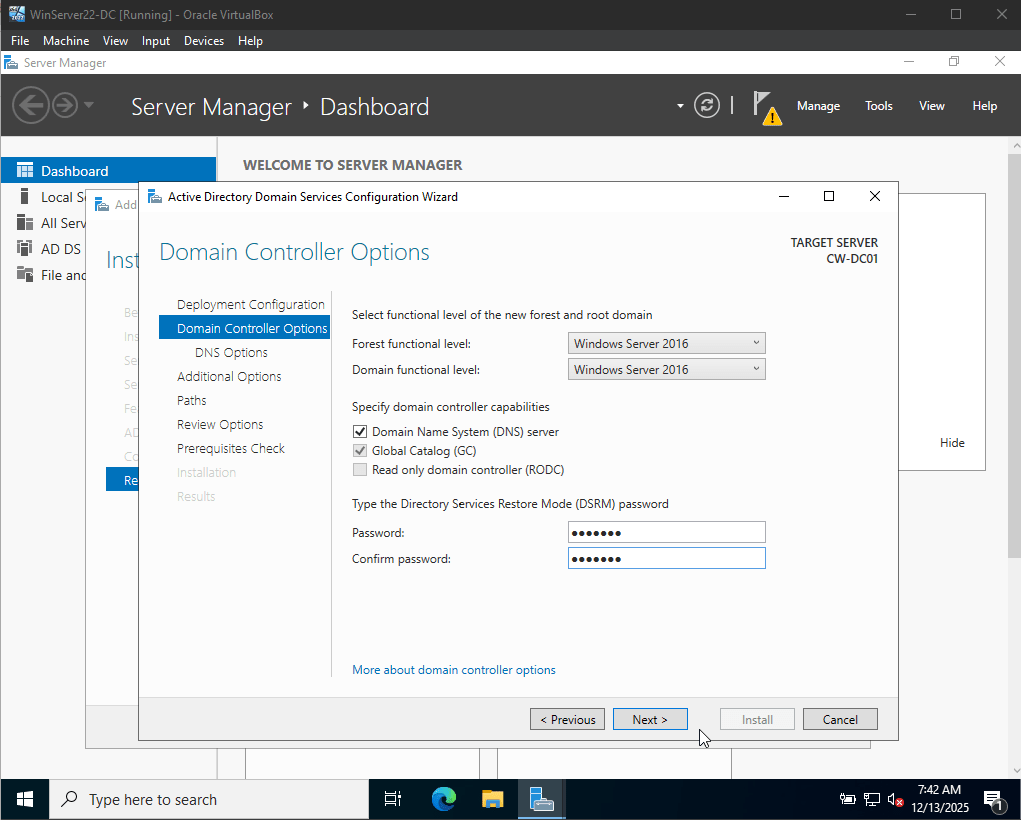
Domain and Forest Functional Levels define which Active Directory features are available and depend on the Windows Server versions running on all domain controllers.
- Domain functional level applies to a single domain.
- Forest functional level applies to all domains in the forest.
Raising functional levels requires all domain controllers to meet the minimum Windows Server version, and once raised, they cannot be reverted without restoring from backup.
Next, under Domain Controller Capabilities, the following options are available:
- DNS Server: Provides name resolution required for Active Directory to function and allows clients to locate domain controllers and services.
- Global Catalog (GC): Stores partial data from all domains in the forest, enabling fast searches and supporting user authentication.
- Read-Only Domain Controller (RODC): Hosts a read-only copy of AD for environments with limited physical security, reducing the risk of compromise.
Finally, you must set a Directory Services Restore Mode (DSRM) password, which is used for emergency recovery and maintenance when Active Directory or the operating system is unavailable.
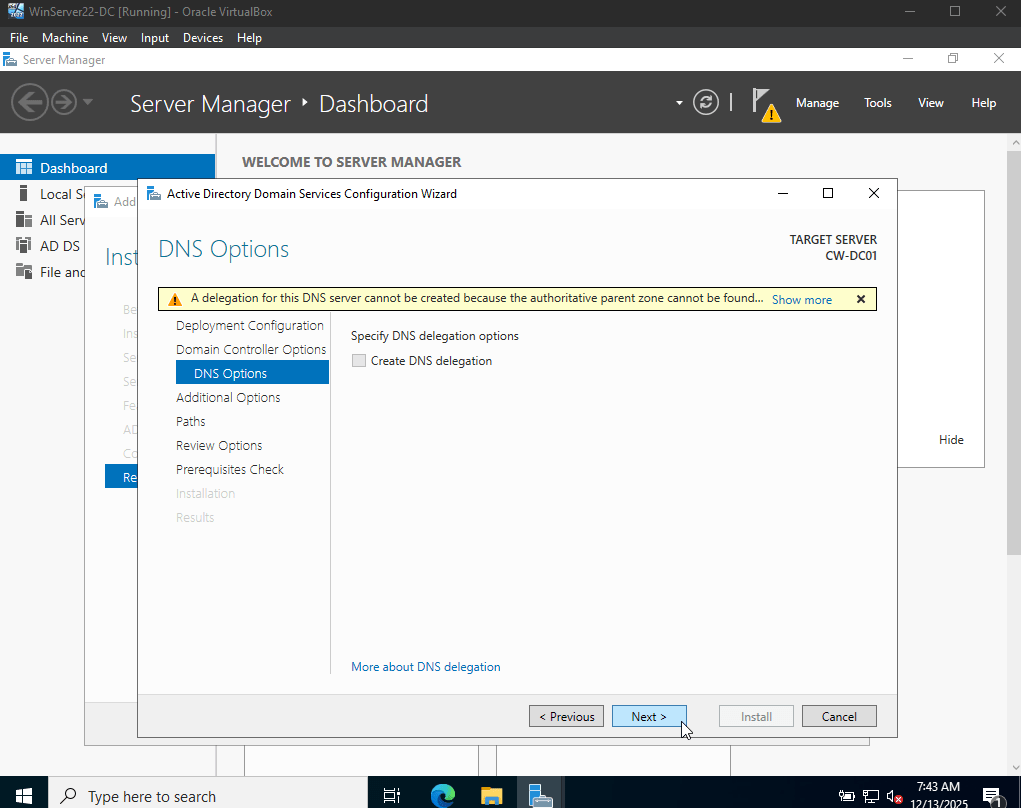
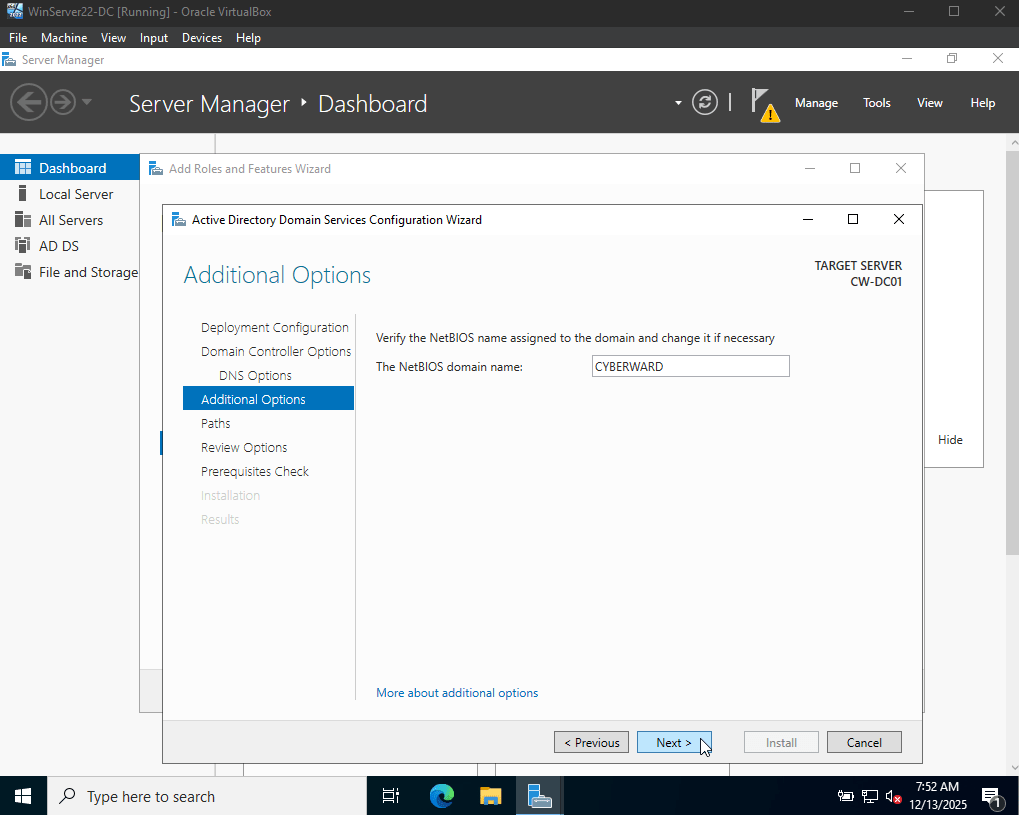
Next, the NetBIOS name must be verified. The NetBIOS name is a network identifier used by Microsoft operating systems to identify resources on a local network. In an Active Directory environment, it is primarily maintained for backward compatibility and to support communication with legacy systems that still rely on this naming convention.
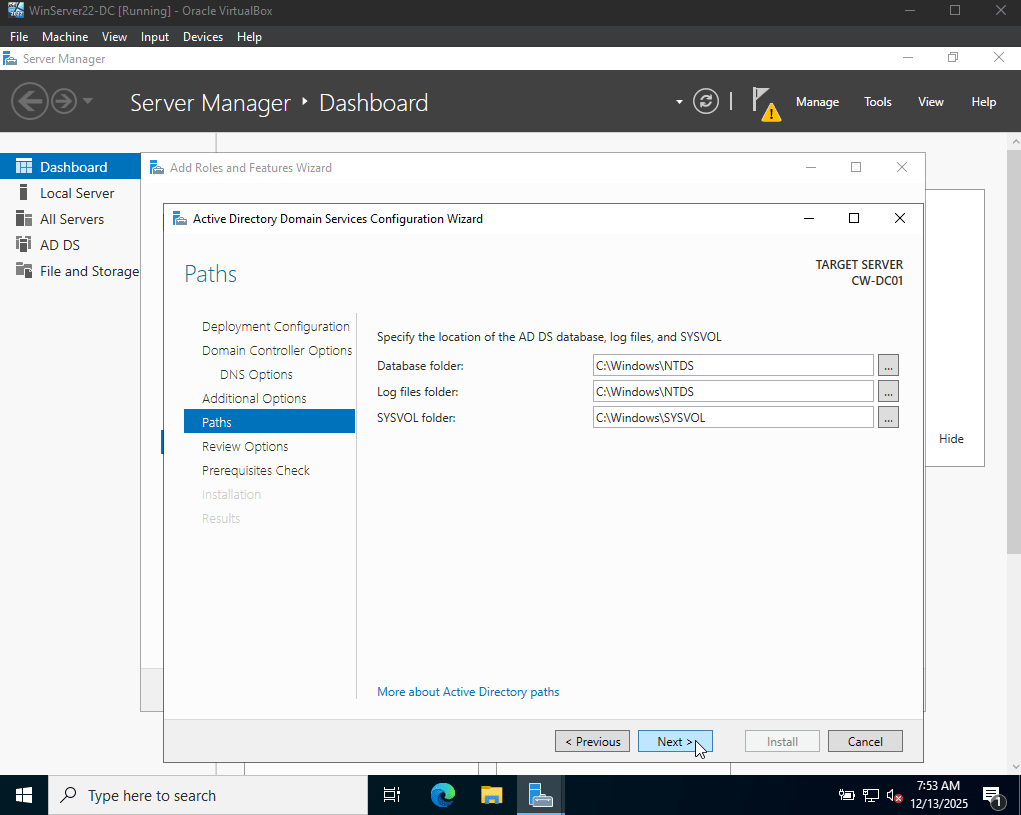
Next, the default paths for the Active Directory database, log files, and SYSVOL folders are displayed.
- Database (NTDS): Stores the Active Directory database (
NTDS.dit), which contains all users, groups, computers, and directory data. - Log Files: Record all changes made to the AD database and are used to maintain integrity and support recovery.
- SYSVOL: Stores Group Policy objects and logon scripts that are replicated across all domain controllers.
These folders are essential for Active Directory operation, replication, and recovery.
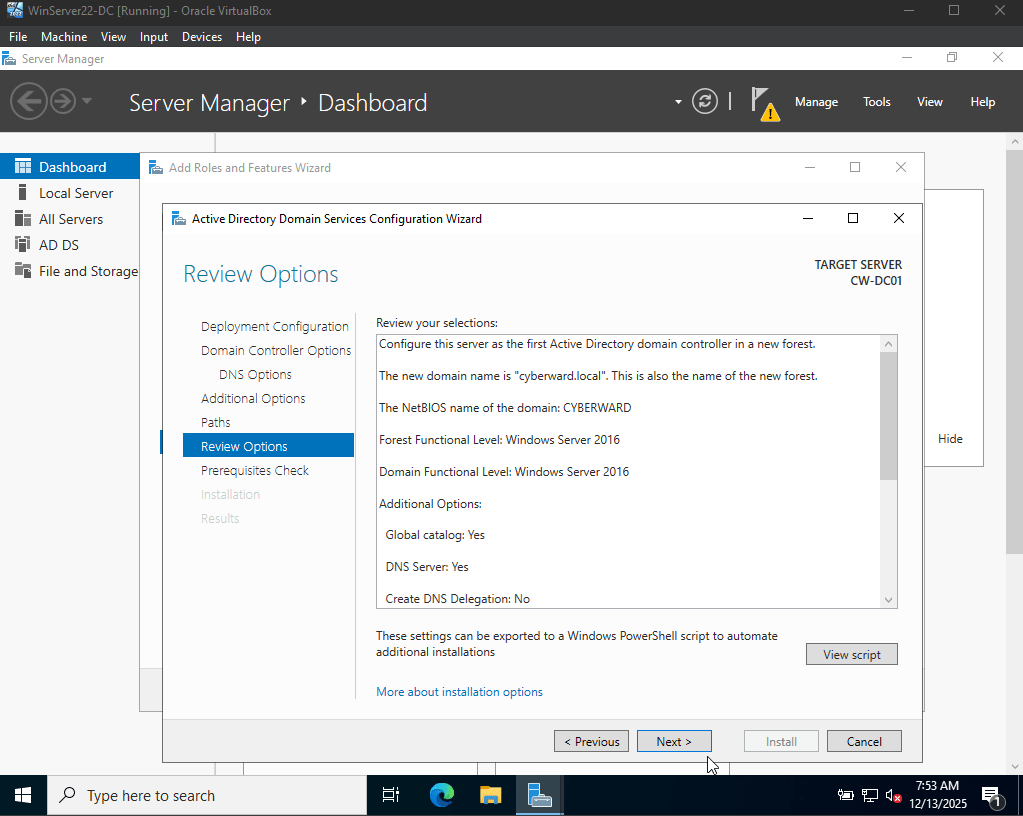
Next, a summary of all selected options and configurations is displayed, allowing a final review before promoting the server to a Domain Controller. After confirming that everything was correct, I proceeded with the installation.
At this stage, the wizard also provides the option to copy the PowerShell script used during the process. This is useful for automating future installations or performing the promotion using Windows PowerShell.
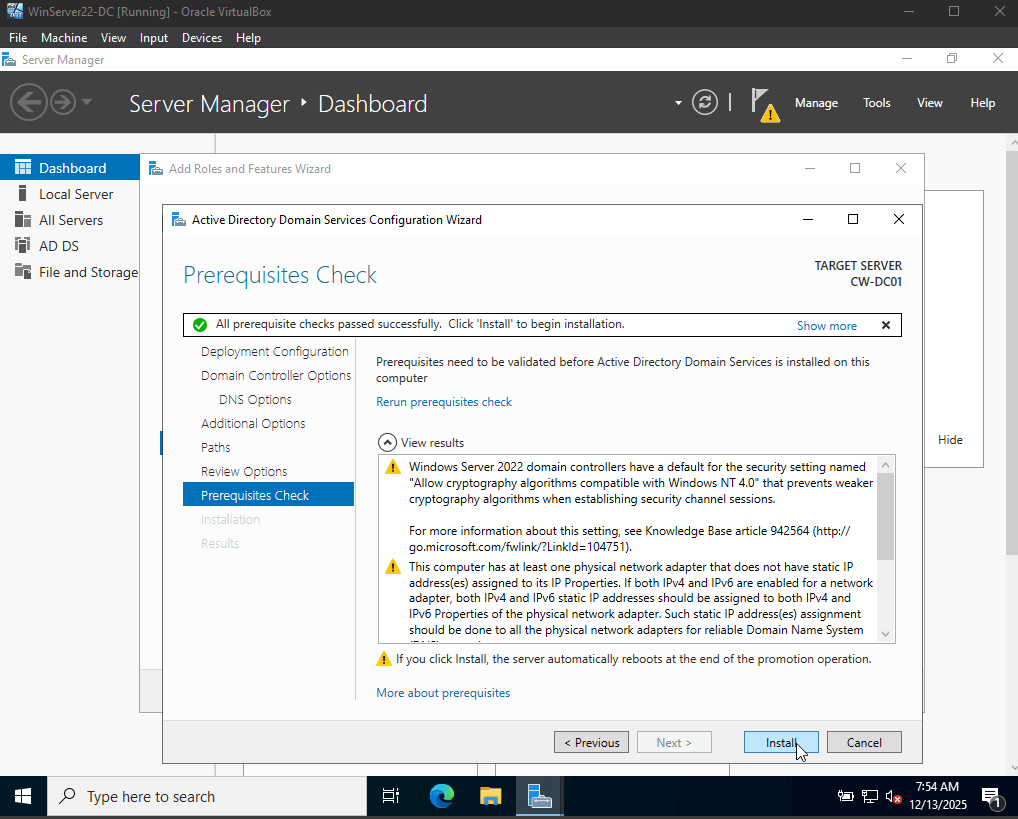
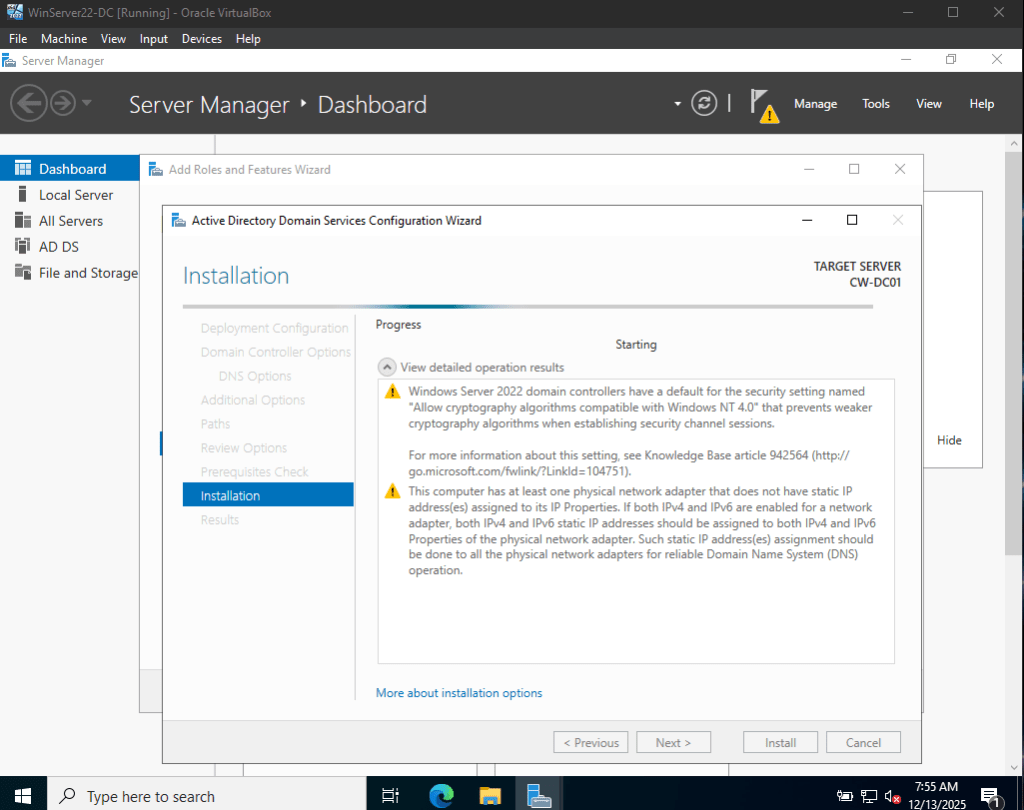
Before the promotion begins, the system runs a prerequisite check to ensure the server is ready to be promoted to a Domain Controller. Although a few common warnings were displayed, the system met all requirements. Afterward, I clicked Install and waited for the process to complete. Once the promotion finished, the server automatically restarted.
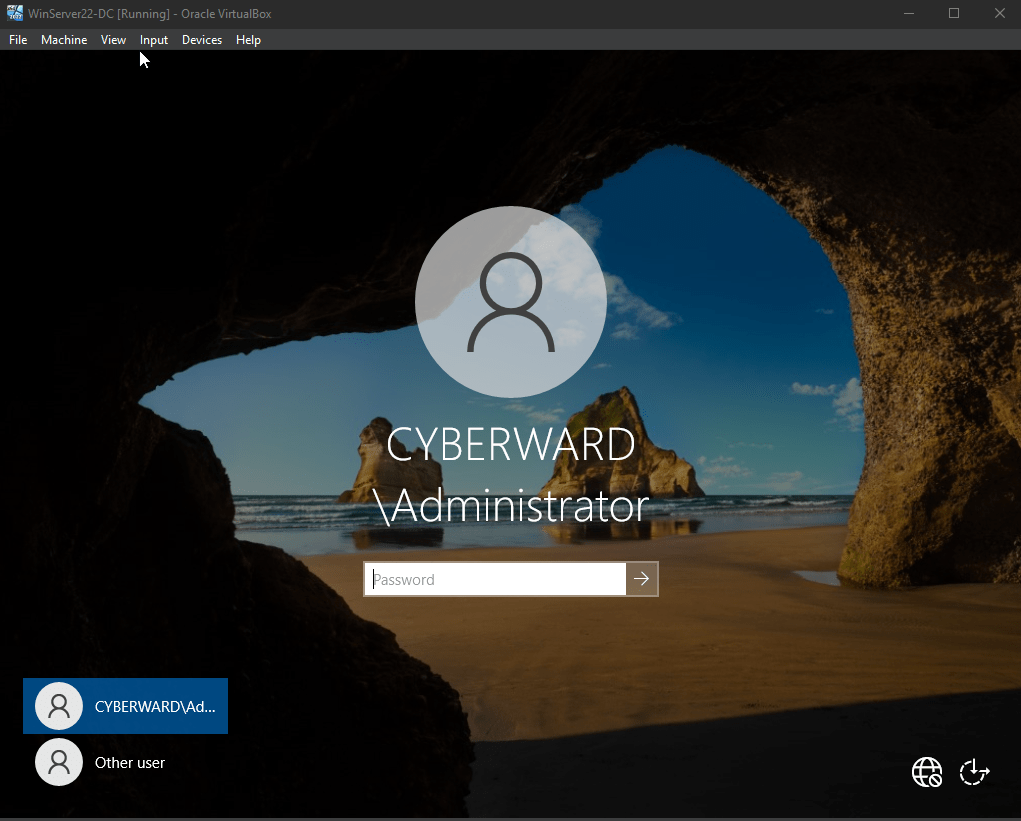
After the server restarts, the login screen changes to display “Sign in to cyberward” beneath the username and password fields. This indicates that, by default, authentication will now occur against the cyberward domain. While this login screen alone does not confirm that the server is a Domain Controller—since client machines display a similar prompt—it does confirm that the server is now joined to the cyberward domain.
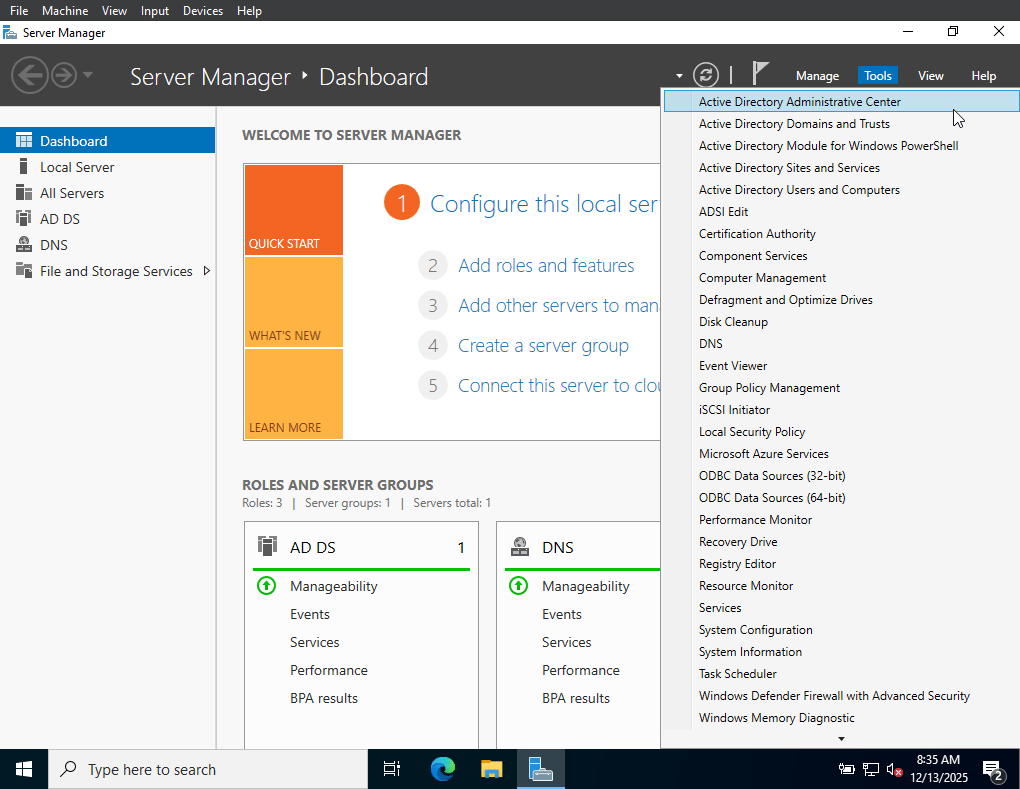
After the server is promoted to a Domain Controller, new sections appear in Server Manager. On the left pane, Active Directory Domain Services (AD DS) and DNS become available. Additionally, under Tools, several new administrative utilities are added, including Active Directory Administrative Center (ADAC), DNS, Active Directory Domains and Trusts, Active Directory Sites and Services, and Active Directory Users and Computers (ADUC).
Step 4: Completion and Verification
At this point, Active Directory Domain Services is fully installed, and the server has been successfully promoted to a Domain Controller. From here, we can begin performing common administrative tasks such as creating and managing domain users, resetting passwords, and managing group policies—all core responsibilities in IT administration.
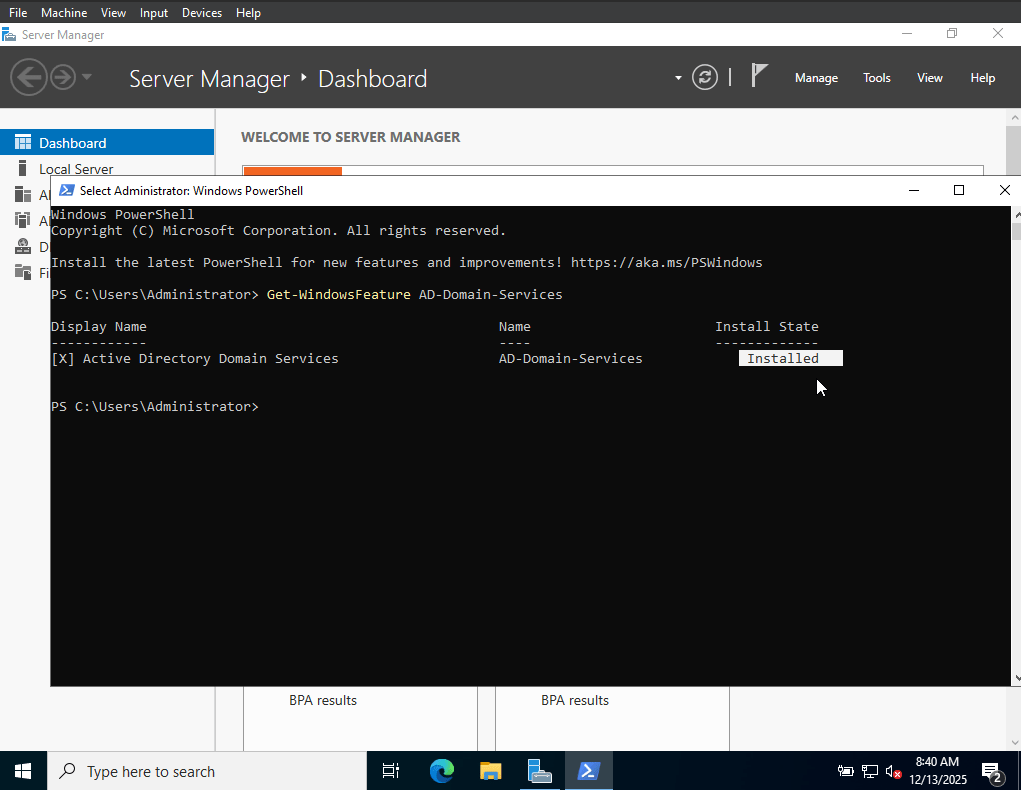
To verify the AD DS installation, I confirmed the role status using PowerShell:
Get-WindowsFeature AD-Domain-Services<br>
I also verified the Domain Controller status with:
Get-ADDomainController
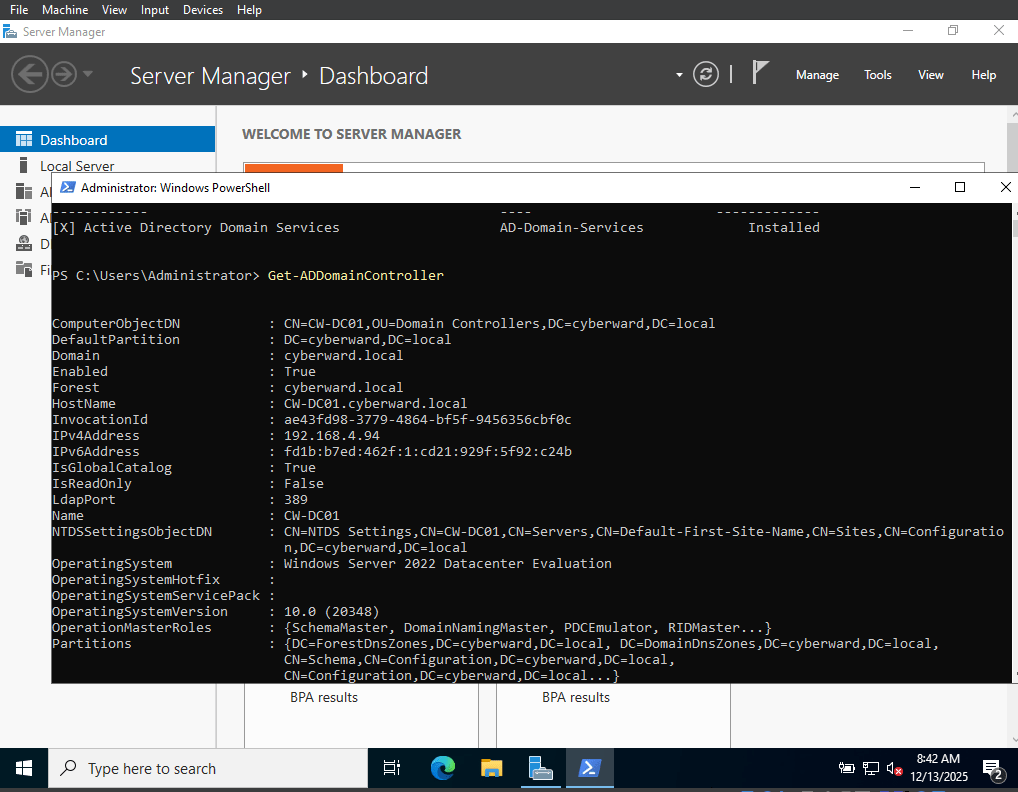
These checks confirmed that the server is operating correctly as a domain controller and is ready for further administrative configuration.
In the next part of this series, I’ll move into administrative tasks and domain management. Stay tuned.





 CYBERWARD
Leave a comment